

Tall walls can be a real headache when it’s time to paint.
You might worry about safety, be frustrated by constant ladder climbs, or be unsure how to reach those tricky high spots.
I know exactly how you feel – I used to dread tackling rooms with high ceilings.
But don’t worry! I’ve discovered some tricks that make painting tall walls much easier and less stressful.
In this guide, I’ll show you how to transform those towering surfaces without the usual hassles.
I’ll walk you through each process step, from setting up safely to using the right tools for effortless coverage.
You’ll learn how to paint high walls and ceilings quickly, neatly, and without constantly climbing and descending ladders.
Let’s turn that daunting task into a breeze!
Material Required for Painting Tall Walls
- Paint
- Paint roller with an extension pole
- Paintbrush
- Painter’s tape
- Drop cloths or old sheets
- Ladder or scaffolding
- 2×6 wooden planks (if using scaffolding)
- Paint tray
- Cleaning supplies (rags, warm water, mild detergent)
- Sandpaper (if needed for wall prep)
Steps to Paint Tall Walls
Painting tall walls might seem like a big challenge, but with the right approach, it’s doable.
I’ve broken down the process into easy-to-follow steps to help you tackle those high surfaces like a pro.
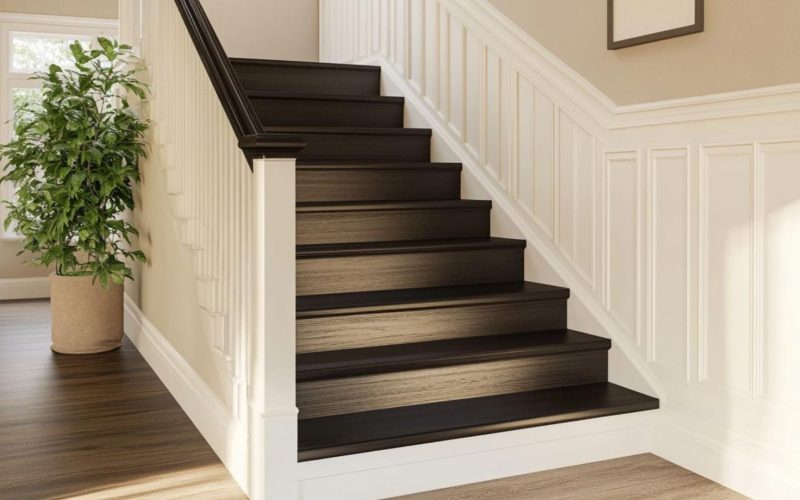
These steps will guide you through refreshing your stairway, sprucing up a living room with a vaulted ceiling, or giving your entryway a new look.
Step 1: Prepare the Room
First things first, let’s get the space ready for painting.
Take everything off the walls – pictures, mirrors, curtains, the works.
Move furniture to the center or, better yet, out of the room entirely if you can.
Cover the floor and furniture you couldn’t move with drop cloths or old sheets.
Don’t skimp on this step – paint drips are no fun to clean up later! Next, take a good look at your walls.
Are there any holes or cracks that need fixing? Now’s the time to patch those up.
Use spackling compound for small holes and let it dry completely before painting.
You might need to use a drywall patch if you’ve got bigger holes.
Once your patches are dry, give them a light sanding to ensure they’re smooth.
Don’t forget to remove any light switch or outlet covers.
Painting around these areas is much easier when the covers are off.
When you finish this step, your room should look pretty bare, but that’s exactly what we want.
A clean slate makes for the best paint job!
Step 2: Clean the Walls
Now that your room is prepped, it’s time to give those walls a good wash.
You might be thinking, “Why bother?
I’m just going to paint over everything anyway.”
But trust me, this step is crucial.
Over time, walls collect all sorts of gunk – dust, cobwebs, grease, you name it.
If you paint over this stuff, it can affect how well the paint sticks and how it looks when it dries.
So, grab a bucket of warm water mixed with a bit of mild detergent.
Dish soap works great for this.
Dip a soft sponge or cloth into your soapy water, wring it out well (we don’t want to soak the walls), and start wiping.
Work from the top down, so any drips don’t mess up areas you’ve already cleaned.
Pay extra attention to areas around light switches, door frames, and anywhere else that tends to collect fingerprints or grime.
Once you’ve washed a section, go over it again with clean water to rinse off any soap residue.
Then, use a clean, dry cloth to wipe the wall dry.
This might seem like a lot of work, but it’ll pay off with a smoother, more even paint job.
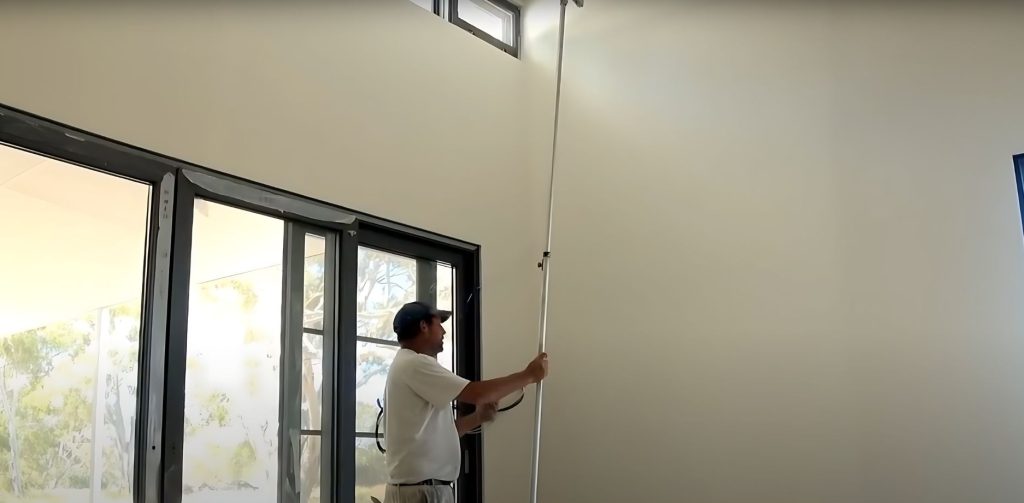
Step 3: Set up Your Work Area Safely
Safety first when it comes to painting tall walls!
If you use a ladder, ensure it’s on a flat, stable surface.
Never place it on something wobbly to gain extra height – that’s a recipe for disaster.
If you’re using scaffolding, set it up carefully.
Place one ladder against the far wall and another on the steps.
Then, lay sturdy 2×6 planks between them to create a stable platform.
Test it out before you start painting to make sure it feels secure.
Remember, you’ll be moving around a lot up there, so it needs to be rock solid.
If you’re not comfortable with heights or setting up scaffolding, it might be worth calling in a pro.
No paint job is worth risking your safety over.
Once your ladder or scaffolding is set up, organize your painting supplies nearby.
Keep your paint, brushes, and rollers within easy reach so you won’t have to constantly climb up and down.
A tool belt can be handy for holding smaller items like your phone (in case of emergencies) and a rag for quick clean-ups.
Lastly, make sure the room is well-ventilated.
Open windows, or set up a fan to keep fresh air circulating.
Paint fumes can be strong, especially when you’re up close and personal with them on a ladder!
Step 4: Tape Off Edges and Trim
Alright, it’s time to break out the painter’s tape!
This blue wonder is your best friend for getting clean, sharp lines.
Start by running tape along the edges where the walls meet the ceiling.
Press it down firmly to make sure the paint can’t seep underneath.
You can skip this step if you’re painting the ceiling.
Next, tape around any trim – baseboards, door frames, window sills.
Take your time here and make sure the tape is straight.
A crooked tape line means a crooked paint line, and that’s not what we’re going for!
If you have any fixtures on the wall that you can’t remove, like thermostats or electrical outlets, carefully tape around those, too.
It’s usually easier to remove light switch plates and outlet covers entirely.
Don’t forget about the floor!
Even if you’ve got drop cloths down, running a line of tape where the wall meets the floor can give you extra protection against drips.
Once everything’s taped off, take a step back and look at your handiwork.
Did you miss any spots?
Better to catch it now than when you’re halfway through painting!
Remember, good prep work is the secret to a professional-looking paint job.
Step 5: Cut in Around Edges and Corners
Now we’re getting to the fun part – actually putting paint on the walls!
We’ll start by “cutting in,” which means painting the edges and corners where your roller can’t reach.
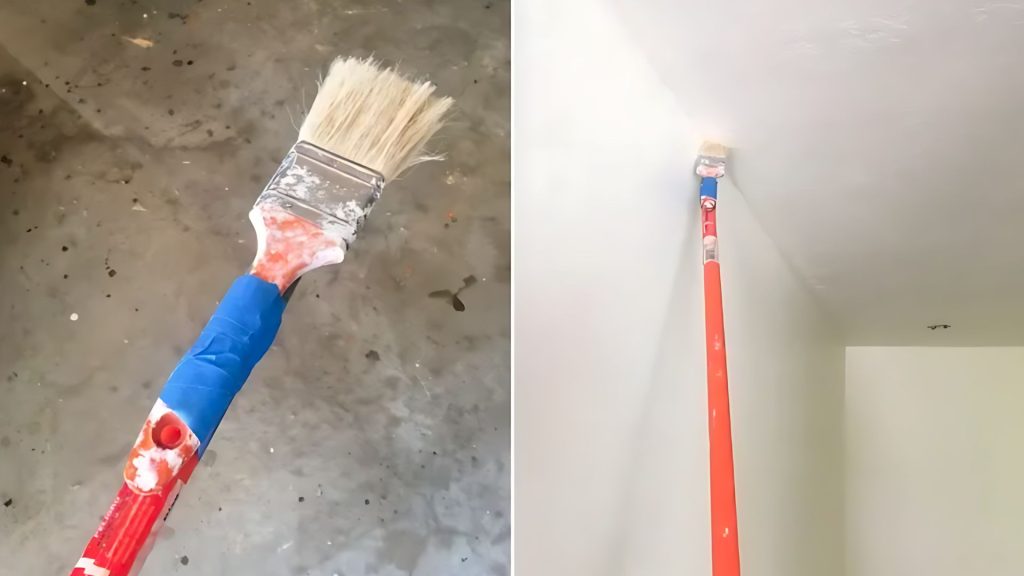
This is where that brush taped to an extension pole comes in handy for those high spots.
Dip your brush in the paint, tap off the excess, and start painting a strip about 2-3 inches wide along the ceiling line.
Work in sections about 3-4 feet long.
The key here is to keep a “wet edge” – that means always painting into or toward the wet paint you’ve just applied.
This helps avoid visible lines or streaks in your finished paint job.
Once you’ve done the ceiling line, move on to the corners of the room.
Paint a strip down each corner, again about 2-3 inches wide.
Then do the areas around windows, doors, and any other trim you’ve taped off.
Take your time with this step.
Steady hands make for clean lines!
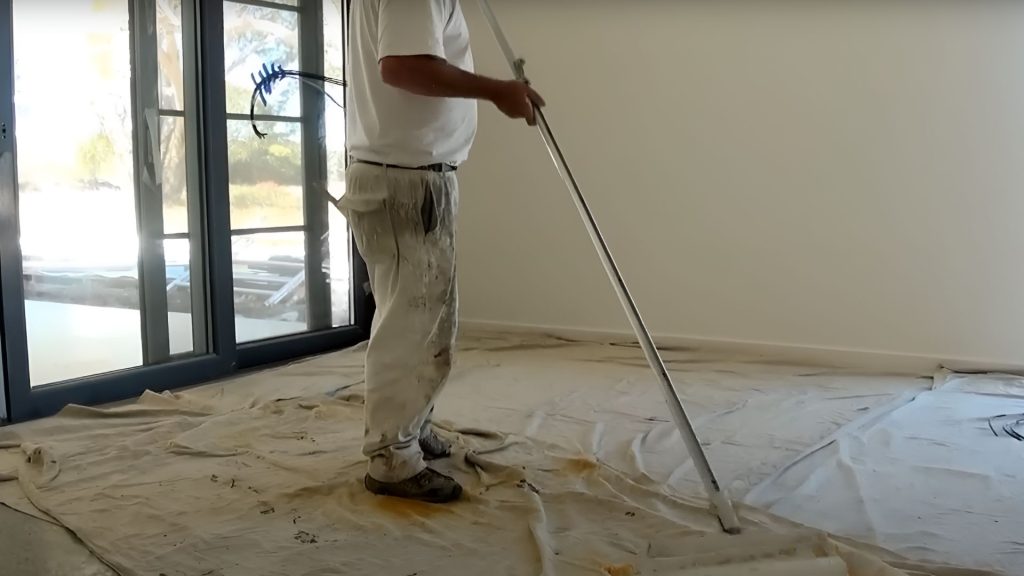
If you’re having trouble reaching some areas, don’t be afraid to reposition your ladder or scaffolding.
It’s better to take a few extra minutes to move your setup than to risk stretching too far and losing your balance.
Remember, safety first!
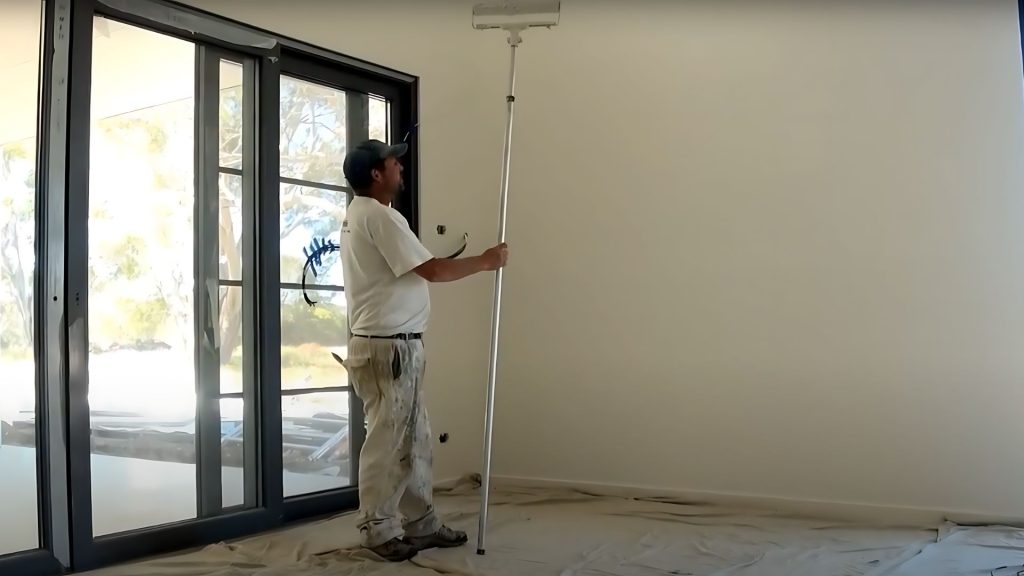
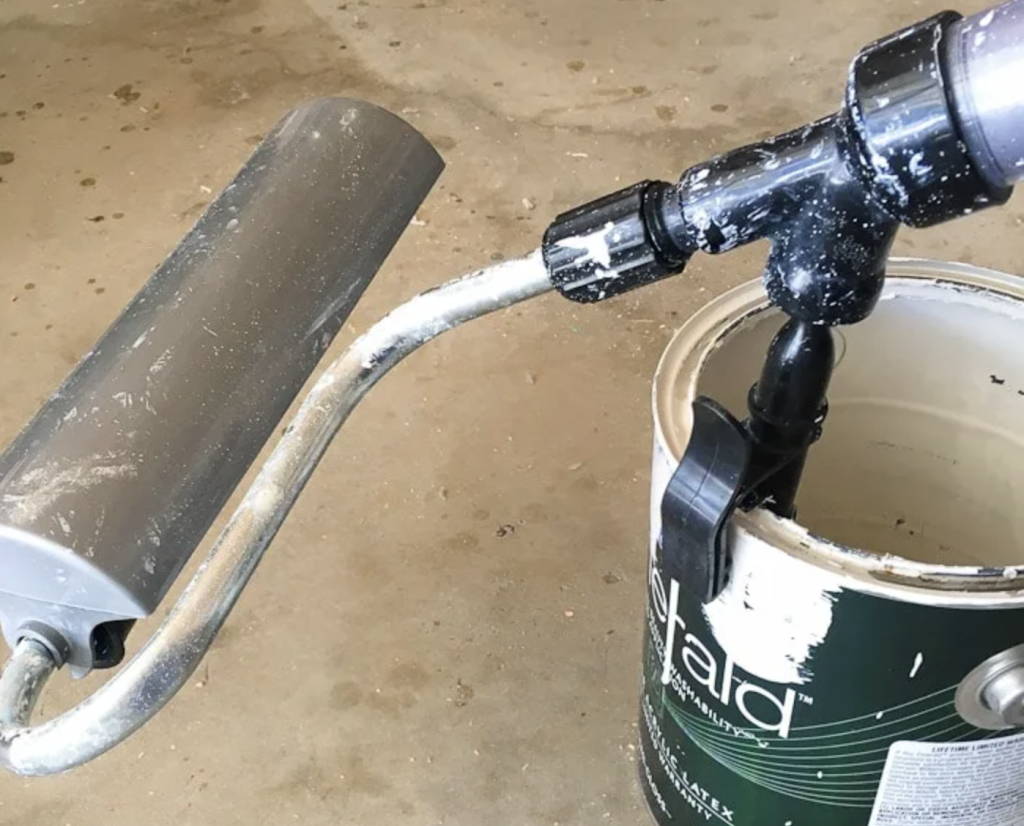
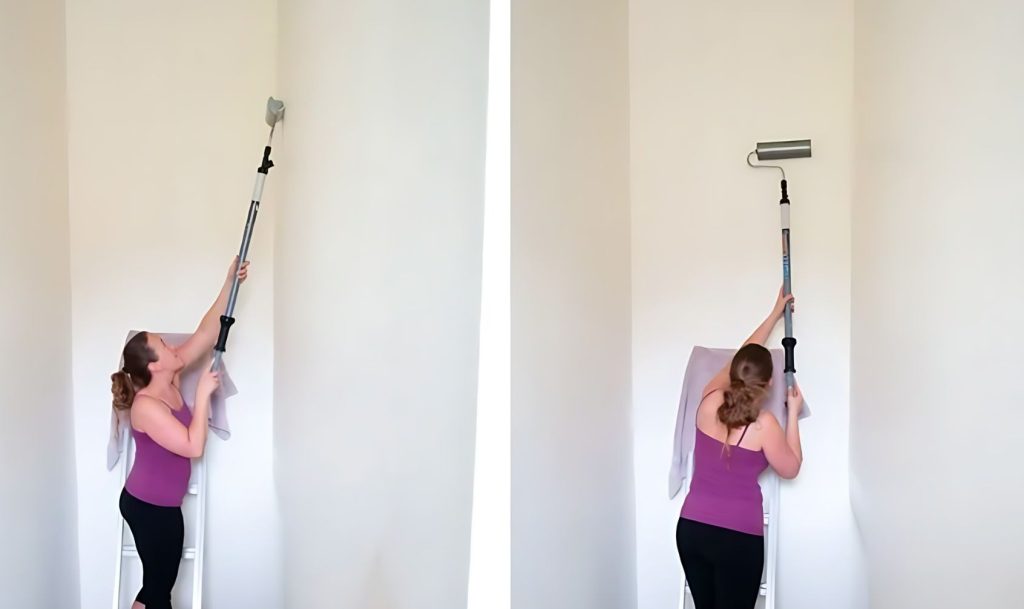
Step 6: Start Rolling Paint on The Walls
Now that you’ve cut in around the edges, it’s time to tackle the main areas of your tall walls.
This is where your roller and extension pole will really shine.
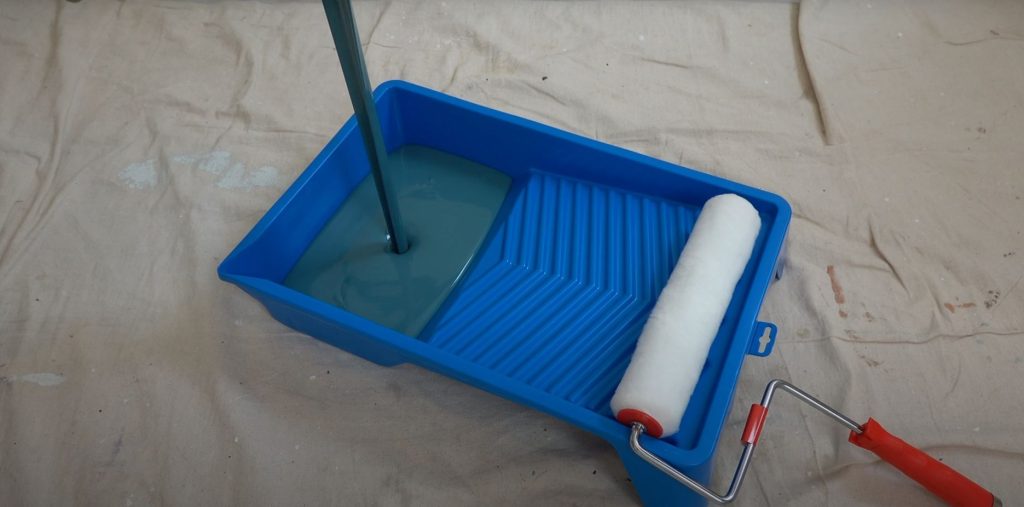
Pour some paint into your tray, but don’t overdo it – you don’t want it sloshing around as you move.
Dip your roller in, roll it back and forth on the ridged part of the tray to distribute the paint evenly, and you’re ready to go.
Start at the top of the wall and work your way down.
Paint in a “W” or “M” pattern, then fill in the gaps.
This helps distribute the paint more evenly than just rolling up and down.
Work in sections about 3-4 feet wide, overlapping slightly with the areas you’ve already painted to blend everything smoothly.
As you work your way down the wall, watch for drips or runs.
If you spot any, smooth them out immediately before the paint dries.
Don’t worry if the coverage looks a bit patchy at first – that’s what the second coat is for.
Remember to take breaks if you need to.
Painting tall walls can be tiring, especially when reaching high.
It’s better to work slowly and steadily than to rush and end up with a sloppy job.
Keep your movements smooth and even, and soon, you’ll see your walls transform!
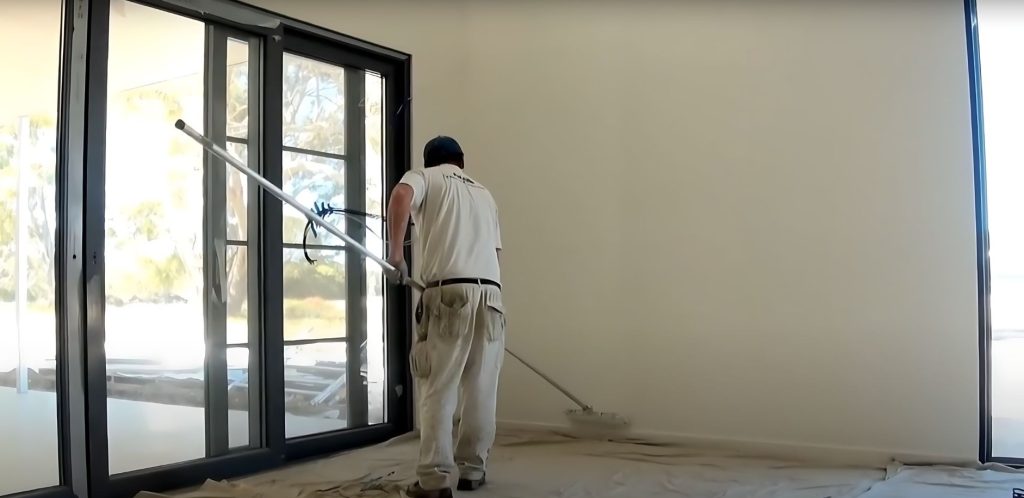
Step 7: Paint The Ceiling (if Needed)
If you’re also painting the ceiling, now’s the time to tackle it.
Painting a ceiling can be tricky, especially when it’s high up, but with the right approach, you can do it!
Start by cutting in around the edges of the ceiling where it meets the walls, just like you did when painting the walls.
Then, it’s time to roll.
For ceilings, it’s often easiest to work in grid patterns.
Start in one corner and roll a strip about 3-4 feet wide across the short length of the room.
Then, go back to where you started and roll another strip right next to it, slightly overlapping the first.
Keep going until you’ve covered the whole ceiling.
The key to painting ceilings is maintaining a wet edge, just like with walls.
This means always rolling into paint that’s still wet to avoid leaving visible lines or streaks.
Also, apply even pressure as you roll to get consistent coverage.
Be prepared for some paint to drip – it’s almost unavoidable when working overhead.
That’s why those drop clothes are so important!
If you get paint on your face (it happens to the best of us), wipe it off immediately with a damp cloth.
Remember, painting a ceiling is more tiring than painting walls, so take frequent breaks.
Your neck and shoulders will thank you!
Step 8: Apply a Second Coat
After your first coat has dried completely (check the paint can for recommended drying times), it’s time for round two.
A second coat is almost always necessary, especially with tall walls where it’s easy to miss spots or have uneven coverage.
Before you start, take a good look at your walls in different lighting conditions.
Natural daylight is best for spotting any patchy areas or missed spots.
Make a mental note of these areas so you can pay extra attention to them during the second coat.
For the second coat, follow the same process as the first.
Cut in around the edges and corners, then roll the main areas.
You might find that the second coat goes on more smoothly and quickly than the first.
That’s because the first coat has sealed the surface, so the second coat doesn’t soak in as much.
As you’re applying the second coat, keep an eye out for any drips or runs from the first coat that you might have missed.
Sand these down gently if needed before painting over them.
Remember, the goal of the second coat is to even out the color and coverage, so take your time and make sure you’re applying the paint evenly.
By the end of this coat, your walls should look smooth and uniform in color.
Step 9: Clean up And Let Dry
Once you’ve finished applying the second coat, it’s time to start cleaning up.
But before you dive into that, take a final look at your walls to make sure you haven’t missed any spots.
It’s much easier to touch up now than later!
Start by carefully removing all the painter’s tape.
Pull it off at a 45-degree angle to avoid peeling off any fresh paint.
If you find that paint has seeped under the tape in some areas, use a sharp utility knife to score along the edge of the tape before you pull it off.
This will give you a cleaner line.
Next, gather up your drop cloths or sheets.
Fold them inward to contain any paint drips or spills.
If you used disposable drop cloths, you can toss them out.
If you used fabric sheets, shake them out outside before washing them.
Clean your brushes and rollers thoroughly with soap and water (for water-based paints) or mineral spirits (for oil-based paints).
The better you clean them, the longer they’ll last.
Conclusion
There you have it – a complete guide to painting tall walls!
I hope these steps have shown you that tackling high surfaces isn’t as daunting as it might seem.
With the right tools and techniques, you can transform any room, no matter how tall the walls.
Remember, the key is to take your time, focus on safety, and work methodically.
Don’t rush the prep work – it’s the foundation of a great paint job.
And don’t forget to step back occasionally to admire your progress!
If you found this guide helpful, why not share it with a friend who’s been putting off their own painting project?
Or leave a comment below about your tall wall painting experiences. I’d love to hear how it went for you!
Happy painting, and enjoy your freshly updated space!