

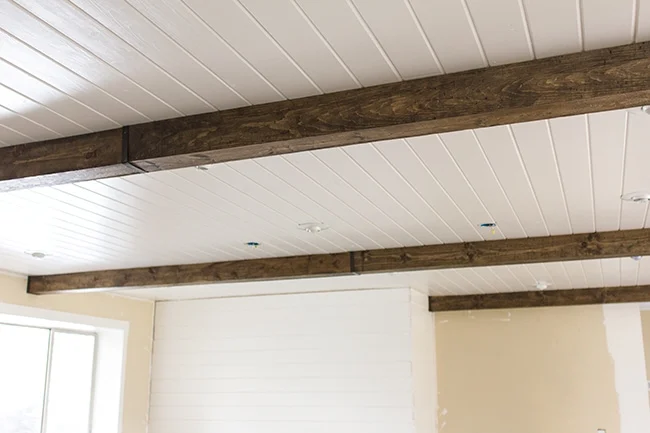
Upgrading your home with the rustic charm of exposed wood beams can instantly elevate the look and feel of any space.
Unfortunately, the cost of authentic beams often puts this dream out of reach for many homeowners.
But what if I told you that you can create stunning faux wood beams for a fraction of the price using simple, affordable materials and basic DIY skills?
In this beginner-friendly tutorial, I’ll walk you through designing, constructing, and installing customized faux beams that will transform the look of your home.
Get ready to add farmhouse elegance and architectural interest without breaking the bank.
Step-by-Step Guide to Creating Faux Beams
Step 1: Planning and Measuring
Why Planning and Measuring Your Space is Important
Accurate planning is crucial for a successful faux beam project. Properly measuring your space and accounting for obstacles will ensure the beams fit perfectly and prevent costly mistakes or material wastage.
Start by measuring the room’s dimensions, focusing on the ceiling height and layout. Note any light fixtures, fans, or other elements that could impact the placement of your beams.
Using Painter’s Tape to Map Out the Project
Painter’s tape is an invaluable tool for the placement and alignment of your beams.
- To help visualize the final look, use painter’s tape to map out where each beam will go.
- This allows you to easily adjust the layout without causing any damage.
- Outline the beam locations, check the spacing between them, and step back to review the design from different angles.
- This visual guide will be invaluable when it comes time to install the beams.
Step 2: Selecting Materials
Types of Wood and Why They Matter
The type of wood you choose can greatly affect your faux beams’ overall look, weight, and cost. Dense, durable red oak provides a robust, refined appearance but is heavier, while lighter cedar has a pleasant aroma and works well for a more rustic aesthetic.
When making your selection, consider the style of your space and check the availability and pricing at your local home improvement store.
List of Tools and Materials
In addition to the wood, you’ll need various tools and materials to complete this project.
- The essential items include a table saw, miter saw, nail gun, air compressor, cordless drill, measuring tape, stud finder, level, and ladder.
- For the wood, you’ll use 1×6 planks and 2×4 pieces for blocking. Don’t forget safety equipment like gloves, goggles, and ear protection.
- Optional items like beam straps and wood conditioner can also help achieve a professional, finished look.
Step 3: Cutting the Wood with Precision
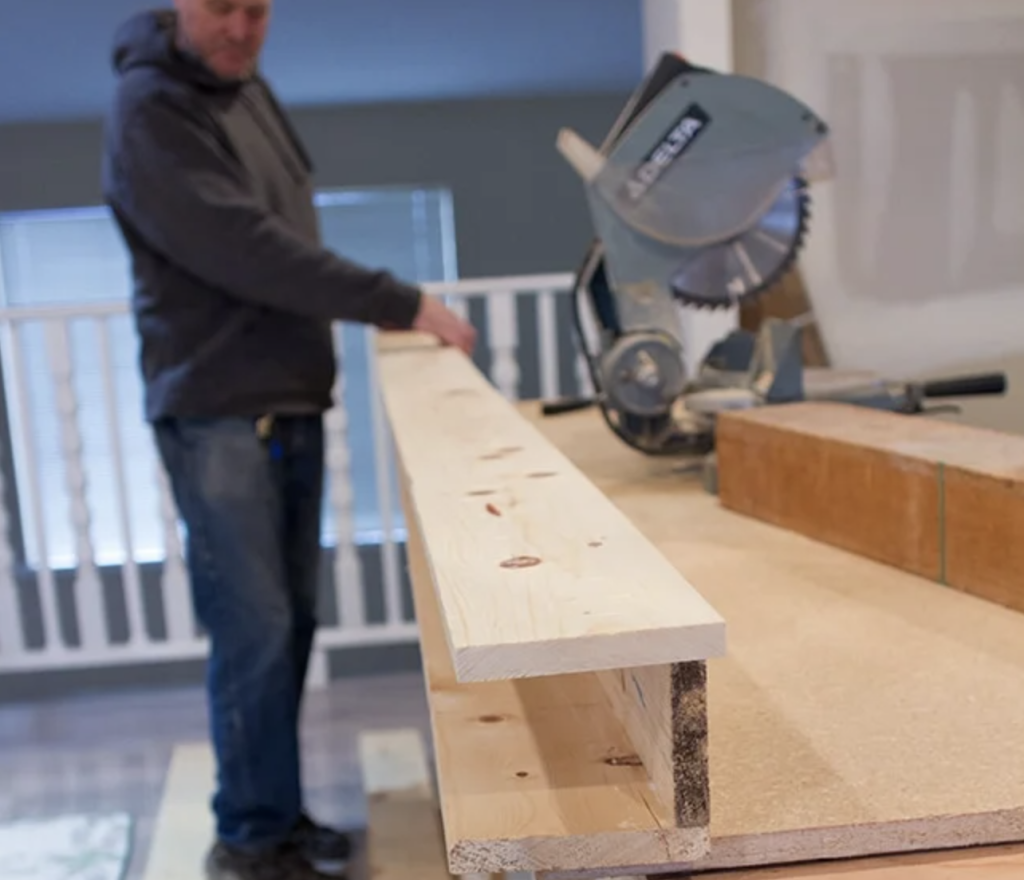
Techniques for Accurate Cutting
Accurate cutting is key to ensuring your faux beams fit together seamlessly. Measure twice and cut once to avoid errors.
Use a stable, secure surface and proper support to keep the wood steady as you cut.
Tips for Mitering Edges at 45 Degrees
For long, straight cuts, a table saw is your best friend. When it comes to precise angles, a miter saw is the tool for the job.
- Double-check and adjust the blade to 44.9 degrees to achieve the perfect 45-degree miter.
- Test your cuts on scrap wood first to confirm the correct angle before moving on to your final pieces.
- Secure the wood firmly in place, using clamps if needed, to prevent unwanted movement during the cutting process.
- Finally, sand down any rough edges for a flawless finish.
Step 4: Building the Beam Structure
Creating a U-Shaped Structure with Cut Wood
The foundation of your faux beams begins with creating a sturdy, U-shaped structure. Use the 1×6 boards you’ve carefully measured and cut to form the sides and bottom of this basic shape.
Lay the boards flat on a stable surface and apply wood glue along the edges to secure them. For added strength and stability, reinforce the assembly with brad nails every 6-8 inches.
Importance of Precision in Assembly
Precision is key during the assembly process. Misalignments can lead to unsightly gaps and an uneven overall appearance, so it’s important to take the time to get this step right.
- Use clamps to hold the pieces firmly as you nail them together, frequently checking with a level and square to ensure proper alignment.
- Once assembled, lightly sand any rough edges or seams to prepare for the staining phase.
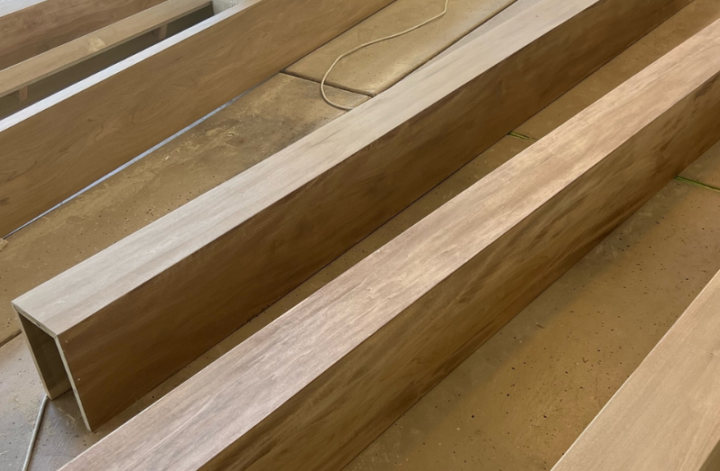
Step 5: Staining and Finishing
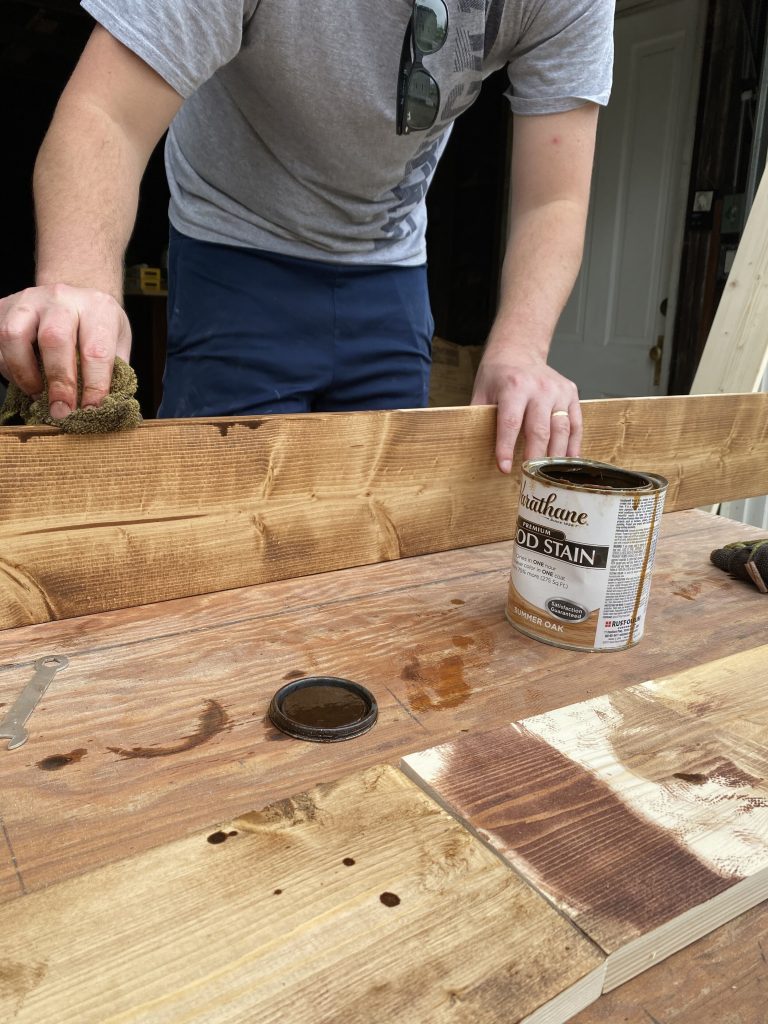
Applying Wood Stain for a Realistic Look
Staining the faux beams will bring them to life and make them look like authentic wood features in your space. Choose a stain color that complements the room’s overall décor.
Apply the stain evenly with a brush or cloth, wiping away any excess to avoid blotchy or streaky results. Allow the paint to dry completely before handling the beams.
Tips for Achieving a Rustic or Polished Finish
Depending on the aesthetic you’re going for, you can further customize the finish of the beams.
- For a rustic, aged appearance, distress the wood using tools like chains, hammers, or nails to create dents and scratches before staining.
- Alternatively, focus on a smooth, even stain application if you prefer a more polished look.
- You can even apply a second coat for a deeper, richer color.
- Seal the stained beams with a clear polyurethane finish to protect the surface and enhance the sheen.
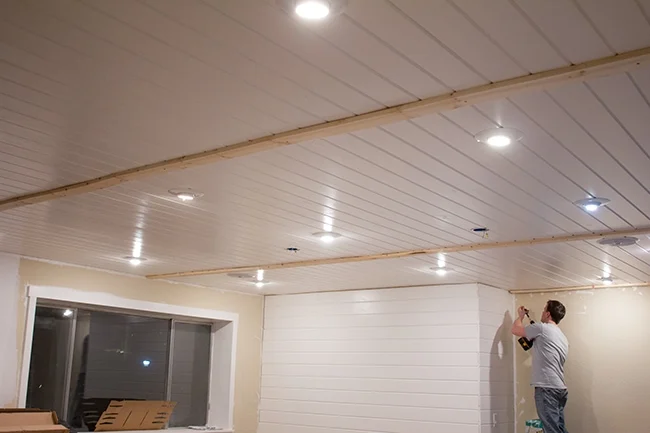
Step 6: Preparing the Ceiling
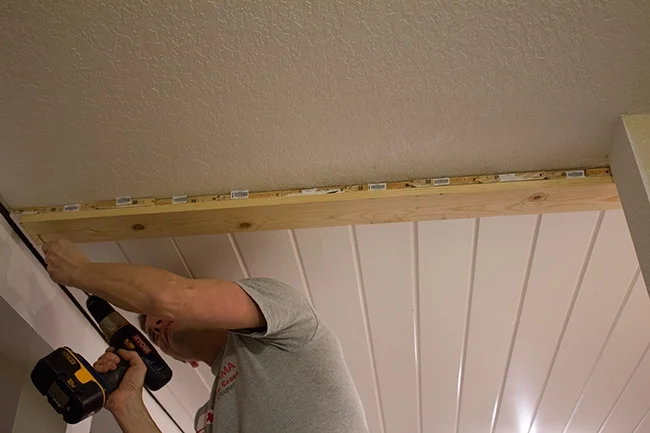
Attaching 1x4s or 2x6s to the Ceiling for Support
First, attach 1×4 or 2×6 support boards to the ceiling to provide a secure base for your faux beams.
These should be positioned perpendicular to the ceiling joists and fastened directly into the joists using long screws spaced every 12-16 inches and check alignment with a level to ensure a straight installation.
Ensuring Beams Align with Ceiling Joists
Proper alignment with the ceiling joists is essential to prevent structural issues.
- Carefully measure and mark the joist locations to ensure correct alignment, using a stud finder if necessary.
- Double-check the level of the support boards before moving on to the next step.
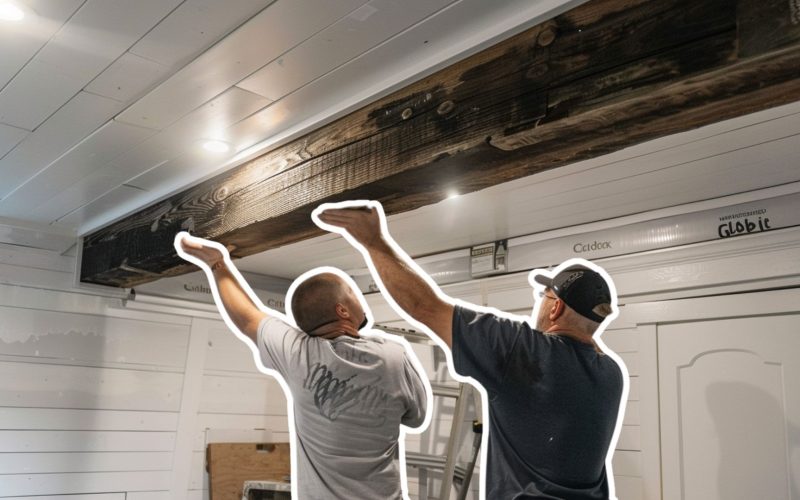
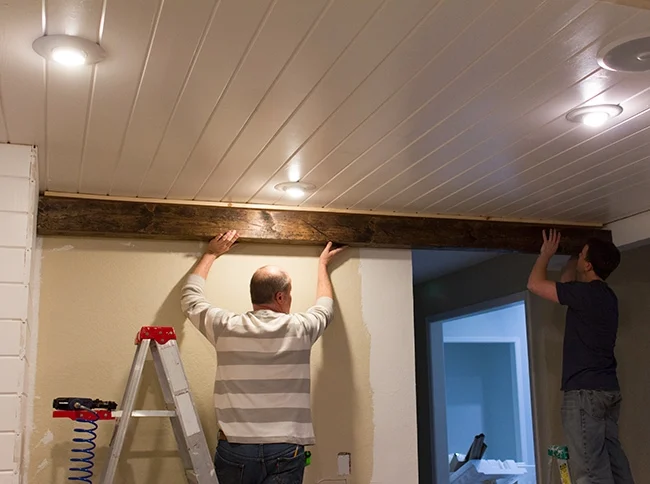
Step 7: Mounting the Beams

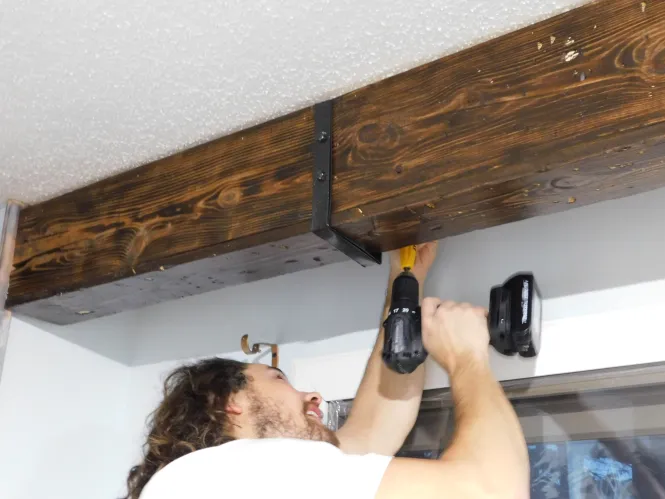
Step-by-Step Process for Securing the Beams
With the ceiling preparation complete, it’s time to install the beams. Enlist an assistant to lift and position each beam over the support board.
Secure the beam in place by driving screws or nails through the sides and into the support board, spacing them approximately every 12 inches. Use a mallet to gently tap the beam into position if needed, ensuring a tight, seamless fit.
Techniques for a Tight Fit and Avoiding Gaps
Achieving a tight fit and avoiding gaps requires careful installation.
- To achieve a professional, gap-free appearance, frequently check the alignment with a level during installation.
- If any small gaps remain, fill them with wood filler or caulk, then touch them up with stain or paint to blend the seams.
- The result will be a beautifully integrated faux beam that looks like it’s always been a part of your ceiling.
How to Enhance the Look of Faux Beam
1. Using Beam Straps to Hide Seams
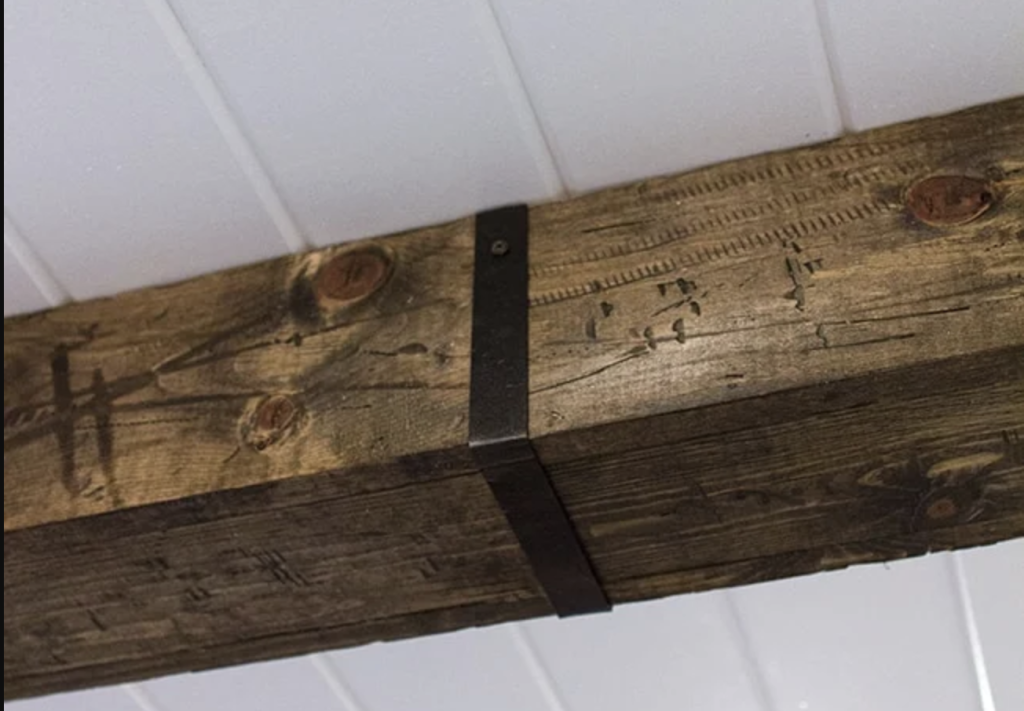
Purpose of Beam Straps
Beam straps can provide a polished, finished look to your faux beams by hiding any visible seams or gaps between the sections.
These decorative elements add a rustic, industrial touch and help create the illusion of a single, seamless beam.
Installation of Beam Straps
Beam straps can be purchased pre-made or easily DIY-ed using thin metal strips.
- Choose a style that complements the overall aesthetic of your room.
- When installing the straps, measure the dimensions of your beams and cut the metal pieces to size.
- Bend the straps to fit snugly around the beams, then use a drill to create holes and secure them in place with screws, spacing them evenly along the length.
- Consider painting the straps to match or contrast with the stained wood for a cohesive look.
2. Adding Decorative Elements Like Crown Molding
Benefits of Crown Molding
Taking your faux beams to the next level, consider adding crown molding to create a truly polished, finished appearance.
Crown molding helps bridge the gap between the beams and the ceiling, adding a touch of elegance and completeness to the design.
Installing Crown Molding
Select a molding style that aligns with the room’s overall aesthetic, keeping the size and profile in mind for the best visual effect.
- To install the crown molding, measure and cut the pieces to fit the length of your beams, using a miter saw for precise angled cuts.
- Apply wood glue to the back of the molding, then secure it with finishing nails, ensuring proper alignment.
- Fill any gaps or nail holes with wood filler before touching up with paint to match the surrounding surfaces.
3. Common Issues and Solutions
Identifying and Addressing Warped Wood One common issue is slightly warped wood, which can cause misalignment and instability in faux beams.
Before purchasing your lumber, carefully inspect each piece for any signs of warping or bowing. Store the wood flat in a dry, climate-controlled area to help maintain its straightness.
If you end up with mildly warped boards, you may be able to straighten them using clamps and weights. However, severely warped wood should be replaced, as it can compromise the structural integrity of your beams.
Take the time to select straight, high-quality lumber to avoid this problem.
Fixing Alignment Issues
Proper alignment is crucial for achieving a polished, professional look with faux beams.
- Use a level frequently during installation to ensure the beams are straight and level.
- If you encounter any misalignment, use shims to gently adjust the positioning before securing the beams permanently.
- Re-check the alignment after each beam is in place to maintain consistency throughout.
Conclusion
In this step-by-step guide, we’ve covered designing, building, and installing your faux wood beams.
By planning carefully, choosing the right materials, and assembling the beams precisely, you can add the rustic charm of exposed wood to any space without the high cost of authentic beams.
This DIY project can be customized to fit your style, whether you prefer a polished look or a distressed farmhouse aesthetic.
The techniques outlined here will help you create the perfect faux beams to enhance your home’s architectural interest.
So what are you waiting for? Grab your tools and prepare to bring your dream of exposed beams to life!
Happy building!