

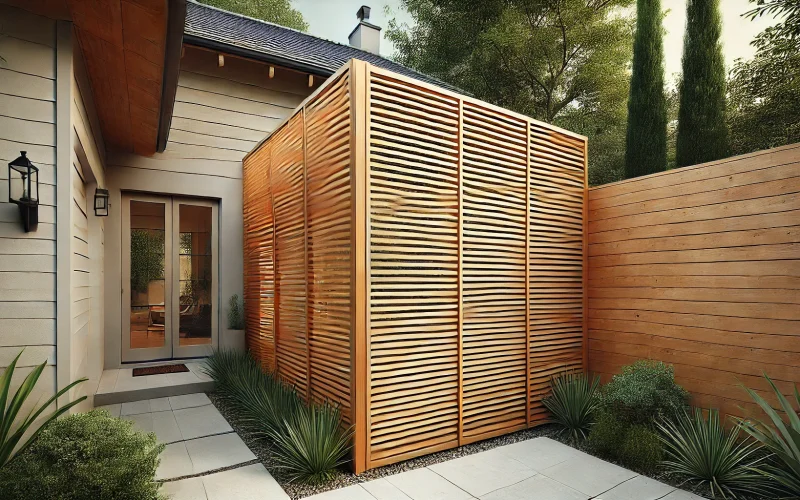
Building a privacy slat wall can be a great way to enhance outdoor spaces, but it can also feel like a daunting DIY project. Many homeowners struggle with where to start and how to ensure a professional-looking result.
This guide will help make the process easier. It will walk you through the step-by-step instructions for installing a privacy slat wall.
You’ll learn how to plan your project, select the right materials, and confidently tackle the installation process.
This article covers everything from preparing your space and setting up posts to attaching the slats and adding finishing touches.
By the end, you’ll have the know-how to create a beautiful, functional privacy wall that adds value to your home.
Materials Required to Build Privacy Slat Wall
Before starting, gather everything needed:
- Slats (1×2 boards work well)
- 4×4 posts
- Deck screws
- Wood preservative
- Level
Tools Required to Build Privacy Slat Wall
Below are the necessary tools required to build a proper privacy slat wall:
- Drill (and drill bits for pre-drilling)
- Saw
- Measuring tape
- Screwdriver
- Safety gear (goggles and gloves)
Having all these items ready before starting makes the job much smoother. Don’t forget to wear safety gear throughout the project – it’s always better to be safe!
Remember, the amount of materials needed will depend on the size of the wall. Measuring the space and calculating the quantities before heading to the store is a good idea.
Also, just in case, pick up a few extra slats—they might be useful.
Step-by-Step Instructions to Build
Follow these detailed steps to build your privacy slat wall. Gather your materials, and let’s get started on this fun DIY project!
1. Planning and Preparation
- Choosing the Right Spot: Start by picking the best spot for the slat wall. Look for an area that needs privacy but also gets good sunlight. Make sure the wall won’t block too much light from the outdoor space.
- Measuring and Marking: Next, measure the area for the wall. Use measuring tape to determine the desired length and height. Then, mark where each post will go. Spacing posts about 6 feet apart works well but adjusts based on the specific space.
- Safety Tips: Before starting any work, put on safety gear. Always wear goggles to protect your eyes and gloves to avoid splinters. Also, make sure the work area is clear of any trip hazards. Keeping the space tidy makes the job easier and safer.
Remember, good planning makes the rest of the project much easier. Take your time with this step—it’s worth it!
2. Installing the Posts
- Digging Post Holes: Start by digging holes for the posts. Make each hole about 2 feet deep and 1 foot wide. This depth helps keep the posts steady. A post-hole digger works best, but a shovel can also do the job.
- Setting Posts in Concrete: Next, put the 4×4 posts in the holes. It’s helpful to have someone hold each post straight while pouring quick-setting concrete around it. Follow the instructions on the concrete package. Mixing the concrete in a wheelbarrow before pouring can be helpful.
- Ensuring Posts are Level: This part is super important. Use a level to check that each post is straight up and down (plumb) on all sides. Adjust the posts as needed before the concrete sets. It’s easier to fix now than later!
Let the concrete dry overnight before proceeding to the next step. Taking your time here really pays off—straight posts make the rest of the project much easier.
3. Preparing the Slats
- Cutting to Size: Measure the space between posts and cut slats to fit. Use a saw to cut each slat, making sure they’re all the same length. It’s a good idea to cut and test one slat to ensure it fits before cutting the rest.
- Pre-Drilling Holes: This step is really important. Pre-drill holes in each slat before attaching them. This helps prevent the wood from splitting when putting in the screws. Use a drill bit that’s slightly smaller than the screws. It takes a bit more time, but it’s worth it for a neater finish.
- Applying Wood Preservative: To help the slats last longer, apply a wood preservative before putting them up. Follow the instructions on the product. It’s easiest to do this on a flat surface, like a workbench or sawhorse. Let the preservative dry fully before proceeding to the next step.
Preparing the slats makes the rest of the job smoother. Plus, it helps the wall look better and last longer!
4. Attaching the Slats
- Starting from the Bottom: Attach the first slat at the bottom of the posts. Use a level to make sure it’s straight. This first slat is key – it sets the foundation for all the others, so take time to get it right.
- Spacing Slats Evenly: To ensure even spacing, cut small blocks of wood to use as spacers between slats. This helps keep the gaps consistent. A 1/2-inch gap often looks good, but adjust to your liking.
- Securing Slats with Screws: When attaching each slat, use two screws at each end where it meets a post. Make sure to drive the screws in straight to get a secure hold. Those pre-drilled holes help keep the wood from splitting here.
Work up the wall, checking with the level every few slats to ensure everything stays straight. It takes patience, but seeing those slats line up nicely is satisfying!
5. Finishing Touches
- Trimming Excess: Some might be a bit long at the top after attaching all the slats. Use a saw to trim these down for a neat, even look. Measuring and marking before cutting is best to ensure a straight line across the top.
- Sanding Rough Edges: Next, sand any rough spots or splinters. This not only makes the wall look better but also makes it safer to touch. Pay extra attention to the cut ends of the slats. Medium-grit sandpaper works well for this.
- Painting or Staining: Lastly, stain or paint the wall to protect it from the weather. Apply the finish with a brush, covering all surfaces evenly. It might take two coats to get the desired color. Remember to let it dry completely between coats.
These finishing steps bring the project together. They turn a basic structure into a polished, attractive feature for the outdoor space.
Plus, they protect the wood and help the wall last longer.
Troubleshooting Common Issues
- Fixing Crooked Slats: Sometimes, a slat might look a bit off after being attached. To fix this, carefully remove the screws, realign the slat, and reattach it. Using a level helps get it straight. Don’t rush this process – it’s worth taking the time to get each slat right.
- Dealing with Warped Wood: Warped slats can be a challenge. For slightly warped pieces, try straightening them out by applying pressure while screwing them in. It’s best to set them aside for more severely warped slats and use straighter pieces instead.
- Adjusting for Mistakes: If a mistake happens, don’t worry – it’s part of the process! When a hole is drilled in the wrong spot, fill it with wood putty and let it dry before drilling a new hole. If a slat splits despite pre-drilling, replace it with a new one. Taking a step back is okay if something isn’t working out.
Maintenance Tips After Building
- Regular Inspections: Make it a habit to check the slat wall every few months. Look for any loose screws and tighten them up. Also, check for damaged slats that might need replacing. Catching these issues early helps prevent bigger problems down the line.
- Cleaning the Wall: To keep the wall looking good, wash it once or twice a year. Use a soft brush to remove dust and cobwebs. For tougher dirt, use a mild soap and water solution. Remember to let the wall dry completely after washing.
- Long-Term Care: To protect the wood, reapply wood preservative or paint every few years. The timing depends on local weather conditions. If the finish looks worn or water no longer beads on the surface, it’s time for a fresh coat.
Conclusion
Building a privacy slat wall might seem challenging initially, but with these steps, you can create a beautiful addition to your outdoor space.
Remember, the key is to take your time, especially when setting up the posts and attaching the slats. Don’t forget to maintain your wall to keep it looking great. Regular checks and cleanings go a long way.
This guide should help you tackle your slat wall project with confidence. If you run into any issues, don’t worry – troubleshooting is part of the DIY experience.
If you found this guide helpful, why not share it with a friend thinking about a similar project?