
I get it—building your furniture can seem daunting. But with the right instructions, you can create a beautiful and functional DIY hutch for your home.
In this post, I’ll show you a simple, step-by-step process for building your custom hutch.
From selecting the right materials to putting all the pieces together, I’ll walk you through everything you need to know to make your DIY hutch project successful.
Let’s get started!
Tools and Materials Needed for Making A Hutch
Having all the necessary tools and materials ready will help the DIY hutch-building process go smoothly.
Tools Needed
- Circular Saw
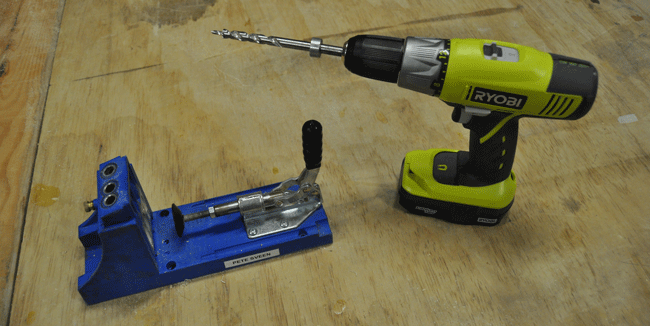
- Drill
- Miter Saw
- Orbital Sander
- Ryobi Airstrike Nailer (optional)
- Clamps (optional)
- Face Clamp (optional)
- Right Angle Clamp (optional)
- Straight Edge (optional)
Materials Needed
- 3/4 inch Plywood
- 1×2 and 1×4 Boards
- 1×12 Boards
- Wood Glue
- Screws
- Painters Tape
- Nails
- Sandpaper
Common Steps for Building the Hutch
Step 1: Cutting the Wood
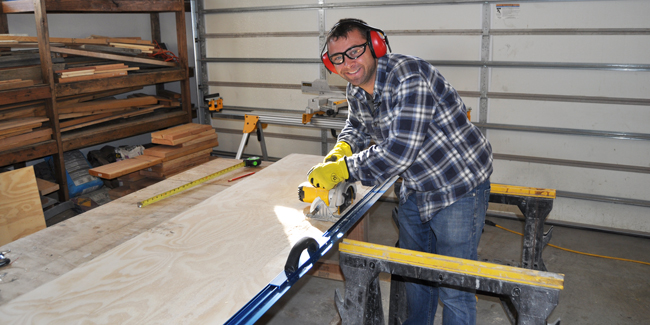
- Measure and Cut Plywood: The first step in building your DIY hutch is to measure and cut the wood pieces. You’ll need to cut two 4×8 sheets of 3/4-inch plywood for the bench and lower cubbies.
- Use a Circular Saw and Straight Edge: Use a circular and straight edge to get clean, precise cuts on the plywood. A straight edge as a guide will help you make nice, straight cuts with the circular saw. Take your time with this step to ensure all the plywood pieces are the right size.
Step 2: Assembling the Lower Bench and Cubbies
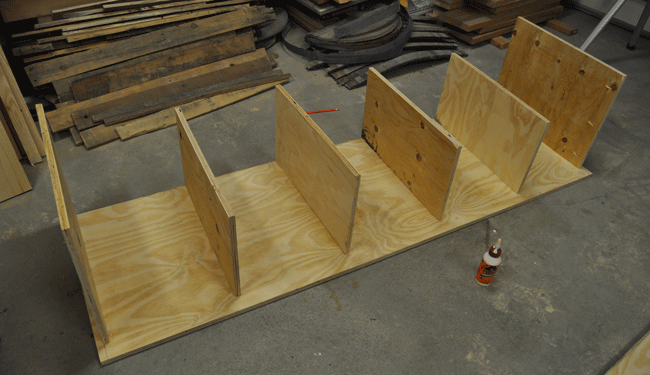
- Use of Pocket Holes: Now that all the plywood pieces are cut to size, it’s time to assemble the lower bench and cubbies. Use the drill pocket holes, allowing you to join the boards seamlessly.
Assembly Instructions:
- Set your drill to the 3/4 inch stock setting and drill the pocket holes on the top and bottom sides of the 4 smaller cubby boards.
- Only drill pocket holes on the top sides for the two larger endboards.
- Use wood glue and one 1/4-inch Kreg screw to attach all the boards.
- Space them evenly using a ruler and a straight edge. This will give the lower unit a nice, sturdy construction.
- Remember to attach the 1×4 boards to the base. This will give the cabinet a bold, finished look and extra strength.
- Finish up using a nail gun or hammer to attach 1×2 trim pieces around the front of the lower bench and cubbies. This makes the whole unit look polished.
Step 3: Attaching the Trim
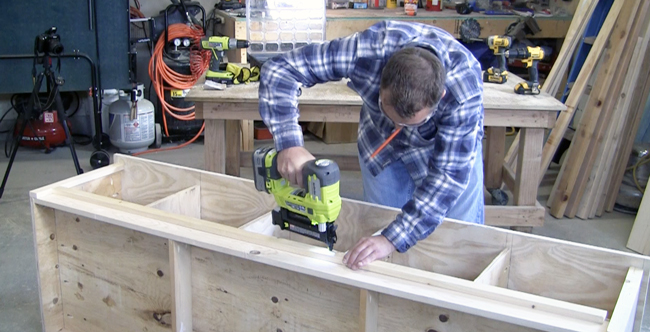
- Cutting and Attaching 1×2 Trim: With the lower bench and cubbies assembled, it’s time to add the finishing touches by attaching the trim. Use a miter saw to cut 1×2 boards to size for the trim.
- Use a Nailer or Hammer for Attachment: Attach the trim using a nailer and one 1/2-inch 18-gauge brad nail. The nailer made this step quick and easy. If you don’t have an air nailer, you can use a good old-fashioned hammer and nails.
- Center the Trim Pieces: Center the trim pieces on the 4 dividers, overlapping the outer edges by about 1/4 inch. This gives the cabinet a nice, clean look. The trim helps pull the whole lower unit together and gives it a polished, professional appearance.
Building the Upper Section
Step 4: Constructing the Upper Hutch
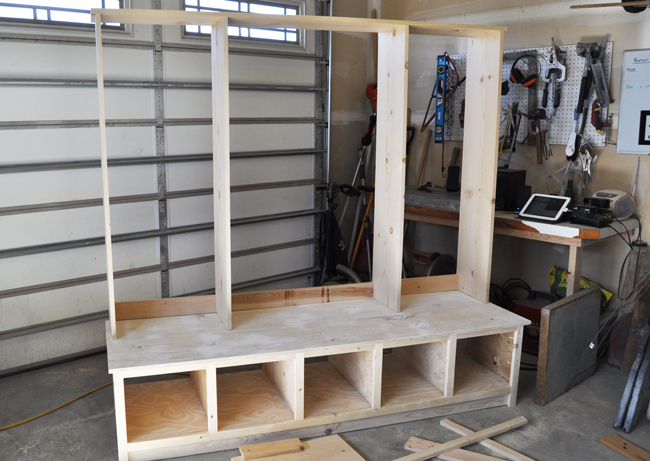
- Cutting 1×12 Boards for Shelves and Uprights: For the upper part of the cabinet, Use 1x12x6 boards and cut down to size using a circular saw and a straight edge. This includes the pieces for the shelves and vertical dividers.
- Assembling the Upper Unit Using Pocket Holes and Screws: Start by attaching the top of the upper unit to the sides using 1 1/4 inch pocket hole screws. Using a right-angle clamp will help hold everything in place during assembly.
- Attaching Vertical Dividers and Shelf Supports: Next, determine the spacing between the vertical dividers and attach them accordingly. Connect the dividers using 1×4 boards on the bottom.
- Measure and Cut the Shelf Boards: Finally, Measure and cut the shelf boards from the 1×12 lumber, then attach them using more pocket holes and screws. This created the shelves for storing items in the upper hutch.
Step 5: Installing the Back Panel
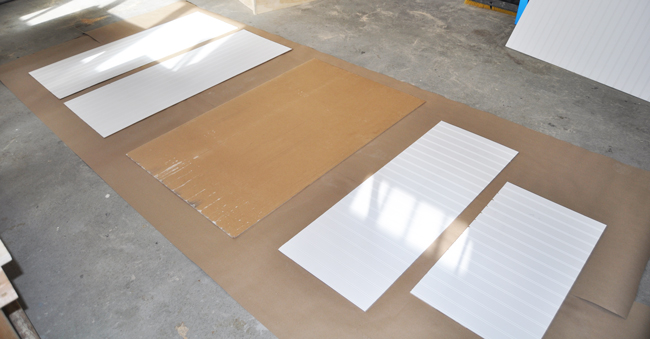
- Cutting Beadboard: To finish the hutch, add a beadboard back panel. Use two 4×8 beadboard sheets, barely enough to cover the top and bottom sections. Use a circular saw to carefully cut the beadboard to size, cutting from the backside for a cleaner edge.
- Attaching Bead Board to Upper and Lower Sections: After cutting the bead board pieces, attach them to the back of the upper and lower hutch sections using a nailer or stapler. Attaching the bead board in two separate pieces made it easier to move the full hutch into place.
Finishing Touches
Step 6: Painting or Staining
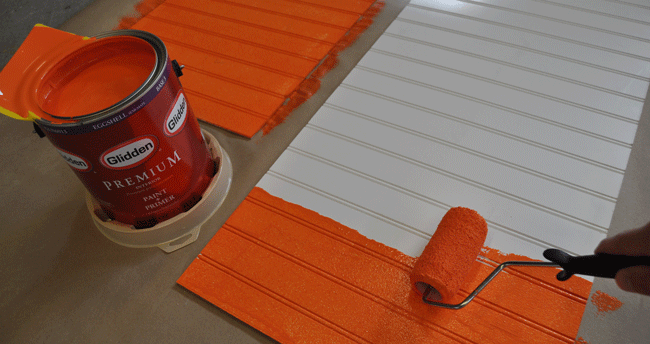
- To apply the paint, use a roller to cover the bead board back panels.
- Use masking tape to help create clean, crisp paint lines around the trim and other edges. This gave the painted areas a nice, professional look.
- Once the painting is complete, attach the back panels to the hutch using an air nailer. The nail gun makes this step quick and easy.
- If you prefer a more natural look, stain the wood instead of painting it. When you’re done, just apply a protective clear coat on top.
Step 7: Final Assembly
- The final step in building your DIY hutch is to attach the upper unit to the lower bench section. Use screws to fasten the two pieces together securely. You could also use metal brackets if you prefer.
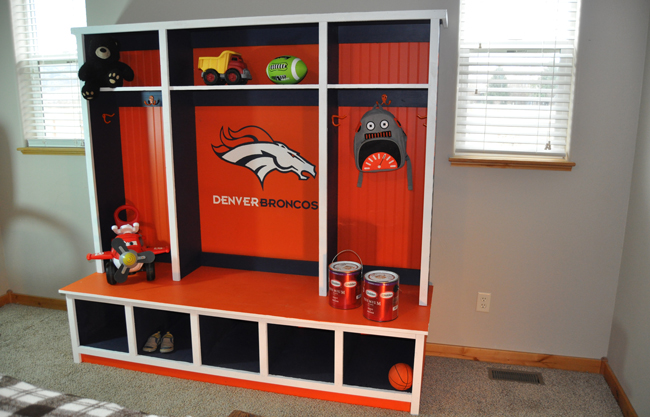
- Once the hutch is fully assembled, it’s time to move it into your desired location.
- After doing the final assembly, take a step back and admire your hard work! You now have a beautiful, custom-built hutch that you can use to organize and display all sorts of items.
Conclusion
Well, there you have it – a step-by-step guide to building your DIY hutch!
I hope this tutorial has inspired you to tackle this project and add a custom storage piece to your home.
By following these simple steps, you can create a functional and stylish hutch that fits your specific needs and design preferences.
Whether you paint it in your favorite team’s colors or stain it for a more natural look, it will be a gorgeous addition to your space.
So what are you waiting for? Gather your tools and materials, and let’s get building!
Frequently Asked Questions
How Do You Make a Hutch More Modern?
To give a hutch a modern look, you can paint it fresh, add some sleek hardware, and incorporate minimalist decor like plants or LED lighting.
How Do You Attach a Hutch to a Buffet?
Secure the hutch to the buffet’s top using strong brackets or clamps. This creates a cohesive piece of furniture for your dining room.
What Should I Put in My Hutch?
You can display your favorite dishes, collectibles, or decorative items in a hutch. Just arrange them neatly and group similar items together for a polished look.
What is the Difference Between a Hutch and a China Cabinet?
The main difference is that a hutch has an open top section, while a china cabinet has enclosed glass doors. Hutches are more versatile and can be used in various rooms.