


Fall is here, and pumpkins are everywhere. But what if you could make your pumpkin decor even more special? Many of us have leftover pumpkins or dried flowers we’re unsure what to do with.
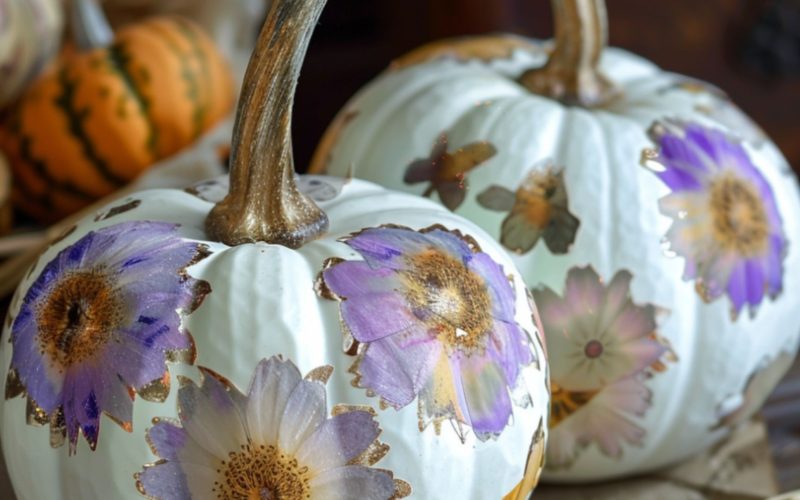
I’ve got a fun project that’ll solve both problems. In this post, I’ll show you how to create a beautiful pressed flower pumpkin. It’s an easy DIY that adds a unique touch to your autumn decor.
You’ll learn to select and press flowers, prep your pumpkin, and arrange the blooms for a stunning result. This guide breaks down each step so even craft beginners can follow along.
Get ready to transform your plain pumpkin into a work of art!
Materials Needed for Making a Pressed Flower Pumpkin
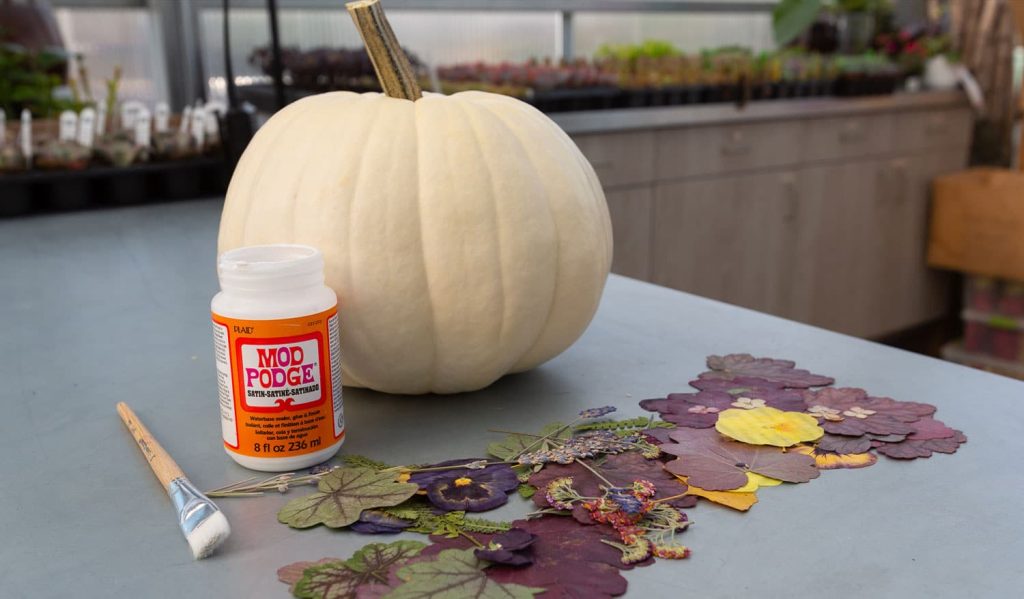
Let’s gather everything you’ll need for this project. The list is simple; basic items are all you need to turn a plain pumpkin into a floral masterpiece.
With these materials, you’re set to start creating your unique pressed flower pumpkin.
- A pumpkin – real or faux, it’s up to you
- Pressed flowers
- A foam brush or 1″ paintbrush
- A fine paintbrush (this is optional but handy)
- Mod Podge
Step-by-Step Guide to Making a Pressed Flower Pumpkin
This step-by-step guide will walk you through creating a pressed flower pumpkin.
From selecting flowers to applying the final touches, you’ll learn how to make a unique autumn decoration that showcases nature’s beauty.
Step 1: Collect and Press Flowers

The first step is to gather and press your flowers. Here’s how to do it:
Selection Tips
- Pick vibrant blooms for the best results. Good choices include violas, pansies, lavender, yarrow, and individual hydrangea flowers. Rose petals work well, too.
- The brighter the colors, the more they’ll pop on your pumpkin.
Pressing Method
- You don’t need fancy equipment to press flowers.
- Use what you have at home: Grab some newspaper, blotting paper, printer paper, or flat cardboard.
- Lay your flowers face down on the paper. Make them as flat as possible. Cover the flowers with another piece of paper.
- If you have one, press them using a heavy book or a wood press.
- Wait about a week before checking on your flowers.
- This process helps preserve the flowers’ colors and shapes.
- With patience, you’ll have perfect pressed flowers for your pumpkin project.
Step 2: Select and Prepare the Pumpkin
Now that your flowers are ready, it’s time to focus on the pumpkin. This step ensures your pressed flowers stick well and look their best.
Pumpkin Selection
While any pumpkin will work, some choices can make your flowers stand out:
- White pumpkins are a great option. Their pale background makes the colors of your pressed flowers pop.
- Smooth-skinned pumpkins work better than deeply ridged ones.
- Choose a size that fits your design ideas.
- Smaller pumpkins are easier to handle, but larger ones give you more space to work with.
Cleaning
Before you start decorating, make sure your pumpkin is clean and ready:
- Gently wash your pumpkin with cool water.
- Use a soft cloth to remove dirt, dust, or sticky residue.
- Pay extra attention to any creases or stem areas where dirt might hide.
- Let the pumpkin air dry completely.
- A clean, dry surface helps the Mod Podge and flowers stick better.
- This simple prep step goes a long way in ensuring your final product looks great and lasts longer.
Step 3: Apply Mod Podge and Attach Flowers
Now comes the fun part – bringing your pumpkin to life with pressed flowers! This step requires patience, but the results are worth it.
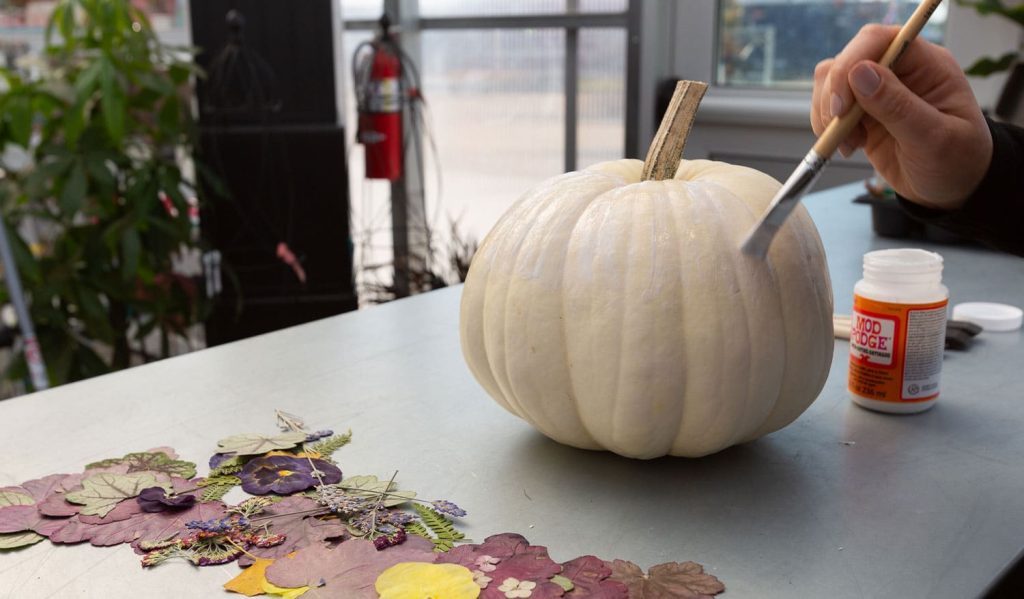
Initial Application
- Take your foam brush or 1″ paintbrush.
- Dip it in the Mod Podge.
- Apply a thin, even layer all over the pumpkin.
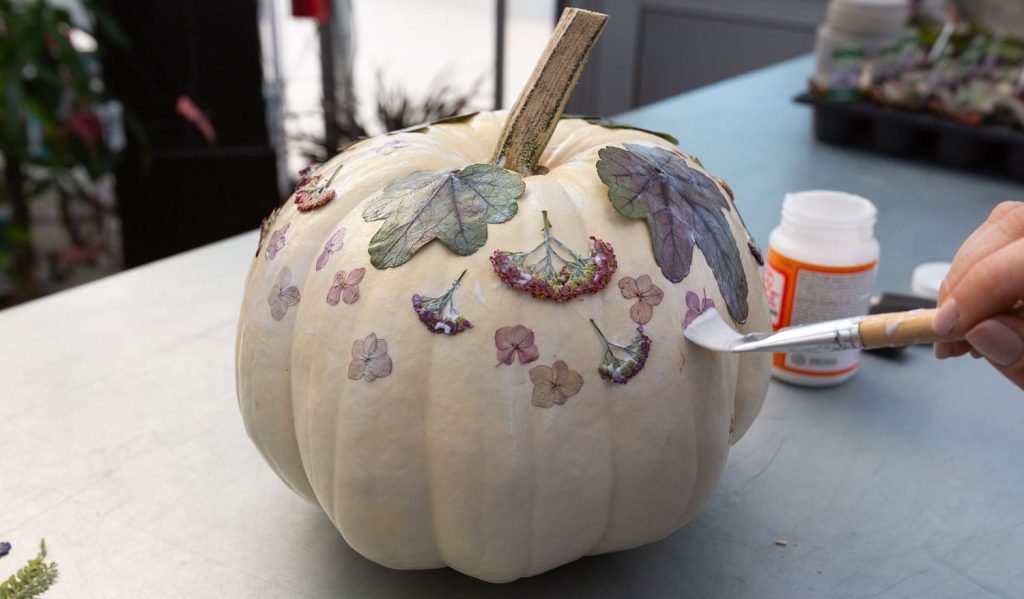
Flower Placement
- While the Mod Podge is still wet, start placing your pressed flowers.
- Gently press each flower onto the pumpkin.
- Once you’ve placed a few flowers, apply another thin layer of Mod Podge over them.
- Use a fine brush for more control for tricky spots or flower edges.
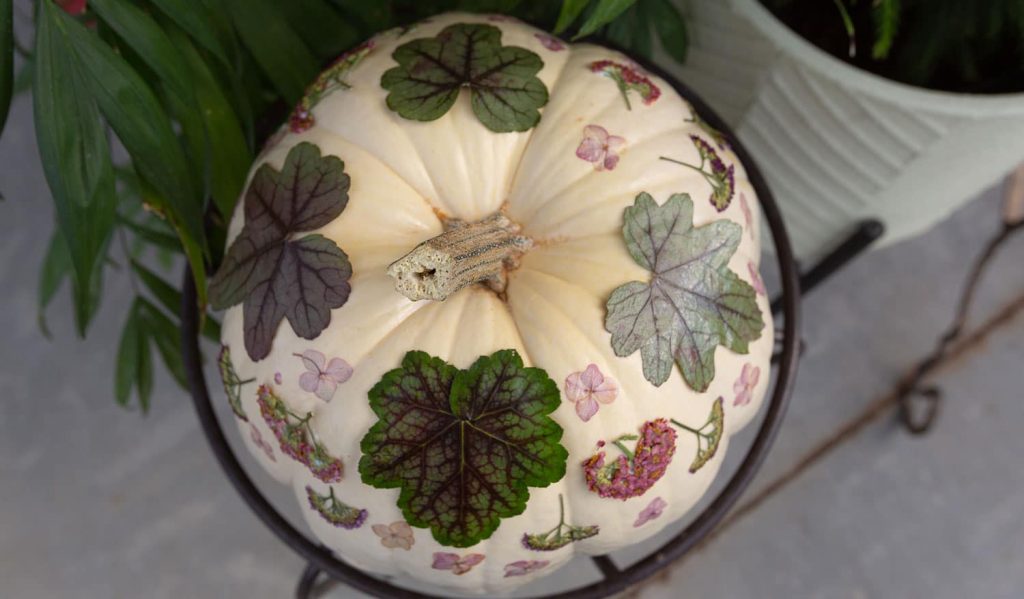
Final Touches
- Add flowers and Mod Podge layers until you’re happy with the design.
- Make sure each flower is fully stuck down.
- Let the pumpkin dry between layers if needed.
Decorating Tips for Your Pressed Flower Pumpkin
Here are some handy tips to make your pressed flower pumpkin truly stand out:
1. Choose the Right Pumpkin
Pick a pumpkin with a smooth surface. White or pale-colored pumpkins work great as they make flower colors pop. The softer the surface, the easier it is to attach your flowers.
If you’re using a real pumpkin, ensure it’s firm and free from soft spots. Faux pumpkins are perfect if you want to reuse your creations year after year. They’re also lighter and easier to handle.
2. Select Vibrant Flowers
Go for bright, contrasting colors. Violas, pansies, lavender, and rose petals are fantastic choices. Press a variety of flowers to create an eye-catching design. Look for flowers of different shapes and sizes, too.
Flat flowers like daisies or Queen Anne’s lace press well and add interesting textures. Don’t overlook leaves and ferns – they can add beautiful green hues to your design.
3. Plan Your Design
Before sticking anything down, lay out your flowers on a flat surface. Play around with different arrangements until you find one you love.
You might want to create a spiral pattern, cover one side of the pumpkin, or make a wreath-like design around the middle. Take a photo of your favorite layout to refer to it while decorating.
4. Layering
Start with larger flowers as your base layer. Then, add smaller blooms and details on top. This creates depth and makes your design more interesting.
You can overlap flowers slightly for a lush, full look, or try placing some flowers at angles for a more natural, flowing appearance.
5. Use Mod Podge Generously
Apply plenty of Mod Podge under and over your flowers. This helps them stick well and protects them too. Use a fine brush to secure flower edges and prevent peeling.
Work in small sections, applying Mod Podge and flowers bit by bit. This prevents the Mod Podge from drying before you can place your flowers.
6. Add Extra Elements
Add small leaves, fern fronds, or dried herbs to enhance your design. For some sparkle, consider using metallic or glitter Mod Podge.
You could also incorporate thin twigs or grasses for a rustic touch. Remember, less is often more – don’t overcrowd your design.
7. Personalize It
Want to add a name or a short quote? Write on your pumpkin using stencils and paint. Just make sure the colors match your flower scheme.
You could spell “Fall,” “Autumn,” or even your family name. Personalizing the pumpkin makes it extra special if you’re giving it as a gift.
8. Seal It
Once everything’s dry, spray on a clear acrylic sealant. This protects your pumpkin from moisture and damage, especially if you plan to display it outdoors.
Apply the sealant in a well-ventilated area and let it dry completely before handling your pumpkin.
9. Display Creatively
Show off your pumpkin on a decorative plate or stand. Surround it with other fall items like acorns or pine cones for a festive display.
You could create a group of pressed flower pumpkins in different sizes for an eye-catching centerpiece. Remember your mantel or porch – these pumpkins make great decorations throughout your home.
10. Light It Up
Place a small LED light inside or behind your pumpkin for a magical touch. This creates a warm glow that highlights your beautiful flower design.
If using a real pumpkin, cut a small hole in the bottom to insert the light. For faux pumpkins, you might be able to use a flameless candle inside for a similar effect.
Conclusion
Lastly, creating a pressed flower pumpkin is a fun way to bring a touch of nature to your fall decor. This project lets you turn a simple pumpkin into a unique piece of art that reflects your style.
Remember, there’s no right or wrong way to design your pumpkin. Whether you go for a minimalist look or cover every inch with flowers, the result will be beautiful.
Don’t be afraid to experiment with different flowers, colors, and patterns.
As you display your creation, you’ll constantly be reminded of the beauty of autumn. Plus, it’s a great conversation starter when guests visit. So gather your materials, press those flowers, and let your creativity bloom.
Happy Crafting!
Frequently Asked Questions
How to Press Flowers to a Pumpkin?
Apply Mod Podge to the pumpkin, place pressed flowers on top, and add another layer of Mod Podge. Use a fine brush to secure the edges. Let it dry completely before displaying.
How Do You Fill a Pumpkin with Flowers?
For fresh flowers: Cut the top off, scoop out seeds, add floral foam, and arrange flowers. For artificial: Remove the stem, fill it with foam or fabric, then insert faux flowers.
How Do You Transfer Prints to a Pumpkin?
Print your design on tissue paper. Apply Mod Podge to the pumpkin, place the tissue paper print-side down, and gently rub. Once dry, carefully peel off the paper backing.
How to Trace a Stencil onto a Pumpkin?
Secure the stencil to the pumpkin with tape. Trace the design using a pencil or washable marker. Remove the stencil and fill in or paint over the traced lines as desired.