


Decorating walls can be challenging and expensive, especially when you’re looking for large-scale art. However, buying pre-made wall art pieces often costs hundreds, if not thousands, of dollars.
But I’ve discovered an easy and affordable way to create your own stunning large-scale wall art using a simple shower curtain.
In this post, I’ll show you how to transform an inexpensive shower curtain into a beautiful custom wall art for your home.
You’ll be amazed at how professional it looks and how little it costs to make.
Understanding the Basics of Wall Art
We’ll create our large-scale wall art using a decorative shower curtain in this project. Shower curtains come in a wide variety of eye-catching patterns and designs, making them the perfect material for a one-of-a-kind piece of art for your home.
Benefits
- Cost-Effective: The best part about this DIY wall art is that it is incredibly cost-effective. Shower curtains are usually quite affordable, especially compared to buying pre-made large wall art.
- Fits Your Style: It also lets you customize the look to fit your style and decor. Rather than spending hundreds on mass-produced art, you can create something unique and personalized for your space.
Supplies Needed for DIY Shower Curtain Wall Art
To create your DIY shower curtain wall art, you’ll need the following supplies:
- 1″x2″x8′ boards (5 pieces): These will be used to build the frame for your wall art.
- Lattice strips (4 pieces): The lattice strips will finish the edges of your frame.
- Shower curtain with the design of your choice: This is the show’s star! Pick a curtain with a pattern or image you love.
- Power drill and bits: You’ll need a drill to make pilot holes and attach the frame.
- Hand saw or miter saw: To cut the 1×2 boards to size.
- Staple gun: This securely attaches the shower curtain to the frame.
- Hammer or brad nail gun: To attach the lattice strips.
- Wood screws: To assemble the frame.
- Wood stain: Optional, but staining the lattice strips adds a nice finishing touch.
Preparation Steps for DIY Shower Curtain Wall Art
Before we assemble the wall art, we need to take a few important preparatory steps to prepare everything.
1. Stain the Lattice Strips
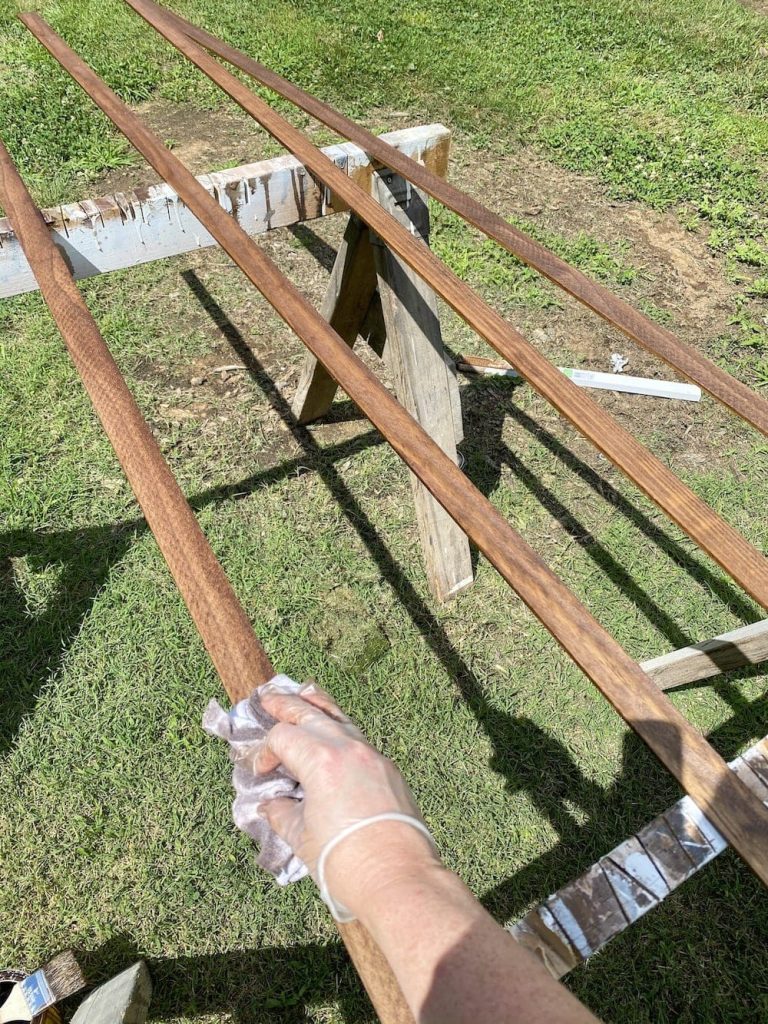
- The first task is to stain the lattice strips that will be used to finish the edges of the frame.
- Apply the stain evenly to the lattice strips and allow them to fully dry before moving on. This step will give the final piece a polished, cohesive look.
2. Measure and Trim the Shower Curtain
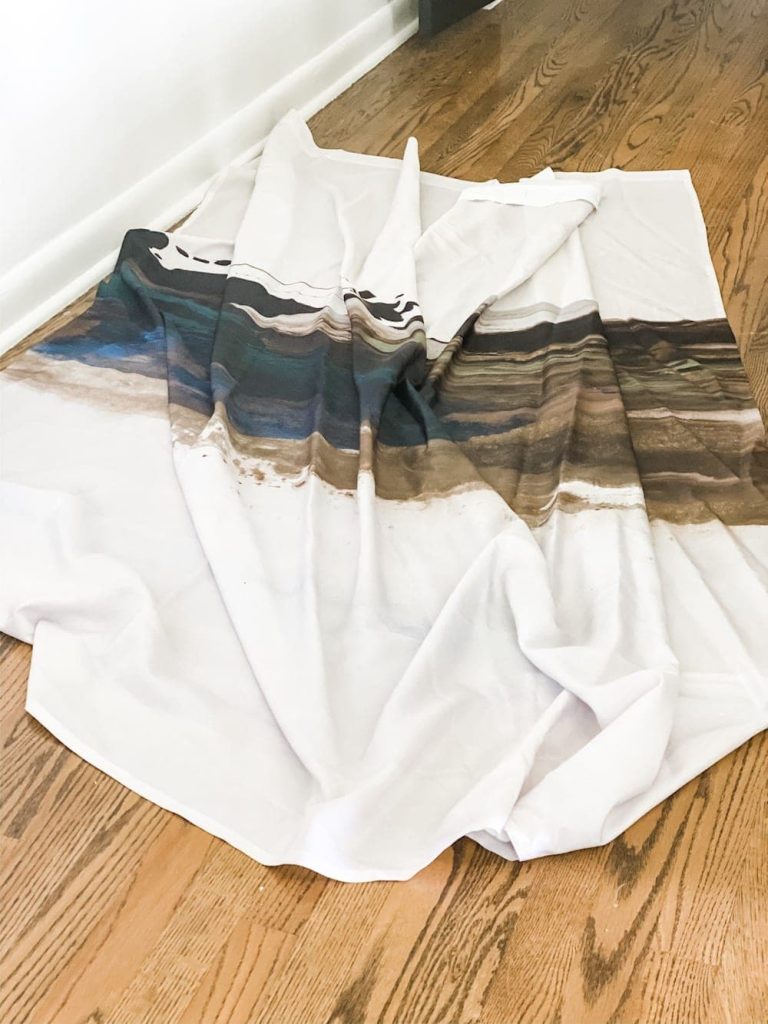
- Next, decide on the exact dimensions you want for your wall art.
- Be sure to leave 3-4 inches of extra shower curtain material around the edges. This excess fabric will wrap around the frame and create the desired “stretched canvas” look.
- Carefully measure and trim the shower curtain to your desired size, ensuring it is square and even.
3. Cut 1×2 Boards
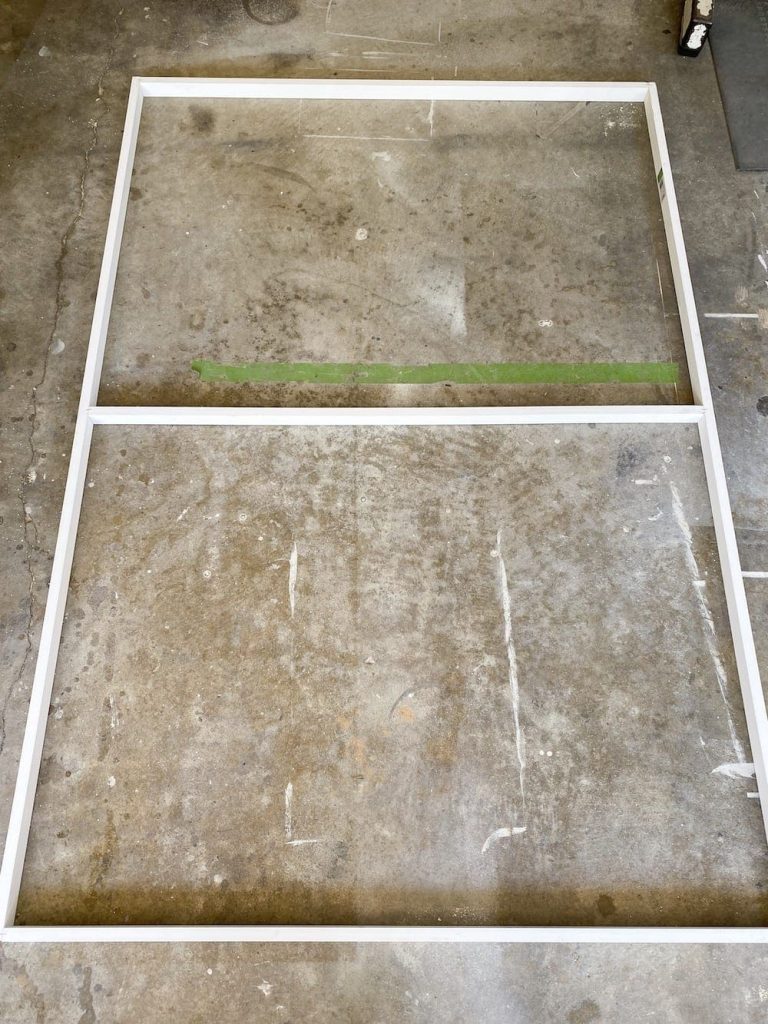
- Cut the 1×2 boards to the appropriate lengths to build your canvas frame using a miter saw or hand saw. You’ll need four boards for the perimeter and potentially 1-2 additional boards to provide extra support across the middle.
- When assembling the frame, carefully measure and mark the boards to ensure a precise fit.
Assembly Process for DIY Shower Curtain Wall Art
Now that we have all the necessary materials, it’s time to start putting everything together. This step-by-step process will transform your shower curtain into a beautiful custom wall art.
1. Attach Boards
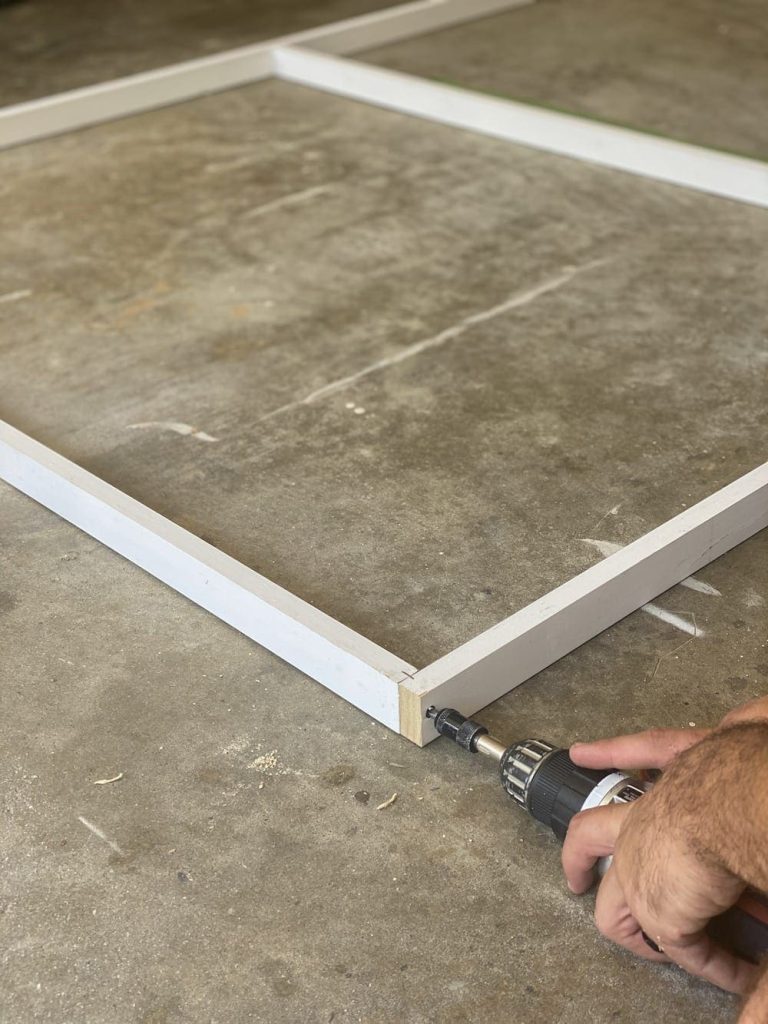
- Use a power drill to make pilot holes at each corner where the 1×2 boards will meet. This will help prevent the wood from splitting when you drive in the screws.
- Next, take the wood screws and securely attach the 1×2 boards to form the canvas frame. Make sure the corners are perfectly square.
- For added stability, you can also go back and add a few sturdy staples along the board seams.
2. Align Shower Curtain
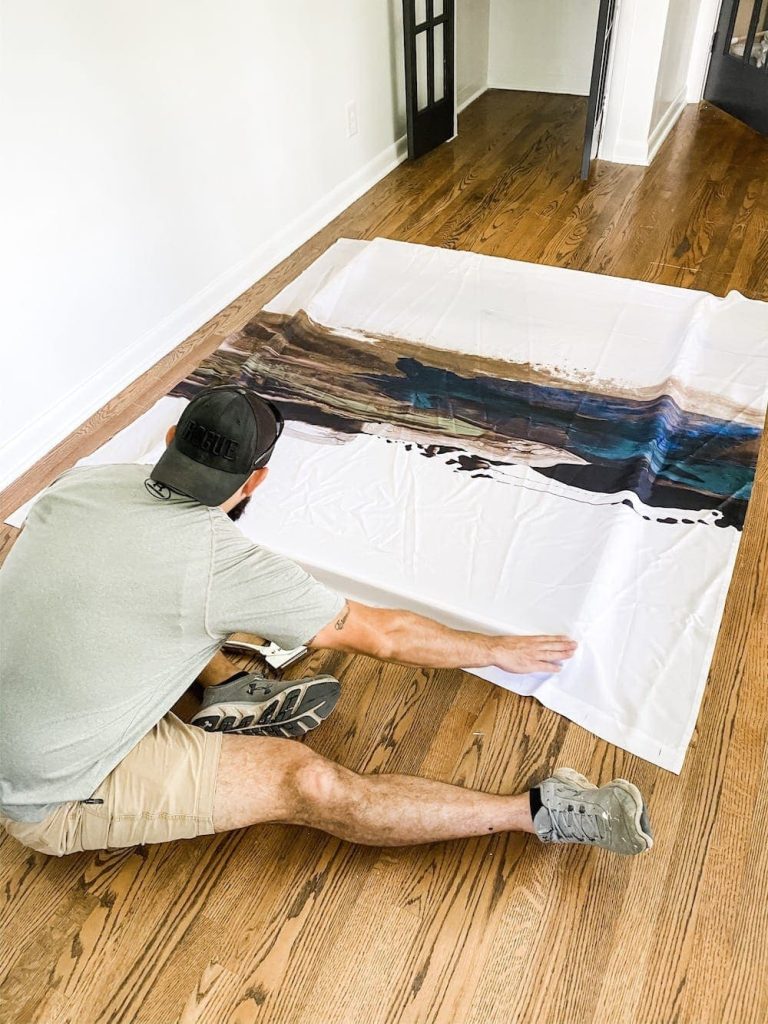
- Lay the shower curtain face-down on a flat surface, then carefully place the assembled canvas frame on top. Adjust the positioning until you’re satisfied with how the curtain design is aligned.
- Add a couple of staples along the top edge to temporarily hold the curtain in place, securing it to the wooden frame.
3. Attach Curtain to Frame
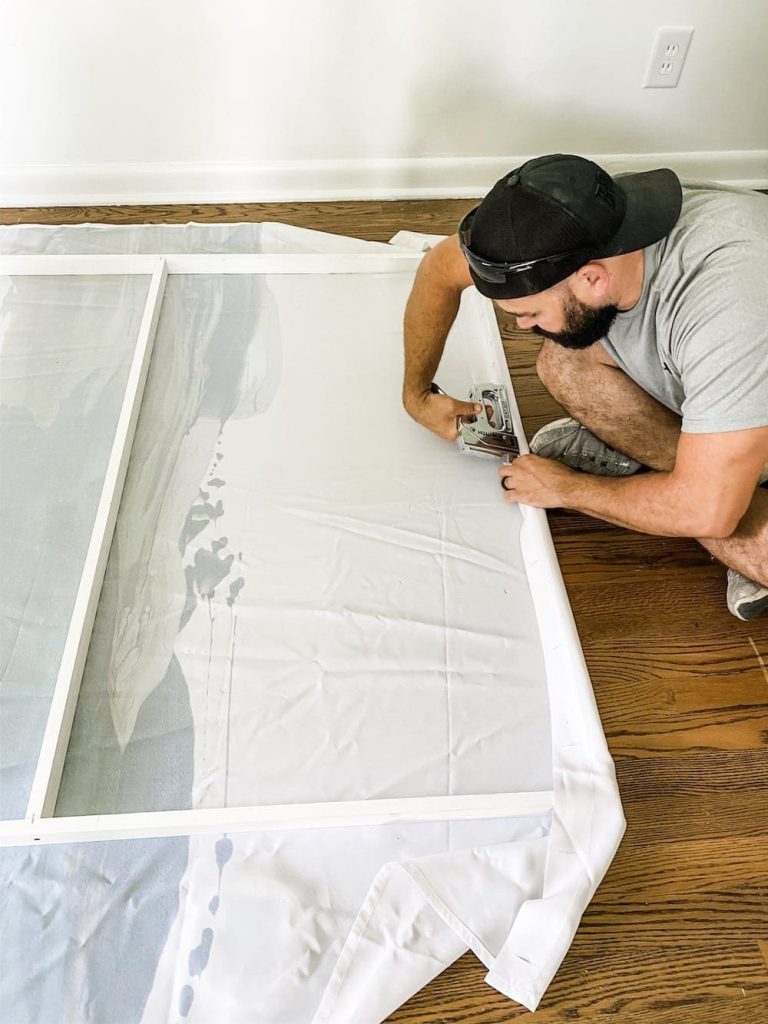
- Flip the entire frame so the shower curtain faces down with the frame on top. This will allow you to wrap and staple the fabric more easily.
- Start by wrapping and stapling the top edge of the curtain around the frame, smoothing out any wrinkles as you go.
4. Stretch Curtain Across Frame
- Moving to the bottom edge, repeat the stapling process, but this time, pull the fabric taut to eliminate any sagging or wrinkles.
- Stretch and staple the fabric along both side edges, ensuring the curtain is pulled tight across the entire frame.
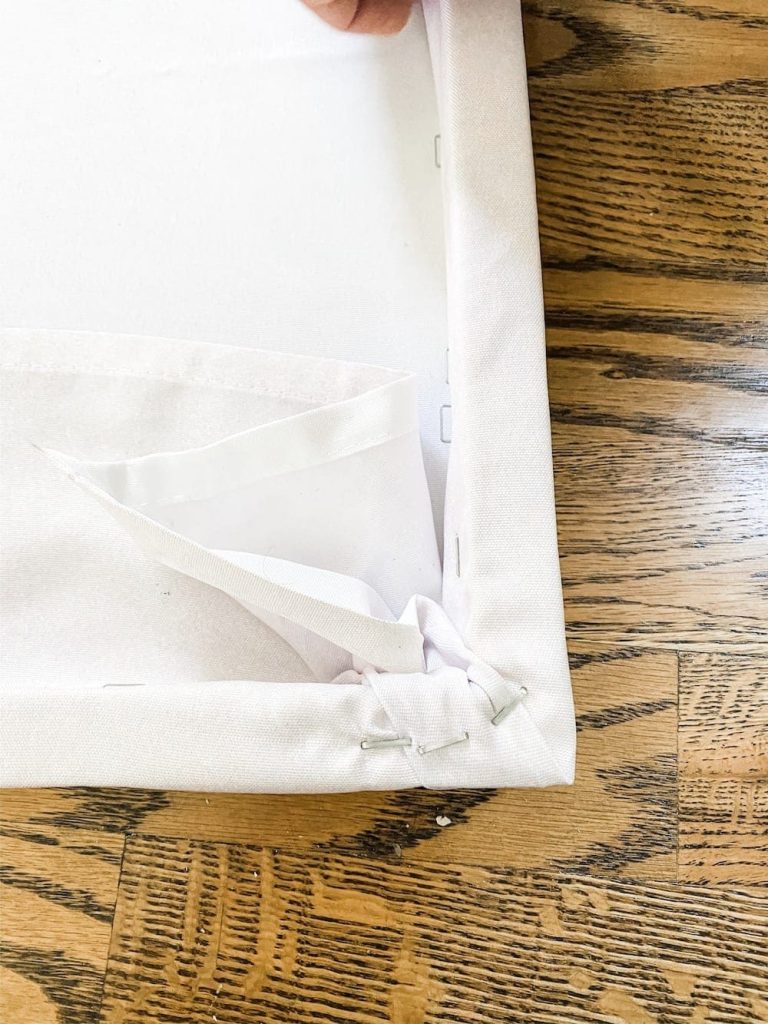
5. Secure Corners
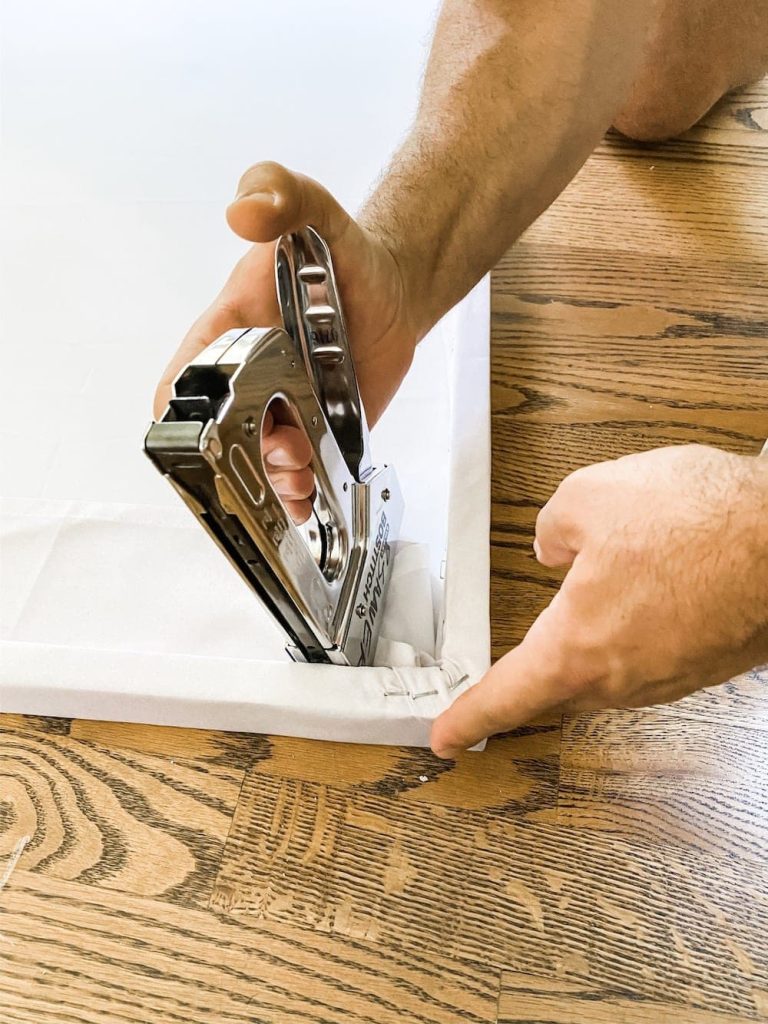
- For a clean, finished look, fold each of the four corners neatly and staple them down securely.
- Finally, additional staples around the perimeter are used to tuck in and hide any excess fabric, attaching it firmly to the wooden frame.
Finishing Touches
1. Cut and Attach Lattice Strips
- Measure and cut the pre-stained lattice strips to fit across the canvas frame’s top, bottom, and sides.
- Use a brad nail gun or hammer to securely attach the lattice strips around the perimeter of the frame. This will give your DIY wall art a polished, finished look.
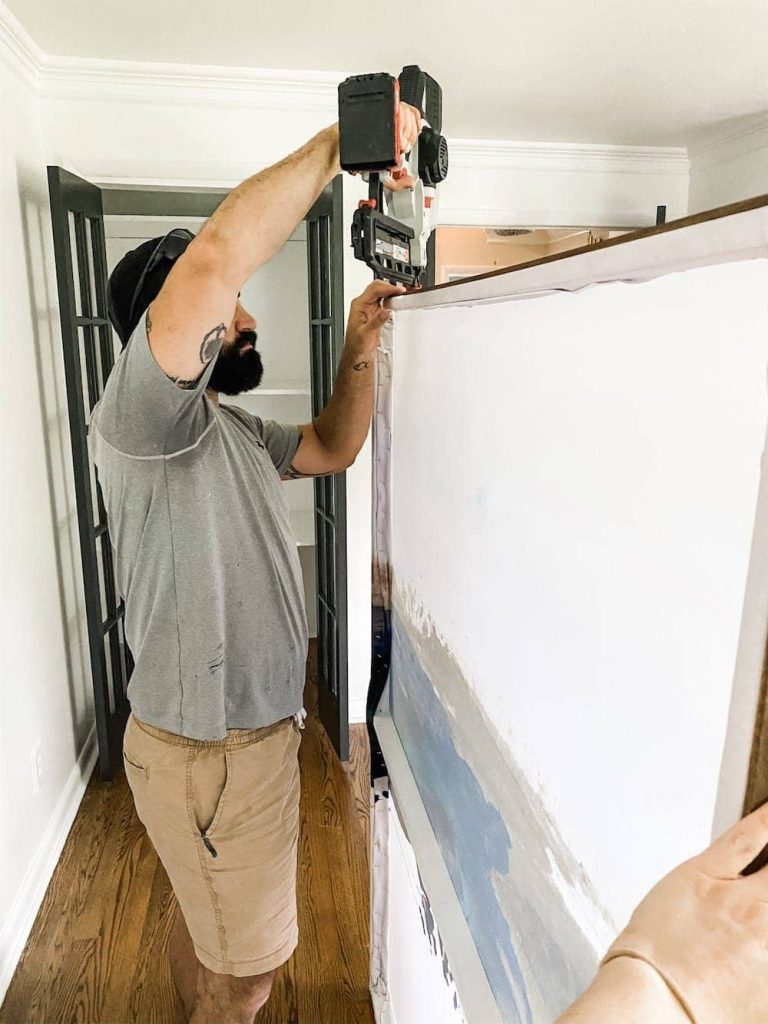
2. Hang Your Art
- Find the spot on your wall where you want to hang the artwork.
- Anchor a couple screws into the wall where the top corners of the frame will rest.
- Hang the completed wall art by placing the frame over the screws.
Additional Ideas
While using a pre-printed shower curtain is a quick and easy way to create large-scale wall art, there are a few other creative variations you can try:
- Personalization: Of course, the beauty of this project is that you can completely personalize it by choosing a shower curtain that fits your style and decor. You can even paint your design directly onto the shower curtain material.
- Creative Variations: Instead of a shower curtain, you can use a plain canvas drop cloth as the base for your wall art. This gives you a blank canvas to paint or draw your custom design.
Conclusion
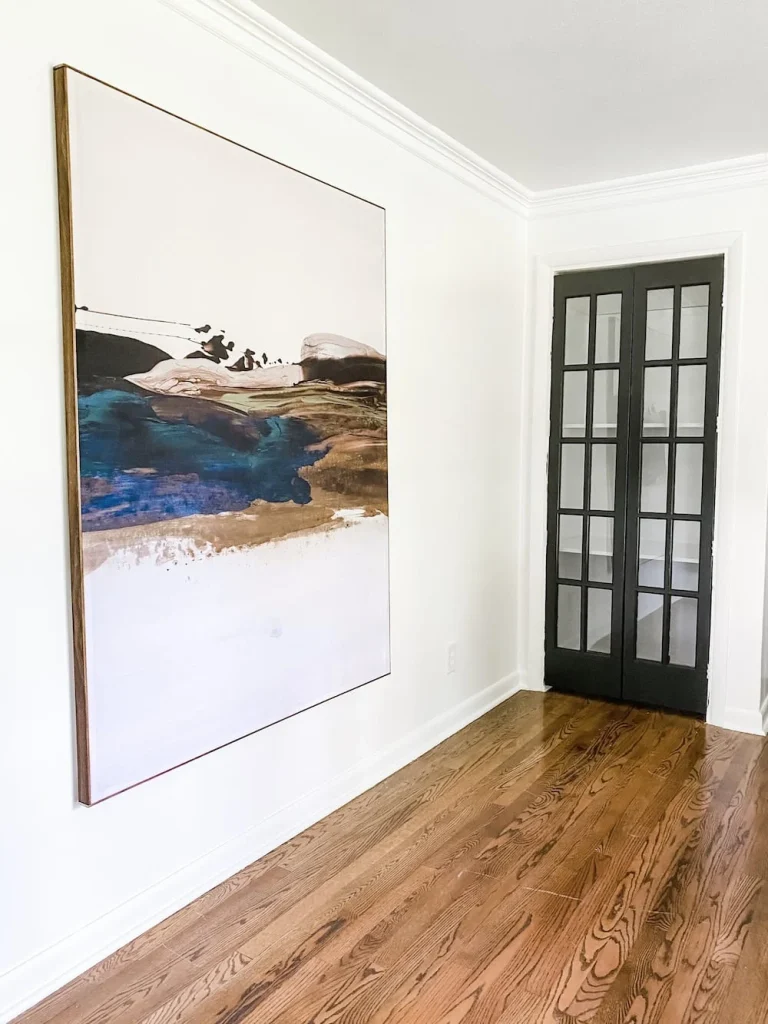
In this post, I showed you how easy and affordable it is to create stunning large-scale wall art using a simple shower curtain.
Following the step-by-step instructions, you can transform an inexpensive shower curtain into a one-of-a-kind piece that will instantly elevate the look of any room.
So what’s next? I encourage you to start browsing shower curtains and let your creativity shine.
Whether you choose a bold pattern or a more subtle design, this DIY project is a great way to add personalized style to your home decor.