

Looking to make your closet work better for you? A closet island might be just what you need.
This simple addition can turn a basic storage space into a useful dressing area.
In this blog, we’ll explain why a closet island is worth adding, explain how to choose between DIY and custom options, describe what supplies you’ll need, and provide step-by-step building tips.
We’ll also cover smart ways to style your closet island and how to fix common problems.
With some basic tools and a free weekend, you can create a helpful hub in the middle of your closet that makes getting dressed much easier.
Why Add an Island to Your Closet?

A closet island gives you extra space in the middle of your closet. It makes getting dressed easier and keeps your clothes neater.
Many people find a closet island speeds up their morning routine.
Added Storage and Functionality
A closet island adds more storage without taking up wall space. The drawers can hold small items like socks, handkerchiefs, and jewelry.
The top can be used for daily tasks, and the island provides a spot to put things down while you get dressed.
You can keep your most-used items within easy reach, which helps reduce clutter in the rest of your closet.
Ideal for Folding, Organizing, and Showcasing Items
The flat top of a closet island is perfect for folding clothes. You can sort laundry right where it will be stored.
Clear display areas let you showcase special items like watches or scarves, while open shelves work well for shoes or bags you use often.
This setup helps you see what you have, so you wear more of your clothes.
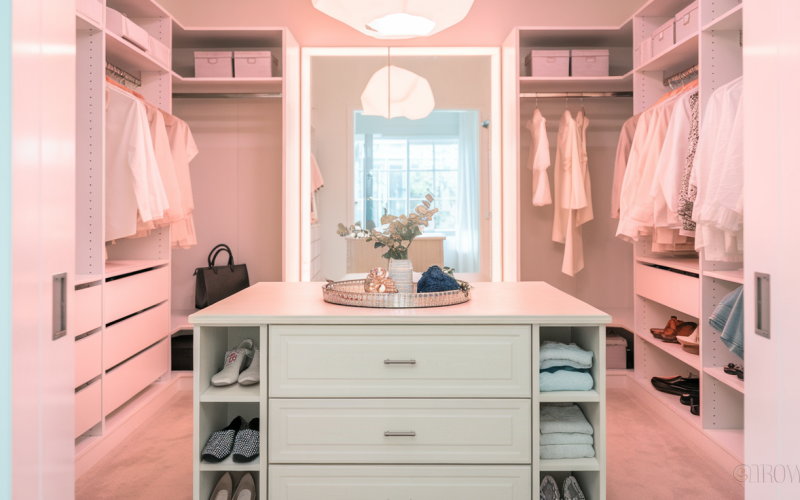
Aesthetic Upgrade to Your Dressing Space
A closet island makes your closet look more put-together. It turns a basic storage area into a nice getting-ready space.
You can pick styles and colors that match your taste. Adding a mirror or good lighting makes the space even more useful.
Your closet becomes a room you enjoy spending time in, not just a place to store clothes.
DIY vs Custom Closet Island: What to Know
| DIY Closet Island | Custom Closet Island |
|---|---|
| Pros: Lower cost, can use what you have, build to fit your exact space, feel proud of making it yourself | Pros: Made by experts, high-quality materials, perfect fit, often includes setup. |
| Cons: Needs tools and skills, might not look as good, can be less stable | Cons: Much more expensive, longer wait times, less control over details |
| Time & Effort: It takes several weekends and requires planning, measuring, cutting, and finishing. Need to buy or borrow tools and find or buy materials | Time & Effort: Minimal work from you – just meet with designers, pick options, and wait for installation |
What You’ll Need: Supplies and Tools

Main Materials
The basic items that form the structure and top of your closet island.
- Base cabinets or storage units
- Wood (most budget-friendly)
- Laminate (good middle option)
- Marble or granite (higher end)
- IKEA Torsby tabletop (easy pre-made option)
- Screws and fasteners
- Wood glue
- Sandpaper
Optional Add-ons
Extra items that can make your closet island more useful and good-looking.
- Drawer pulls or knobs
- Wheels for the bottom (if you want it movable)
- Task lighting or LED strips
- Glass display top
- Drawer organizers
- Velvet lining for jewelry drawers
Finishing Materials
Products that help complete the look and keep your island in good shape over time.
- Paint or stain (if using unfinished wood)
- Sealer (especially for wood tops)
- Caulk (for any gaps)
Step-by-Step Guide to Build Your Closet Island

Step 1: Assemble the Shelving Units
Start by putting together your base storage units. If you are using store-bought cabinets, follow the included directions.
Make sure all parts are tight and level. Check that drawers open and close smoothly. If you have adjustable shelves inside, add shelf pins.
Step 2: Add Legs (Optional)
If you want your island raised, now is the time to add legs. Screw leg plates to the bottom of your units.
Twist legs into the plates until secure. Make sure all legs are the same height. Use a level to check that the top is flat.
Step 3: Arrange and Secure the Structure
Place your units in the spot you want in your closet. Push them close together. Use clamps to hold them steady.
Screw the units to each other through their side panels. Check again with your level to make sure everything is straight.
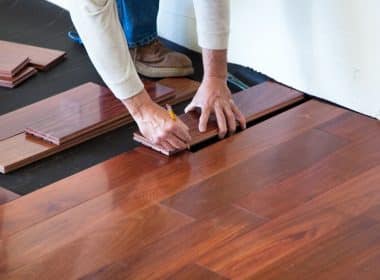
Step 4: Add a Top Surface
Measure and cut your chosen top to fit. Sand any rough edges until smooth. Place it on top of your base units.
Secure it with screws from inside the cabinets up to the top. Be careful not to screw too far through the top.
Step 5: Decorate and Style
Add any pulls or knobs to drawers and doors. Arrange your items on top in a way that looks nice.
Put small boxes or trays inside to sort tiny things. Add your favorite items to open shelves. Step back and enjoy your new closet helper.
Styling Ideas to Upgrade Your Island
1. How to Accessorize with Trays, Candles, Busts

Place a nice tray on top to hold small things like watches and rings. This keeps items from rolling off. Add a small dish for daily jewelry.
Put a bust on top for necklaces and scarves. A pretty box can hide lint rollers and other not-so-pretty items.
A small plant or flower can add life to the space.
2. Color Coordination and Minimalism

Pick one or two main colors that match your closet. Keep most items in these colors for a clean look.
Too many colors can make the space feel messy. Put away items you don’t use daily.
A clean top makes the whole closet feel calmer—group things together for a tidy look.
3. Tips for Adding Lighting or a Mirror

Stick-on lights under shelves help you see inside drawers. A small table mirror lets you check jewelry or ties. Clip-on lights work well and don’t need wiring.
Make sure the lights point where you need to see them. A full mirror on a nearby wall works with your island for outfit checks.
Battery lights mean no cords to trip on.
4. Practical Storage Solutions for Daily Use

Keep a small basket for items that need to be put away. Add drawer dividers for better organization of small things.
Use clear containers so you can see what’s inside easily. This will speed up your morning routine and keep the island tidy.
5. Seasonal Rotation Strategies

Change items on your island as the seasons shift. Winter might need glove storage, while summer might need sunglasses.
Store off-season things away to save space. This keeps your island fresh and makes finding current items easier.
Common Problems and How to Avoid Them
- Wobbly shelves: Use a level and add cross braces at the back.
- Uneven top surface: Sand high spots and use shims under low corners.
- Heavy toppers tipping the base: Choose a wide base or attach it to the floor with L-brackets.
- Securing components safely: Use correct length screws and pre-drill holes.
- Drawer alignment issues: Install drawer slides carefully and test before adding the top.
Wrapping Up
A closet island can change how you use your closet space every day. It gives you more room to store, fold, and show off your things.
You can make one yourself with basic tools and materials from any home store.
Start small if you’re not sure—even a simple closet island with drawers and a top can make a big difference.
Try adding one feature at a time, like good lighting or drawer dividers.
Your morning routine will be smoother, and your clothes will stay neater. Are you ready to start your closet island project this weekend?