
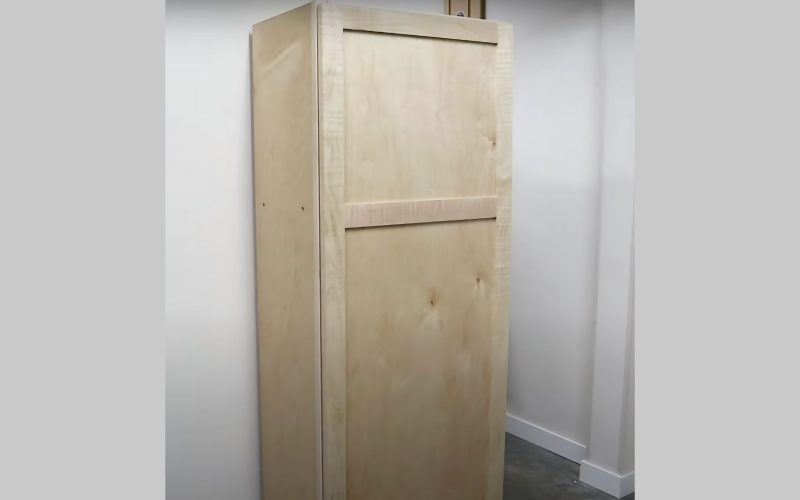
Is your workshop overflowing with clutter? Organize the mess with a DIY storage cabinet that’s both practical and stylish.
This tall, sleek DIY storage cabinet isn’t just a place to stash your stuff—it’s your ticket to a clutter-free workspace.
Whether you need to store safety gear, tools, or miscellaneous items that appear out of nowhere, this DIY storage cabinet project is the perfect solution.
We’ll guide you through each step, from the first cut of plywood to the final, satisfying click of the door.
Don’t sweat it if you’re not a carpentry pro; with some basic tools and patience, you’ll be amazed at the DIY storage cabinet you can create.
So, grab your safety goggles, and let’s build a storage solution to make your workshop the envy of DIY enthusiasts everywhere!
Supplies Needed
To build this storage cabinet, you’ll need various plywood sheets, woodworking tools like a table saw and router, and finishing supplies. Don’t forget essential hardware such as hinges and clamps.
Having these materials ready will ensure a smooth building process for your custom storage solution.
- 4×8 sheet of 3/4″ pre-finished maple plywood
- 4×8 sheet of 1/2″ pre-finished maple plywood
- 1/4″ pre-finished maple plywood
- Undersized plywood router bit set
- Table saw with ripping blade
- Wood glue
- Parallel clamps
- Euro-style cup hinges
- Center punch
- Oil/wax finish (or polyurethane/lacquer for more durability)
- 35mm Forstner bit
- Cordless drill
- Tape measure
- Double square
- Square
- Track saw (optional but helpful)
- Jointer and planer (if using rough lumber for face frame)
Steps to Follow During the Process
Building a DIY storage cabinet involves carefully planning steps, from preparing and cutting plywood to assembling and finishing the cabinet structure.
Each stage ensures precision, functionality, and a professional look, transforming your workspace into an organized and efficient area.
Step 1: Preparing and Cutting the Main Cabinet Pieces
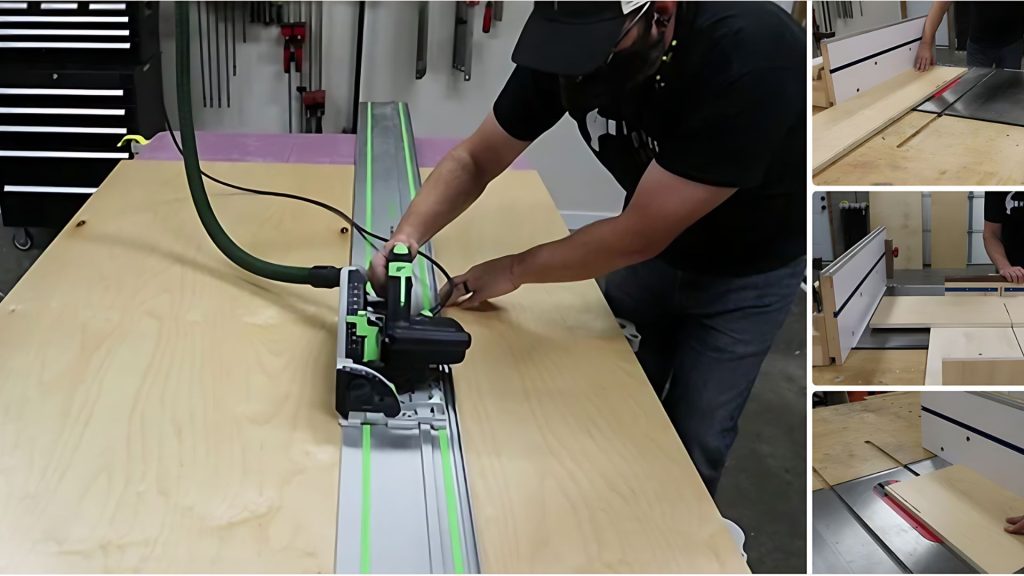
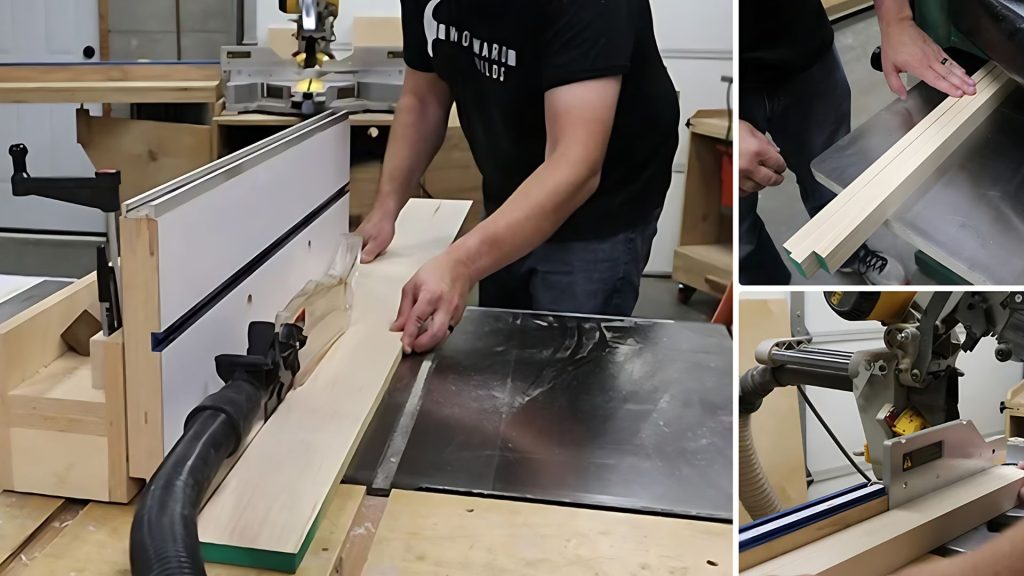
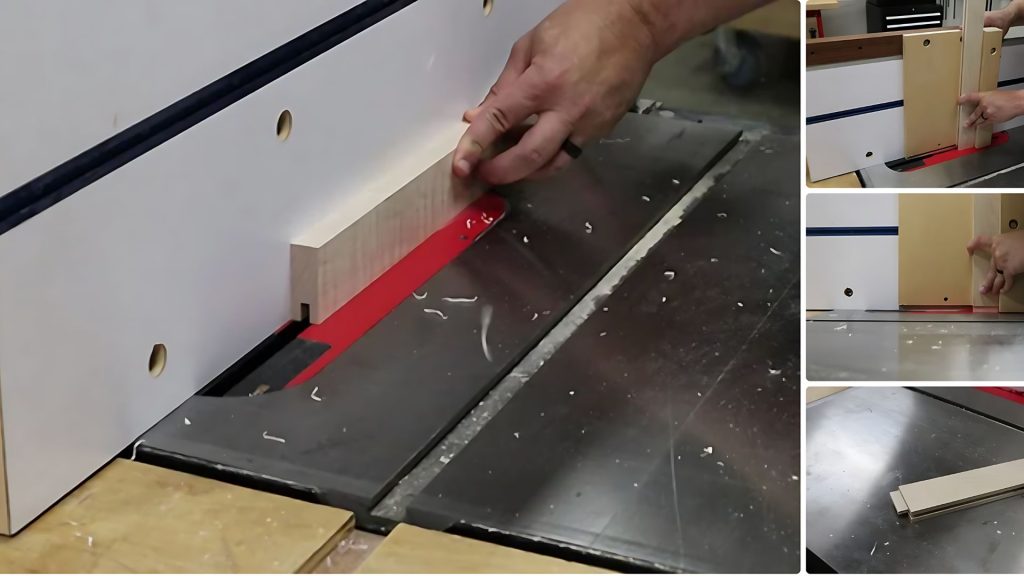
Let’s kick off our cabinet-making journey by breaking down the plywood sheets. Set up a comfortable work surface, ideally with a foam insulation sheet underneath for protection.
Cut three 12.5″ strips from the plywood using your track saw – two for the cabinet sides and one for the horizontal pieces. Run these through the table saw to achieve a precise 12″ width.
Next, crosscut one strip to create top, bottom, and shelf panels. Remember to make the shelf 1/2″ shorter to accommodate the back panel. This step sets the foundation for your entire cabinet, so take your time and measure twice!
Step 2: Testing Your Joinery Cuts
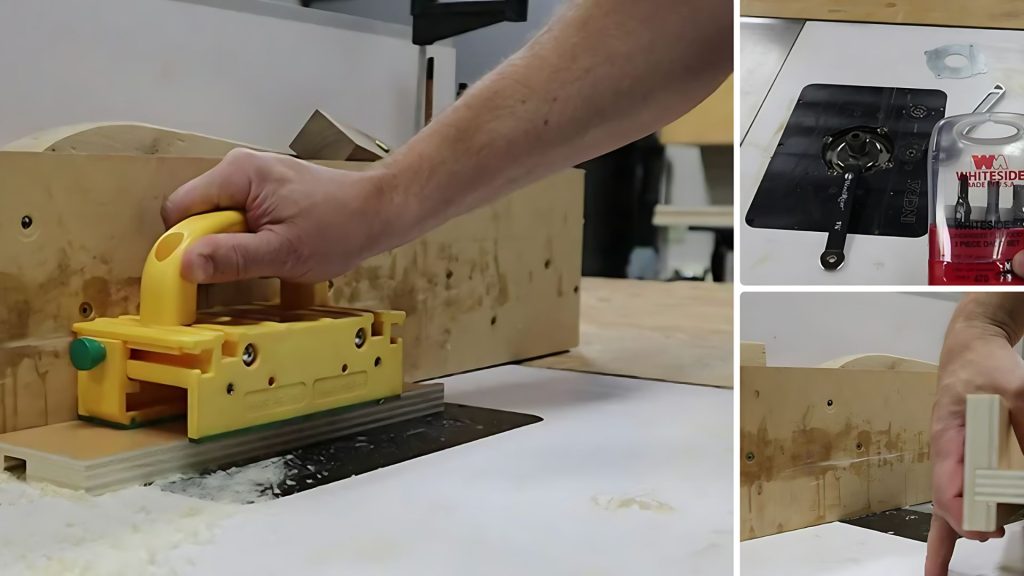
Before tackling your actual cabinet pieces, it’s crucial to do a test run. Grab some scrap plywood and set up your router with the undersized plywood bit set. Make a test cut to ensure the fit is perfect.
This rehearsal helps you fine-tune your technique and avoid costly mistakes on your main pieces. It’s a small step that can save you a lot of headaches down the line.
If the test fit isn’t quite right, adjust your router settings and try again until you are satisfied.
Step 3: Cutting the Cabinet’s Structural Joints
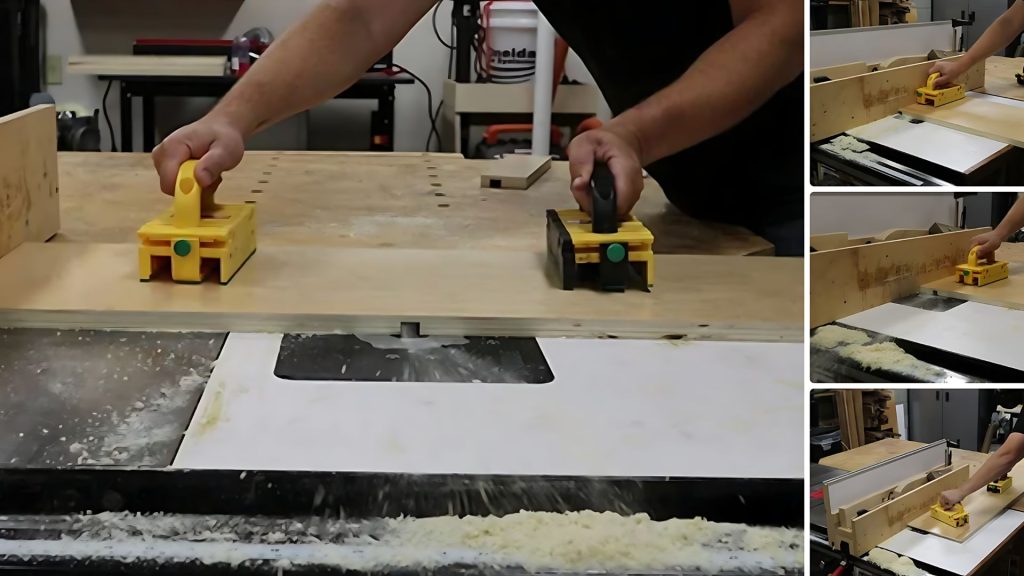
It’s time to create the puzzle pieces that will hold your cabinet together. Start by cutting rabbets at the top of each cabinet side – these will have the top panel. Next, cut dados for the shelf and bottom panel.
Finally, rabbets were created along the back edges of the sides for the back panel. Take your time with each cut, ensuring they have the correct depth and width.
Precision is key because these joints are the backbone of your cabinet’s structure. Double-check your measurements between each cut to ensure everything will fit together smoothly.
Step 4: Initial Cabinet Assembly and Fit Check
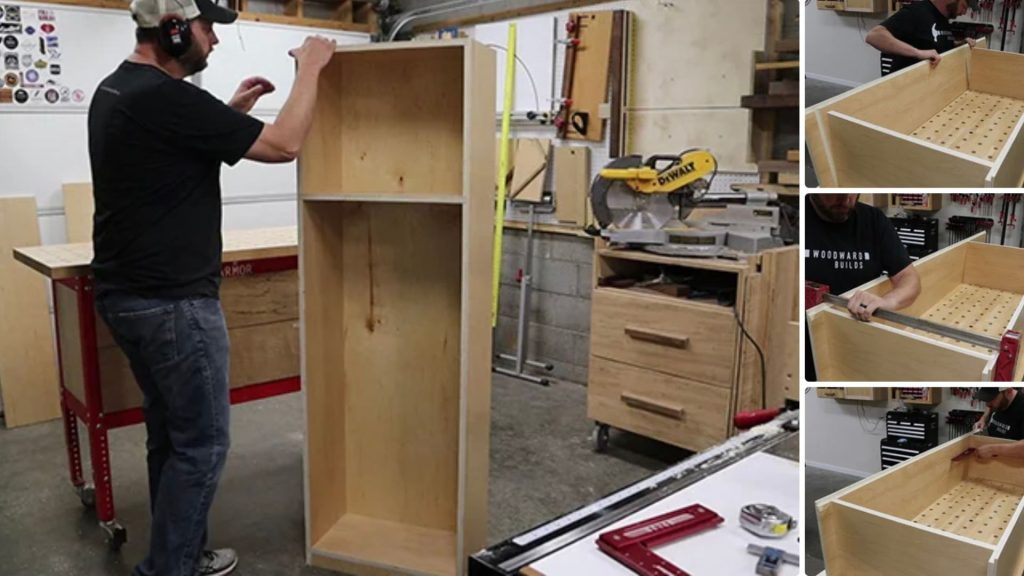
With all your pieces cut, it’s time for a trial run. Dry fit all the parts together without any glue or screws. This step lets you check if everything fits snugly and identifies potential issues before final assembly.
Please pay close attention to how the shelf and bottom sit in their dados and how the top fits into the side rabbets.
If anything seems off, now’s the time to make adjustments. Use clamps to hold everything in place and check for squares.
This dry run gives you a preview of your finished cabinet and builds confidence for the final assembly.
Step 5: Securing the Cabinet’s Core Structure
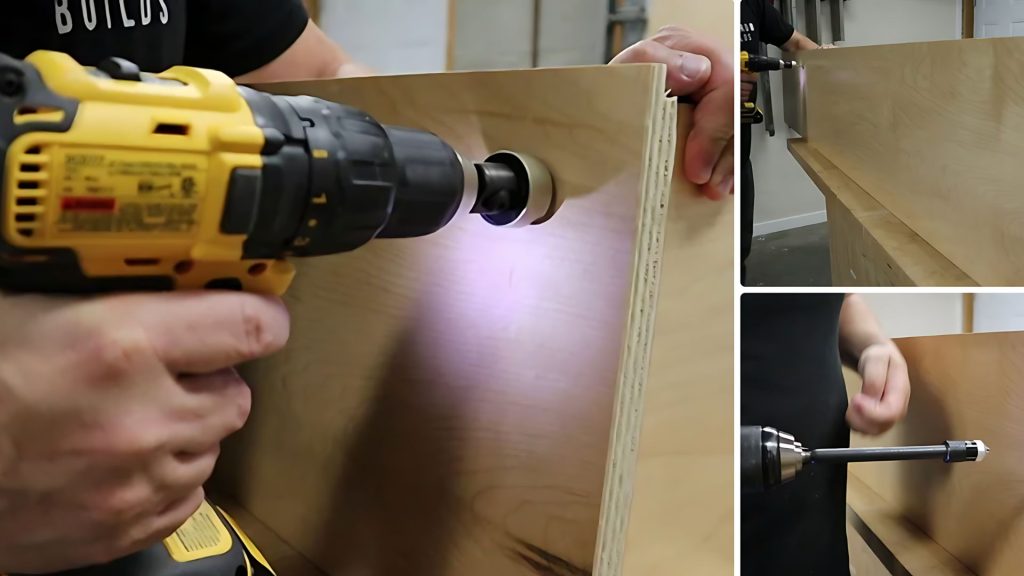
Now that you’ve confirmed everything fits, it’s time to start the assembly. Begin by countersinking holes in the cabinet sides where you’ll attach the bottom and shelf.
This ensures your screws will sit flush and won’t interfere with anything you’ll store in the cabinet. Drive in the screws, connecting the bottom and shelf to the sides.
For a shop cabinet like this, screws alone are sufficient – no need for glue. Take care not to overtighten the screws, which could strip the plywood or cause splitting.
Step 6: Completing the Basic Cabinet Structure
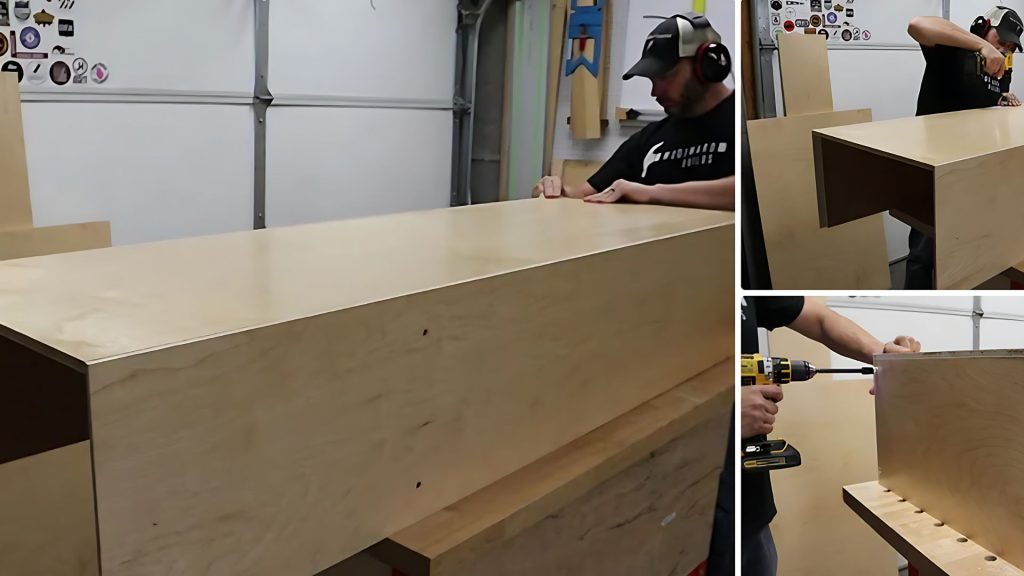
It’s time to add the finishing touches with the core structure assembled. Slide the back panel into the rabbets you cut earlier. Secure it with countersunk screws around the perimeter.
Next, attach the top panel, screwing it into place through the rabbets on the sides. Finally, a filler strip for the bottom front edge of the cabinet must be created and attached.
This gives the cabinet a finished look and covers any exposed plywood edges. Stand back and admire your handiwork – your cabinet is taking shape now!
Step 7: Preparing Lumber for the Face Frame
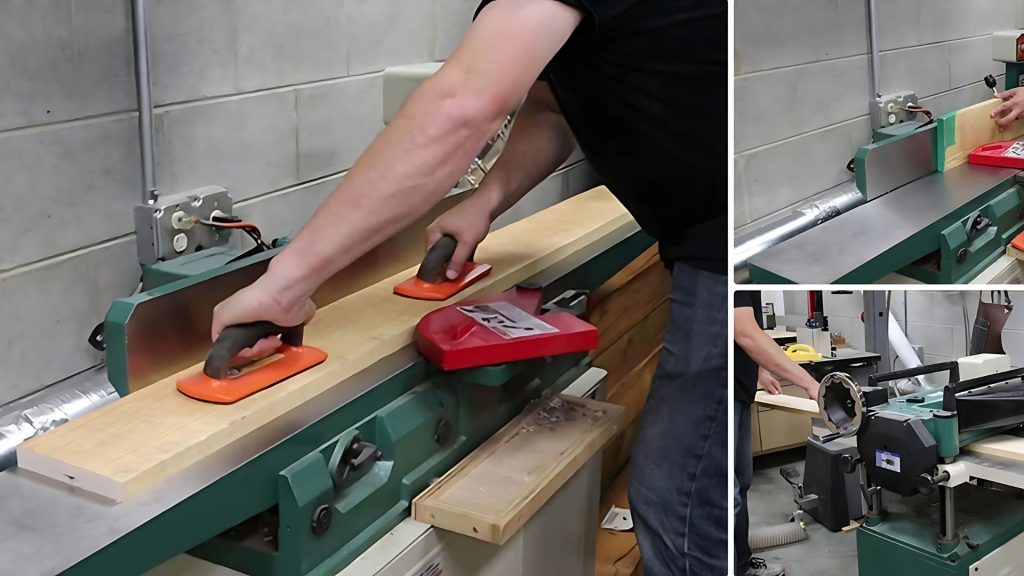
If you’re starting with rough-cut lumber for your face frame, it’s time to mill it down. Begin by flattening one face of your stock at the jointer.
Then, square up one edge against the jointer fence. Move to the planer to make the opposite face parallel and smooth.
Continue planning until you reach a thickness of 3/4″. This process ensures your face frame stock is perfectly flat, square, and consistent in thickness, providing a solid foundation for your frame.
Step 8: Cutting Face Frame Components to Size
With your lumber milled, it’s time to cut your face frame parts. At the table saw, rip all your frame pieces to a width of 1 1/4″. Run these pieces through the planer one last time for an extra-smooth finish.
This step removes any potential burn marks from the table saw and gives you a perfectly smooth surface.
Finally, head to the miter saw and cut all your frame parts to their final lengths. Precision is key here, as these pieces will form the visible front of your cabinet.
Step 9: Laying Out the Face Frame
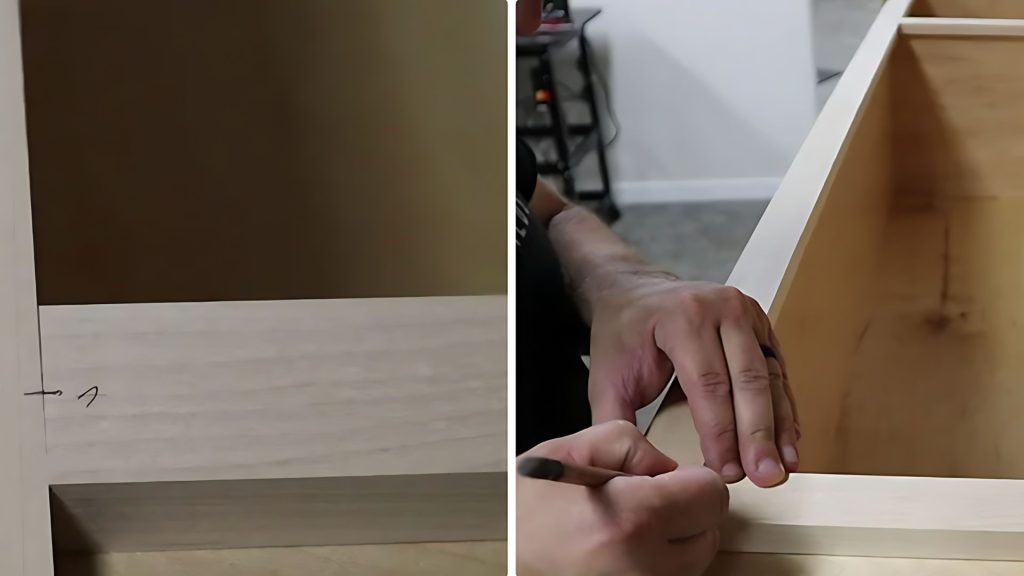
Before assembly, it’s crucial to plan out your face frame. Lay all your cut pieces on the front of your cabinet in their final positions.
Make tick marks across each joint and assign letters to indicate which parts join together and exactly where.
This simple step prevents confusion during assembly and ensures your face frame goes together correctly. It’s like creating a roadmap for your frame assembly – a few minutes here can save a lot of headaches later.
Step 10: Assembling the Face Frame
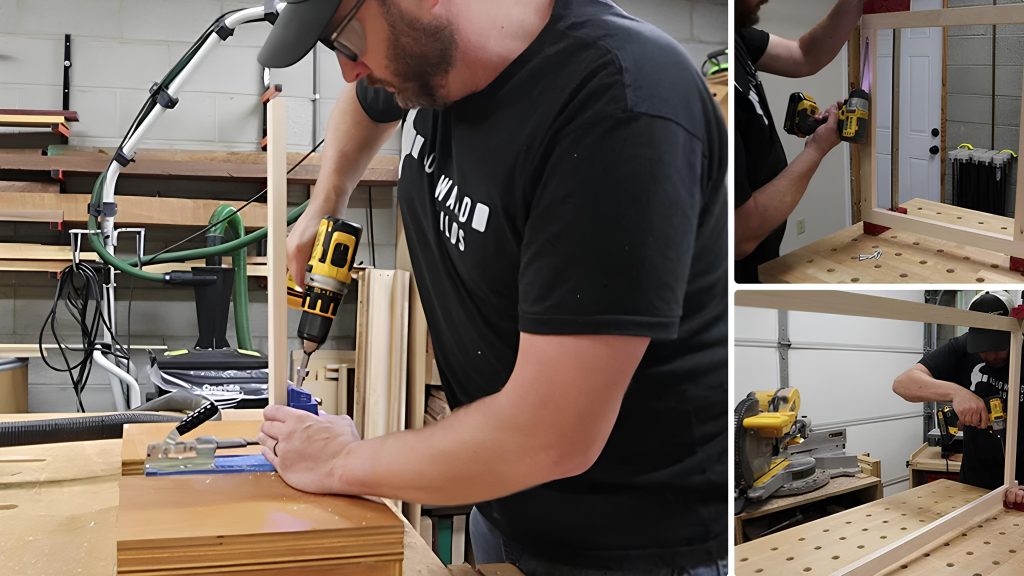
Now, it’s time to join your face frame. Pocket hole joinery is a great method for this. Drill your pocket holes according to your layout marks.
Then, carefully line up all your frame parts and secure them in clamps. This keeps everything perfectly aligned while you drive in the screws.
Take your time here and double-check your layout marks as you go. Once the last screw is in, you’ll have a solid, square-face frame ready to be attached to your cabinet.
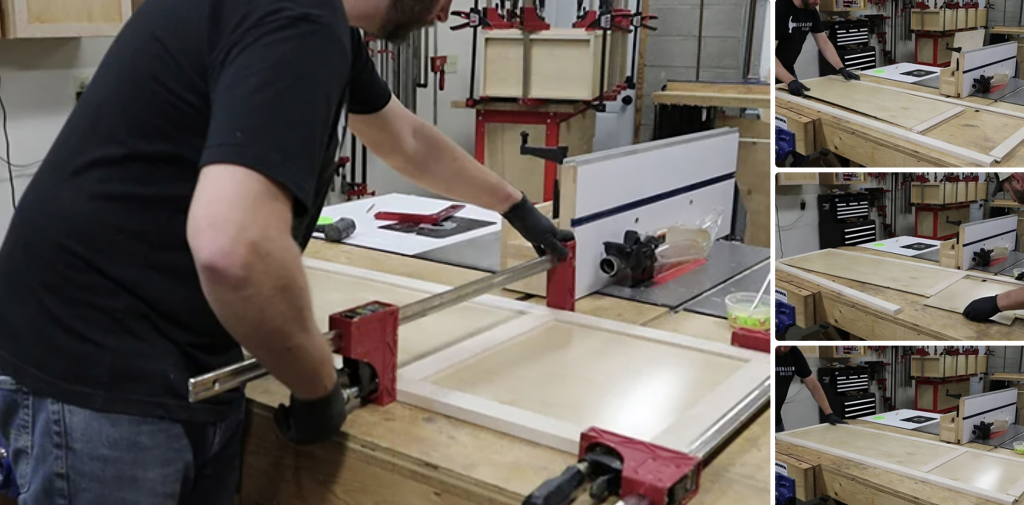
Step 11: Attaching the Face Frame to the Cabinet
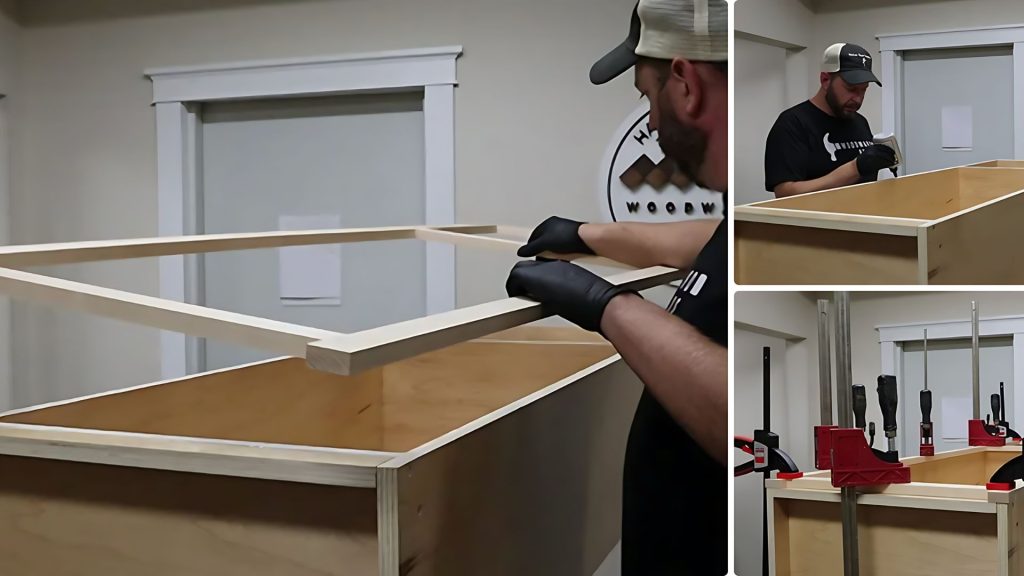
With your face frame assembled, it’s time to unite it with your cabinet. Use a thick, quick-drying glue for this step. Apply the glue to the front edges of your cabinet, then carefully position your face frame.
Make sure it’s perfectly aligned with plenty of clamps before securing it. The quick-drying glue allows you to remove the clamps after about 30 minutes, but let it cure fully before moving on for best results.
This step transforms your basic box into a professional-looking cabinet.
Step 12: Cutting Door Components
Now, we move on to creating the cabinet door. Start by cutting all your door parts to size, including the rails, stiles, and center rail for your two-panel design.
Remember, the grooves in your rails need to be on both sides of the center rail to accommodate both panels. Take extra care with these cuts, as the door is the most visible part of your cabinet.
Any imperfections here will be noticeable in the finished product.
Step 13: Assembling the Cabinet Door
Assembling the door requires patience and precision. Start by dry-fitting all the pieces to ensure everything aligns correctly.
Then, glue is applied to the joints, and the panels are carefully slid into place. The panels should float freely in their grooves to allow for wood movement.
Once everything is in position, apply clamps. Remember, you only need clamps at the joints, and don’t overtighten—you just need enough pressure to close the joints fully.
Check for a square to ensure your door doesn’t twist or warp.
Step 14: Finishing the Door
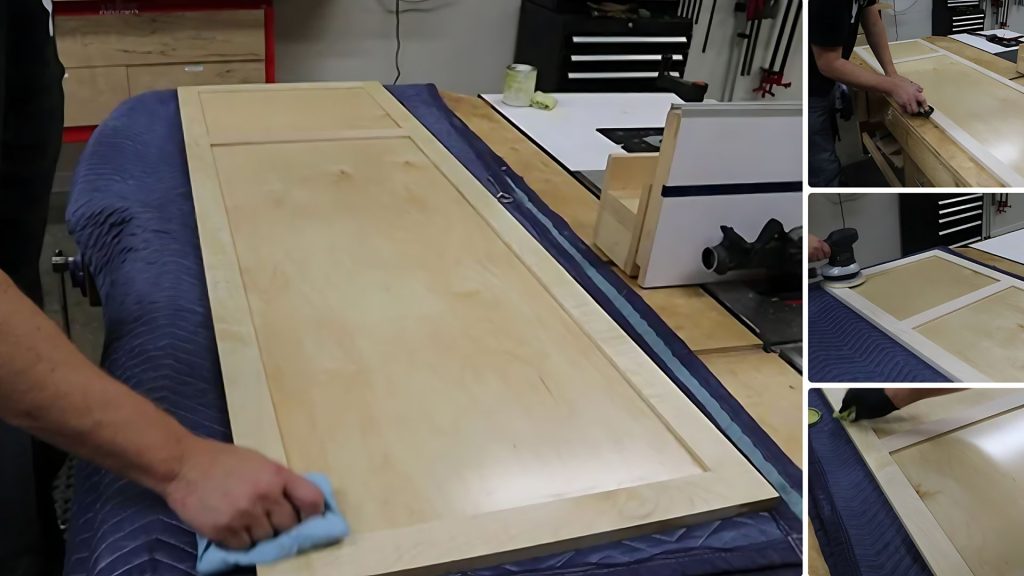
With the door assembled, it’s time for the finishing touches. Use a block plane or sandpaper to slightly break the sharp edges of the door.
This small detail makes a big difference in the feel of the finished product. To achieve a smooth surface, sand the entire door, starting with 120-grit sandpaper and finishing with 180 grit.
Be careful not to sand through the veneer if you’re using plywood panels.
Apply your chosen finish – a simple oil/wax finish works well for a shop cabinet, but consider a more durable option like polyurethane for high-use areas.
Step 15: Installing Door Hinges
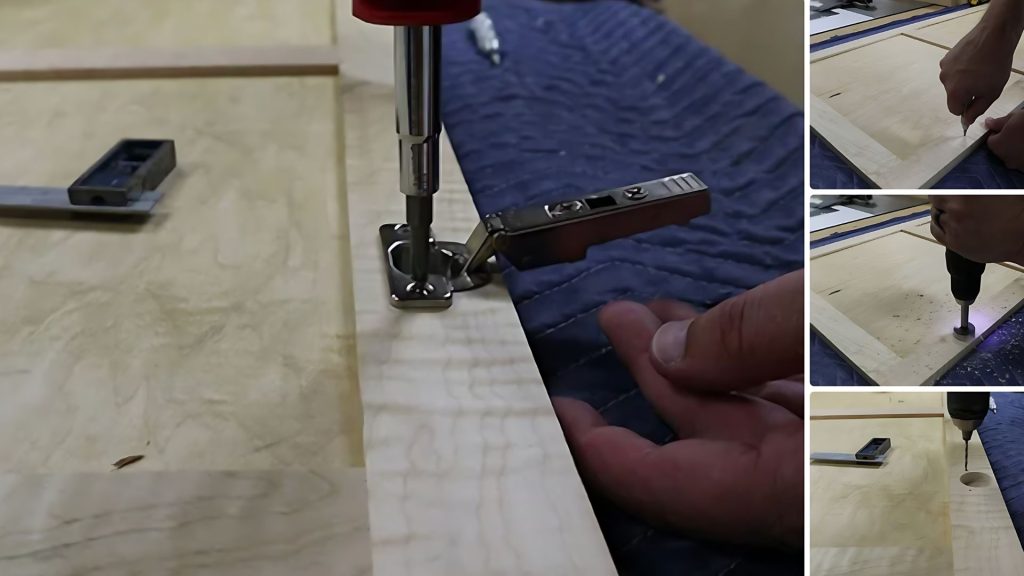
Properly installing the door hinges is crucial for smooth operation. Cup hinges are a great choice for this type of cabinet.
Follow the manufacturer’s instructions for your specific hinges, as the positioning and depth of the cup can vary between brands.
Use a Forstner bit to drill the cup holes and position them correctly.
This step requires precision, but when done right, it results in a perfectly hanging door that’s a joy to use.
Step 16: Adding Final Touches
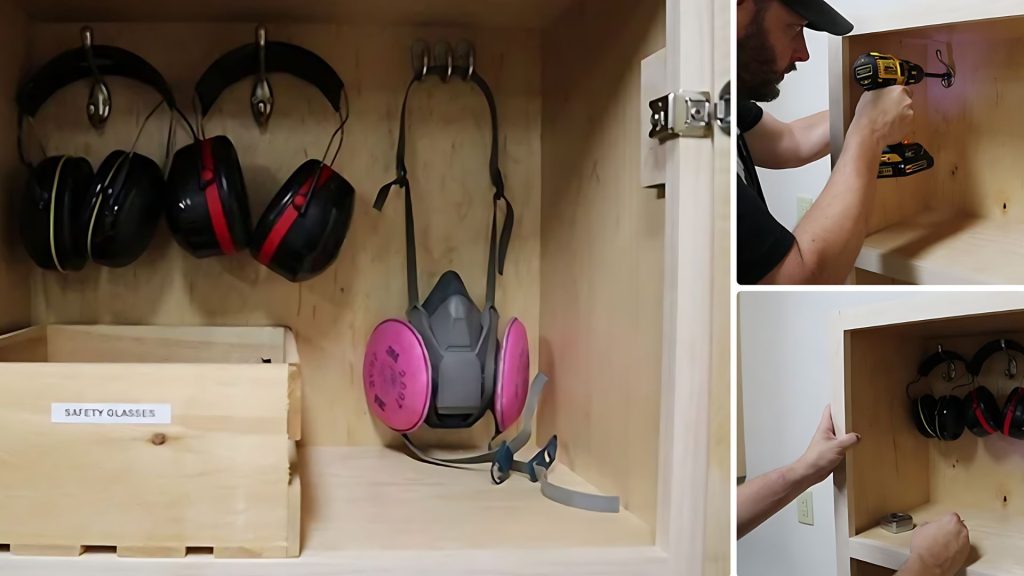
You’re in the home stretch! Start by hanging your beautifully crafted door. Then, consider the interior of your cabinet. Add hooks at the top for items like hearing protection and more at the bottom for shop aprons.
Finally, install magnetic catches at the top and bottom of the door. These will keep the door securely closed and help remove dust from your cabinet.
Step back and admire your work – you’ve created a custom storage solution that’s both functional and attractive!
For a more detailed guide, check out this YouTube tutorial, which explains the process step-by-step.
Final Thoughts
Bravo! You’ve crafted a DIY storage cabinet that’s not just a box with a door—it’s a game-changer for your workshop organization.
This DIY masterpiece is a testament to your skills and the ultimate solution to storage misery. The beauty of this DIY storage cabinet lies in its adaptability.
Feel free to tweak the dimensions or add extra shelves to make it uniquely yours. As you admire your handiwork, imagine all the clutter that’ll soon have a new home.
No more tripping over gear or hunting for elusive tools. Your DIY storage cabinet gives everything a place so everything can be in its place. So go ahead, fill those shelves, and revel in your organized space.
Who knows? This DIY storage cabinet might be the first of many custom solutions in your DIY future. Happy organizing!