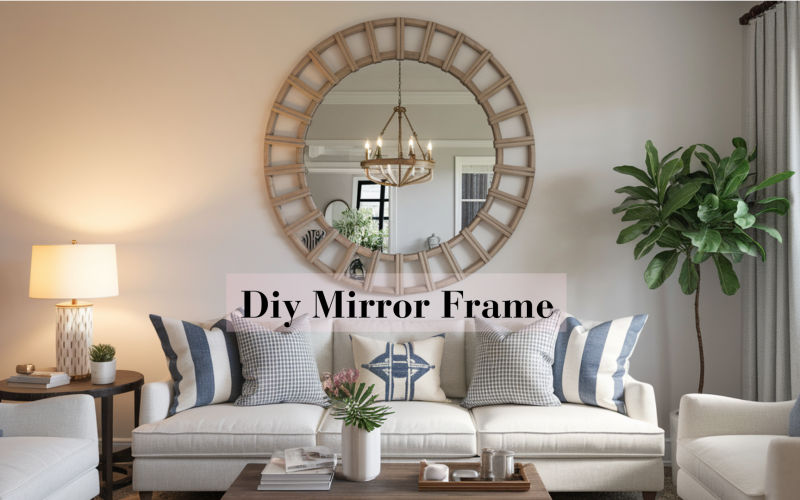
Plain mirrors can look unfinished in any room.
Adding a frame transforms them into eye-catching focal points without breaking the bank.
DIY mirror frames have become incredibly popular among homeowners and renters alike because they offer a simple way to add personal style to any space.
The best part? You don’t need years of woodworking experience or expensive tools to create a beautiful mirror frame.
With basic materials and a few hours, you can completely change the look of your mirrors.
Many people find this project perfect for updating bathroom mirrors, creating statement pieces for living areas, or giving new life to thrift store finds.
Materials and Tools You’ll Need
Getting the right supplies is the first step in creating your mirror frame.
Most items can be found at reasonable prices at local hardware stores or online.
1. Wood
Wood remains a top choice for mirror frames due to its strength and ease of use.
While pine is cost-friendly and simple to cut, white oak, with its natural grain patterns, offers a more high-end look.
Wood frames work well in nearly any room and can be painted or stained to match your style.
2. Foam and Plastic
For renters or quick makeovers, foam, and plastic frame options provide a lighter, often stick-on solution.
These materials don’t require heavy tools to cut and can be attached without damaging walls or mirrors. Plus, they’re easy to remove when you move.
3. Tools
Basic tools for this project include:
- Miter box with saw
- Measuring tape
- Pencil
- Corner L brackets
- Adhesive (mirror-specific glue works best)
- Command strips for renter-friendly options
4. Framing Kits
If measuring and cutting seem too much work, many companies offer framing kits with pre-cut pieces in various styles.
These kits include everything needed to frame your mirror; the price varies depending on the mirror size.
Step-by-Step Guide to Framing Your Mirror
This section breaks down the mirror framing process into manageable steps that anyone can follow, even without prior DIY experience.
Preparation
Start by carefully measuring your mirror’s height and width. Add about 1-2 inches to both measurements to account for the frame overlapping the mirror edges.
Mark these measurements clearly on paper. For bathroom mirrors already mounted to the wall, measure while it’s in place.
Cutting the Frame
- Mark your measurements on your chosen frame material
- Use a miter box and saw to cut the pieces at 45-degree angles at the corners
- Cut two pieces to match your mirror’s width and two pieces to match its height
- Test fit the pieces around your mirror before proceeding
For the cleanest cuts, go slowly and check your angles twice before cutting.
Assembling the Frame
- Lay your cut pieces flat, with the front side down
- Apply wood glue to the mitered edges
- Connect the corners to form a rectangle
- Secure each corner with flat L brackets on the back side
- Let the frame dry completely (usually 24 hours)
Attaching the Frame to the Mirror
For wall-mounted mirrors:
- Apply mirror-specific adhesive to the back of the frame
- Press the frame carefully onto the mirror’s edges
- Hold in place with painter’s tape until dry
For renter-friendly options:
- Use command strips on the back of the frame
- Place the frame over the mirror without permanent adhesive
- Small L brackets can help support the frame’s weight
Check that your frame sits level before leaving it to set fully.
Tips for a Professional Finish
Small details make the difference between a DIY project that looks homemade and one that appears store-bought.
Sanding and Painting
Sand your assembled frame with medium-grit sandpaper, then finish with fine-grit for smoothness.
Wipe away the dust before applying a thin primer coat. Add 2-3 light coats of paint, allowing drying time between each.
For best results, sand lightly between coats and let the paint cure fully before handling.
Decorative Additions
When enhancing your mirror frame, consider adding thin decorative molding for extra depth, or try antiquing with dark wax over paint for character.
Wooden appliques at corners, small shells for beach themes, or metal corners can create a vintage aesthetic.
These small touches transform ordinary frames into statement pieces.
Common Mistakes to Avoid
Precision matters when framing mirrors. Avoid rushing measurements and always test fit before final assembly.
Use mirror-specific adhesive rather than regular glue and allow sufficient drying time.
Be careful not to apply excessive weight to foam frames, check that your frame is level, and remember to account for existing mirror clips.
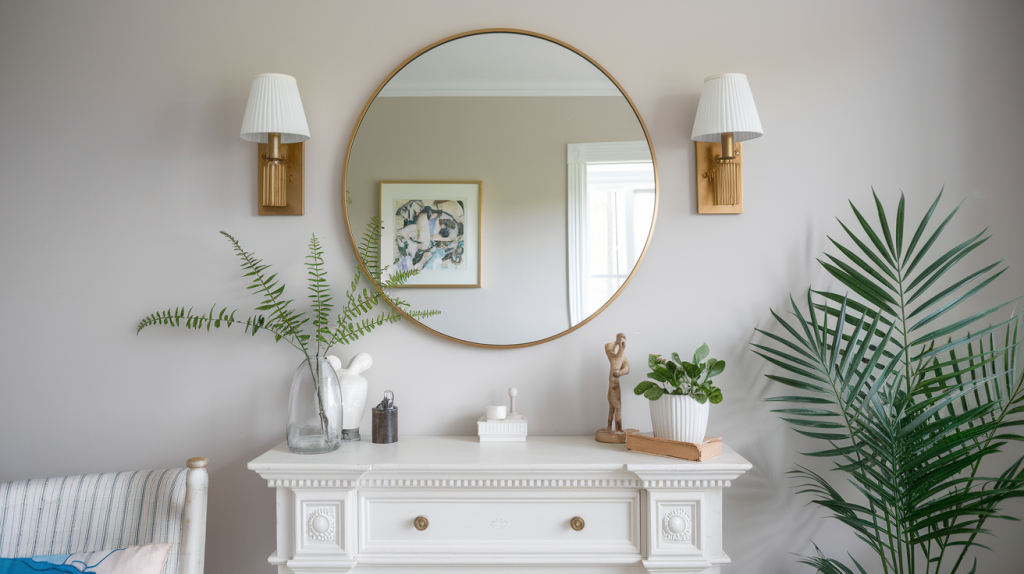
Frame Design Ideas
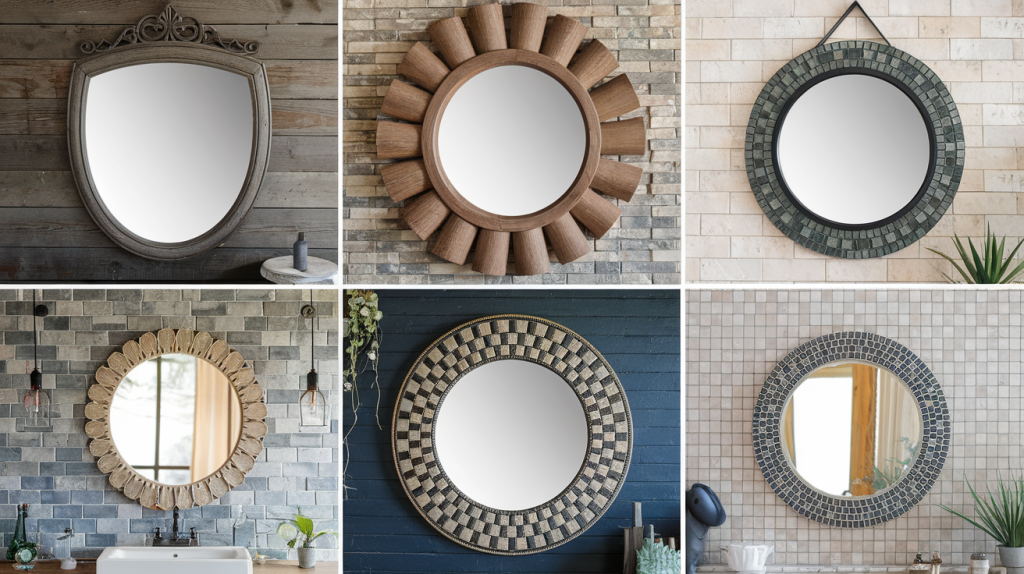
Your mirror frame style can complement your home’s existing decor or make a bold statement.
Rustic and Vintage Styles
Create a farmhouse-looking frame using wood with visible grain patterns—stain rather than paint to highlight the natural texture.
For a vintage effect, use reclaimed wood from pallets or barns and try whitewashing techniques.
Small imperfections like nail holes or distressed edges add character, while a matte sealer preserves the look.
Modern and Minimalist Styles
Modern frames focus on clean lines and simplicity. Choose thin frames without extra details in solid colors like white, black, or gray.
Metal trim adds an industrial touch that works in contemporary spaces.
Keep corners precise and consider high-gloss paint for a sleek finish that complements minimalist decor.
Unique Designs
Add personality with unexpected elements. For texture, apply mosaic tiles, paint geometric patterns, or wrap the frame in textured wallpaper.
For coastal themes, try wrapping thin rope around the edges.
Mixing materials like wood with metal creates visual interest, while stamps or stencils can add patterns that match your existing decor colors.
Conclusion
Making your mirror frame is a simple project that brings big rewards.
Not only will you save money compared to buying custom frames, but you’ll also end up with something that perfectly fits your space.
Even if you’ve never tackled a DIY project before, framing a mirror is a great starting point.
The materials are cheap, the tools are basic, and the results can truly change the feel of a room. So grab your measuring tape and pick up some frame materials this weekend.
In just a few hours, you can transform that plain mirror into a custom piece that looks like it costs much more than it did.
Frequently Asked Questions
How to Handle Imperfections
If your corners don’t match perfectly, use wood filler to smooth gaps, then sand when dry. For adhesive issues, clean both surfaces thoroughly and consider using clamps while the glue sets.
Adjusting for Different Mirror Sizes
For larger mirrors, use thicker frame materials to maintain proportion. With odd shapes, create a template from cardboard first. Consider adding support brackets for heavy frames on big mirrors.
How to Frame Mirrors Without Damaging Walls
Use command strips rated for your frame’s weight. Lighter materials like foam or thin wood reduce strain. For bathroom mirrors, stick-on frames that attach directly to the mirror avoid wall contact entirely.
What is the best adhesive for a wood frame to mirror?
Mirror-specific construction adhesives, such as Loctite or Liquid Nails Mirror adhesive, provide strong bonds without damaging the mirror’s reflective backing.