
In the intricately detailed world of carpentry and woodworking, the dividing line between an amateurish outcome and a professional-grade finish often hinges on one critical factor: precision. Every slice and polish counts big time – miss by a hair’s breadth, and you could mess up both how good something looks and works.
Achieving seamless finishes that blend flawlessly with the overall design necessitates a deep understanding of both the craft and the materials at hand. Imagine mastering those precise cuts and flawless edges in your projects. Stick around for insider tricks that promise peak performance each step of the way.
Understanding Your Material
The foundation of any successful cut and edge project lies in the choice of material. Different wood types or board materials boast unique properties, impacting not just the appearance, but also the cutting and edging quality. Hardwoods like oak or maple provide durability but demand sharp tools and careful handling to avoid splintering.
On the other hand, softer woods like pine are easier to cut and edge but are more prone to dents and scratches. Engineered woods such as MDF or plywood offer consistency and are less susceptible to warping, making them ideal for precise cuts and edges.
Think about what you’re aiming for with your work, then choose materials that bring those ideas to life—this approach ensures durability and high standards.
Selection of the Proper Tools
The adage “You’re only as good as your tools” rings particularly true in the domain of woodworking. Precision cutting and edging demand the right tools – those designed to handle the specific characteristics of the material you’re working with.
Circular saws and table saws are quintessential for straight, long cuts, while jigsaws and routers cater to intricate shapes and patterns. When it comes to edging, a high-quality edge bander can make a world of difference, applying bands with precision that hand tools simply cannot achieve.
Additionally, considering the type of blades, such as carbide-tipped ones for longevity and precision, is crucial. Investing in quality tools tailored to your material and project complexity not only enhances accuracy but also ensures a professional finish.
Preparing Your Workspace
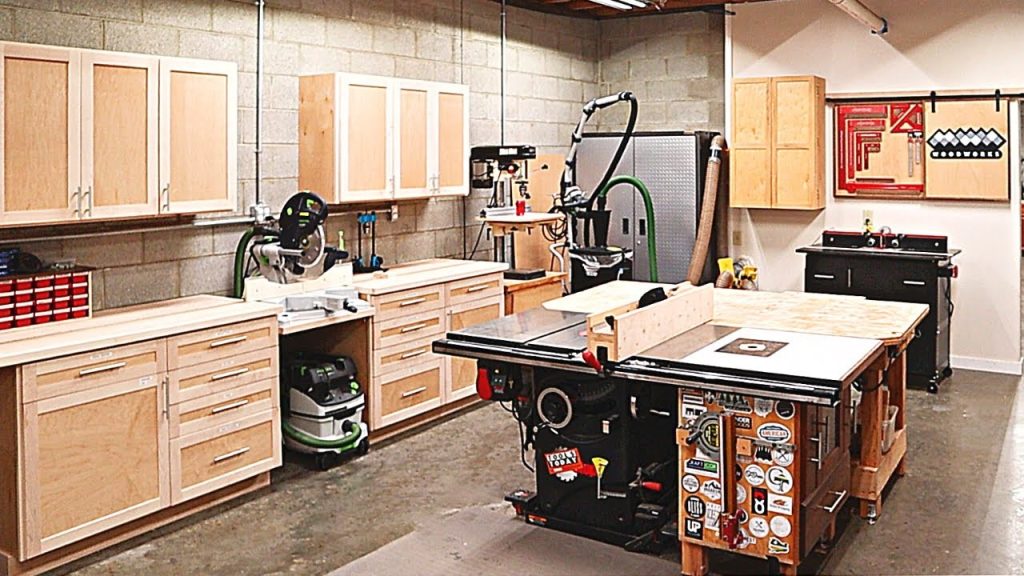
A well-organized and safe workspace is pivotal for precision work. The layout of your space should promote efficiency, with tools within easy reach and ample space to maneuver large pieces of material. Adequate lighting and a clean, clutter-free environment minimize the risks of errors and accidents.
Let’s face it, having the right tools at hand—like accurate measures and a solid bench—is what sets apart an okay job from amazing craftsmanship. Think of your workspace as a garden; tend it carefully, and watch inspiration and skill flourish within.
Measuring and Marking Accurately
Precision in woodworking starts long before the saw meets the wood. Accurate measuring and marking are fundamental to ensure that cuts and edges align precisely with the intended design specifications. Every skilled hand knows this secret – owning quality measurement gadgets like tapes or rules isn’t enough; it’s learning their language that counts.
A little bit of prep work—like using pencils or chalk to mark out your cuts—can save you from costly slip-ups down the line. It’s advisable to measure twice and cut once, ensuring accuracy and saving both time and material.
Securing Your Material
Movement during cutting or edging can result in inaccuracies that compromise the integrity of the project. Securing your material firmly in place with clamps or a vice is crucial to prevent shifting.
Stability here does double duty – it brings pinpoint precision to every cut and edge while putting a lid on risky material movements that could throw us off track.
Selecting the appropriate clamping method based on the material size and the type of cut or edge being made can make a significant difference in the outcome of your project.
Mastering Cutting Techniques
To transform raw material into a crafted piece, mastering various cutting techniques is essential. Choosing the right saw and blade is the first step, but understanding how to manipulate these tools is where skill really comes into play. For instance, using a push stick when operating a table saw can improve both your control over the material and your safety.
Playing around with how high your blade is and how fast it goes can turn rough edges into something sleek, avoiding those annoying splinters. Techniques like scoring the cut line before making a full pass can minimize tear-out, particularly when working with laminated materials.
Always take into account the grain direction and adjust your cutting technique accordingly, as cutting parallel or perpendicular to the grain can affect the ease of the cut and final appearance.
Achieving Smooth Edges
A smooth, well-finished edge on a piece of wood not only enhances its beauty but also its durability by sealing against moisture and other environmental factors. When tackling rough edges, nothing beats starting with gentle strokes of fine-grit sandpaper followed by the precision work of an edge trimmer or a router. Different materials and the type of edge required may dictate the appropriate tool and approach.
For instance, using a router with a rounding-over bit can create smooth, rounded edges that are both visually pleasing and less prone to splintering. Sanding, both with power sanders and by hand, remains critical to remove any burrs or rough patches, ensuring that the final product is smooth to the touch and visually appealing.
Think of Edge Banding as Giving Your Furniture a Neat, Polished Finish
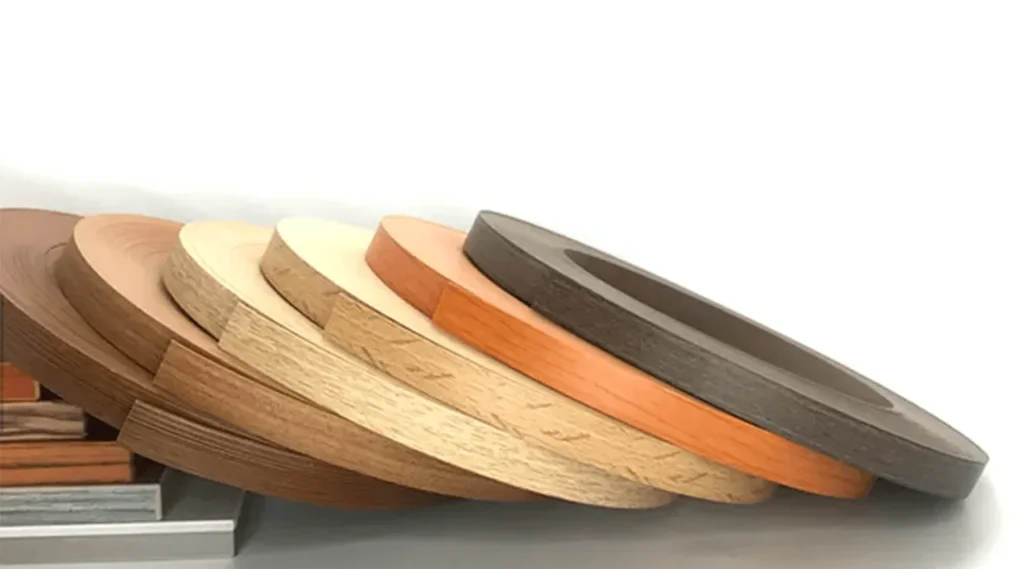
If you’re tackling cabinet or furniture projects, edge banding can transform raw edges into polished perfection with ease. Choosing the right edge banding material—be it wood, PVC, or acrylic—and matching it with the color and texture of the main material is key to a seamless finish.
The correct application of edge banding involves precise temperature and pressure settings in an edge banding machine, ensuring that the adhesive bonds effectively without overheating or underheating, which can lead to poor adhesion and longevity issues.
For those without access to professional equipment, iron-on edge banding is a viable alternative, though it requires careful application to avoid wrinkling or detachment over time.
Utilizing Cut and Edge Services
For complex projects or when precision beyond typical DIY tools is required, leveraging professional cut and edge services by the CNC Workshop can be a game changer. Using the latest gear, they make sure every cut is spot-on and every edge shines—something that’s not always easy at home.
Particularly for high-volume projects or those requiring intricate detailing, investing in such services can help maintain consistency and quality throughout the project, saving time and reducing material waste.
Tap into professional insights for choosing building materials and decorative finishes that echo your project’s ambitions perfectly.
Final Checks and Adjustments
Once the main cutting and edging tasks are completed, conducting thorough final checks and adjustments is critical to ensure the assembly aligns perfectly and meets all specifications. This might include dry-fitting parts before final assembly, checking for flush edges, and ensuring all components are square and level.
Believe it or not, just giving something another once-over with some sandpaper or cutting off a tiny piece can take your project from good to great. Now comes the crucial part – giving those final touches that make all our hard work shine with a sleek and expert finish.
Conclusion
To sum things up in the high-stakes world of prime real estate – savvy professionals keep their eyes on market shifts and always put customers first to stay ahead.
The secret behind flawlessly edged pieces lies within picking up quality gear; learning slick moves through practice makes progress; but above all else? It demands lingering over tiny details with unwavering attention. Grab onto this wisdom from those in the know, and see how quickly your efforts morph from basic craftsmanship to stunning works that surprise even yourself. From start to finish, every cut and polish on raw wood matters, shaping its journey into a finished marvel. To hit those high marks on each project? It’s simple but not easy—commit to lifelong learning, pick quality over quantity when choosing resources, and practice until perfection seems second nature.