


A beautifully designed media wall can truly transform the look and feel of your living room. Unfortunately, many struggle to create a visually appealing media wall that meets their practical needs.
In this ultimate guide, I’ll show you a simple, step-by-step process for building a custom media wall that looks amazing and provides ample storage and functionality.
By the end of this post, you will have the knowledge and confidence needed to build your stunning media wall at home.
Planning Your Media Wall
1. Initial Considerations
Before diving into the building process, let’s assess the key factors shaping your media wall design. First, look at the wall space you must work with and note any structural elements or limitations.
Next, start deciding on the design elements you want to incorporate. How big of a TV do you want to mount? Do you need additional shelving for decor or storage? How about hidden cabinets or a pocket door?
Making these foundational decisions upfront will make the rest of the process much smoother.
2. Designing the Media Wall
Now that you’ve evaluated the space and your design needs, it’s time to put pen to paper (or pixels to screen!). Start by sketching some initial ideas – you can do this on paper or use simple design software.
The key is to map out where each component will go, ensuring the TV placement, shelves, cabinets, and other features harmonize harmoniously.
Remember, the goal is to create a media wall that looks great and functions perfectly for your needs. Take the time to plan it out carefully before moving on to the build.
Materials and Tools Needed for Building the Media Wall
1. Essential Supplies
- Pocket door
- Track for door
- Insulation
- Particleboard
- MDF
- 2×8 lumber
- Screws
- Paint
2. Tools Required
- Track saw
- Painting rig
- Carpentry tools (saws, drills, measuring instruments)
- Insulation materials
Step-by-Step Guide to Building Your Media Wall
1. Demolition and Preparation
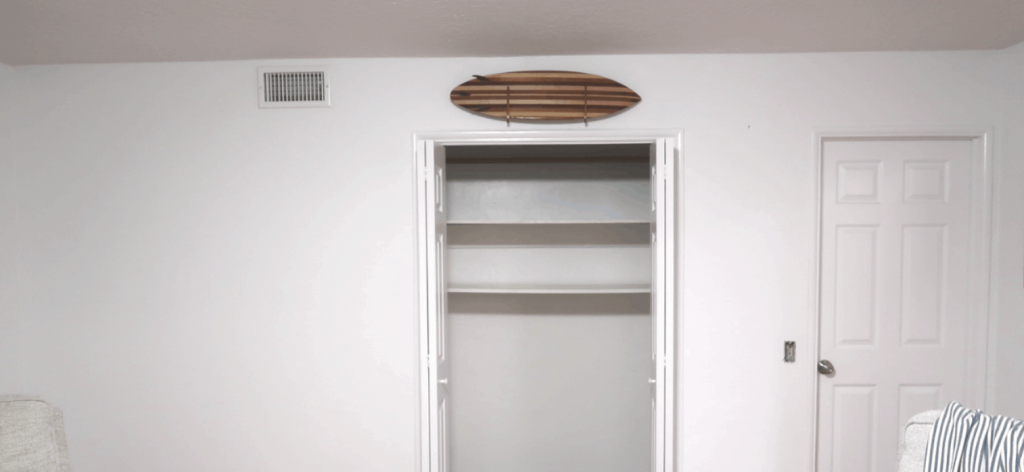
- Remove Existing Structures: The first step in building your media wall is to tackle any demolition work that needs to be done. This might involve removing an existing closet, wall, or other structures that are in the way of your new design.
- Protect the Surrounding Area: Once the area is cleared, protect the surrounding space by covering it with plastic sheets. This will help contain the dust and debris stirred up during construction.
2. Framing and Insulation
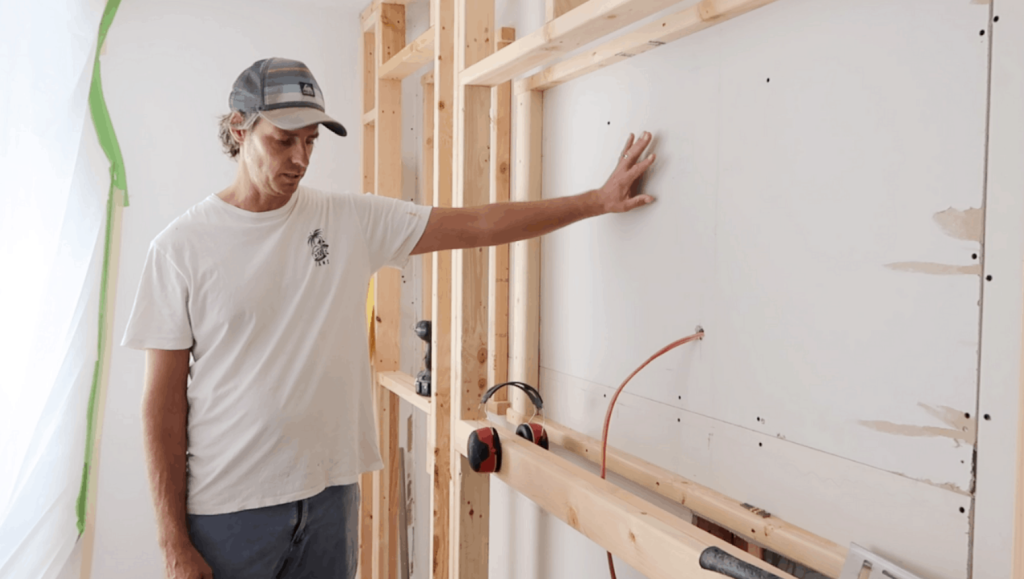
- Frame the New Wall: After clearing out the existing structures and protecting the work area, the next step is to focus on the framing and insulation. Start by building a sturdy wall frame, ensuring everything is level and secure.
- Insulate the Wall to Prevent Noise Transfer: This is also the perfect time to add insulation. Doing this upfront will help avoid any unwanted noise from traveling to the room on the other side of the media wall. Take the time to insulate the entire wall for maximum soundproofing properly.
3. Installing the Pocket Door
- Install the Pocket Door Frame and Track: With the wall frame in place and properly insulated, it’s time to install the pocket door. This is an important step, as you want to ensure that the door frame and track are properly aligned for smooth operation.
- Ensure Alignment and Smooth Operation: Take your time carefully following the manufacturer’s instructions during this process. Test the door several times to ensure it slides open and closes effortlessly. Getting the pocket door right at this stage will save you a lot of headaches down the line.
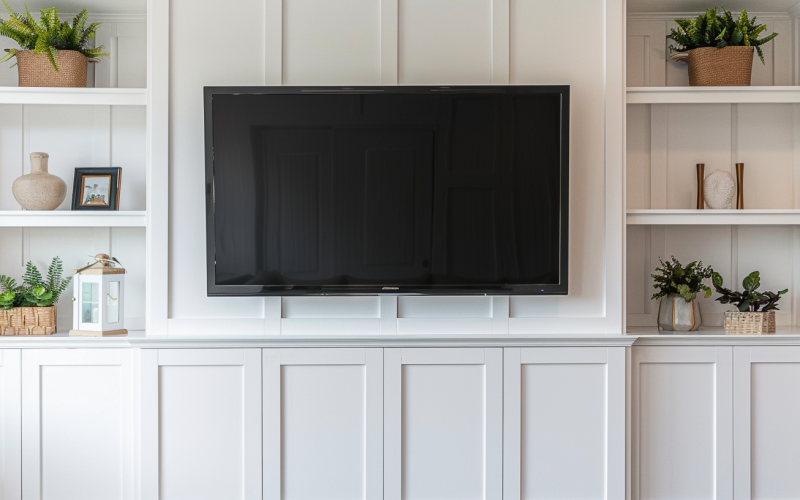
4. Building the Media Wall Structure
- Attach Particleboard to The Framing: With the framing and pocket door in place, it’s time to assemble the media wall structure. Begin by attaching particleboard to the wall framing – this will give you a solid foundation to build upon.
- Install MDF Panels for a Smooth Finish: Cover the particleboard with MDF panels. The MDF will provide a soft, seamless finish for your media wall. Be sure to pay extra attention to the area where the TV will be mounted, reinforcing it with additional 2×8 lumber. This will ensure your TV has a sturdy, secure place to be installed.
5. Adding Decorative Elements
- Install Battens for Texture and Design: Add some decorative elements to make your media wall stand out. One great way to do this is by installing battens across the wall. The battens will create subtle lines and shadows, giving the wall an extra visual depth and character layer.
- Ensure All Joins Are Covered, and The Wall is Symmetrical: Plan the placement carefully, ensuring all the joins are covered, and the overall design remains symmetrical and balanced. Take your time during this step, making any necessary adjustments to ensure the final look is exactly what you envisioned.
6. Painting the Media Wall
- Use a Painting Rig or Hire a Professional for a Flawless Finish: Use a painting rig or hire a professional painter for the best possible results. This will ensure a seamless, high-quality finish that elevates the entire look of your media wall.
- Choose a Color that Complements the Room’s Decor: When it comes to the paint color, choose something that will complement the existing decor. You want the media wall to blend harmoniously while still making a statement. Take some time to consider different color options and test them out before making your final decision.
Integrating Technology and Lighting
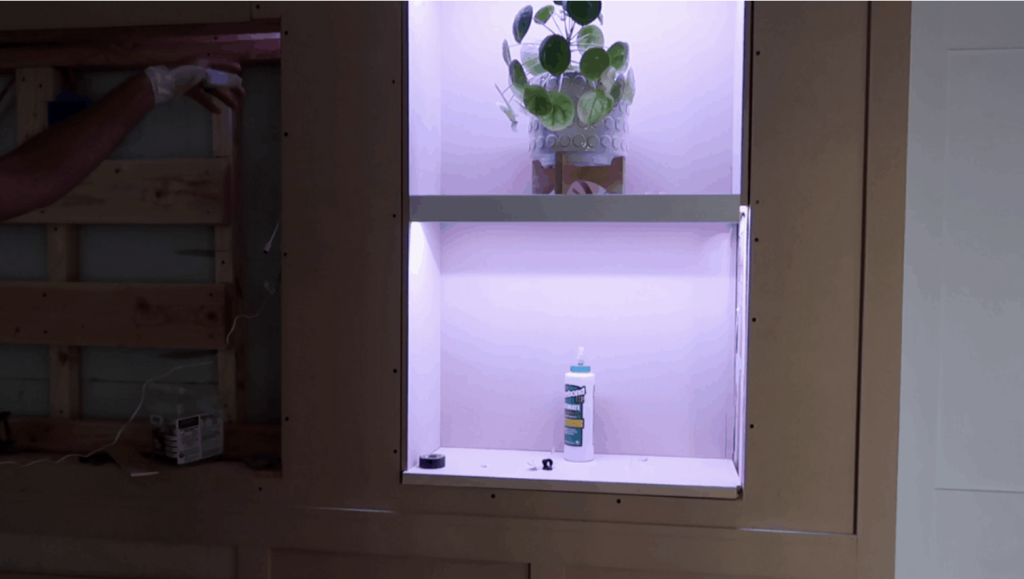
1. Installing LED Shelf Lighting
- Place LED Strips Under Each Shelf: Add subtle, integrated lighting to take your media wall to the next level. Installing LED strip lights under the shelves is a great way to achieve this.
- Conceal the Wiring Behind the Wall: Be sure to conceal the wiring behind the wall so everything looks clean and seamless. And don’t forget to set up the lighting so it can be controlled remotely – that way, you can easily adjust the brightness as needed.
2. Hiding Cables and Wires
- Use Conduits and Other Cable Management Solutions: No media wall is complete without properly hiding cables and wires. Use conduits and other cable management tools to keep everything neat and organized for a professional look.
- Route All Wires Behind the Wall: Route all the wiring for your TV, lighting, and other components behind the wall. This will create a clean, seamless appearance that doesn’t distract from the beautiful media wall you’ve built. Take the time to plan out the cable routing carefully, ensuring everything is tucked away securely.
Tips and Advice
1. Avoiding Common Mistakes
- Measure twice and cut once to prevent costly errors: When it comes to the construction process, always remember the adage, “Measure twice, cut once.” Taking the extra time to double-check your measurements can save you a lot of headaches down the line.
- Don’t rush through the painting process: When it comes to painting, don’t rush through it – a slow, careful approach will yield the best results.
2. Maintenance
- Regularly Dust and Clean: To keep everything looking its best, regularly dust and clean the shelves, TV, and other components.
- Check for Structural Issues: Periodically inspect the structure for loose elements or other issues that must be addressed.
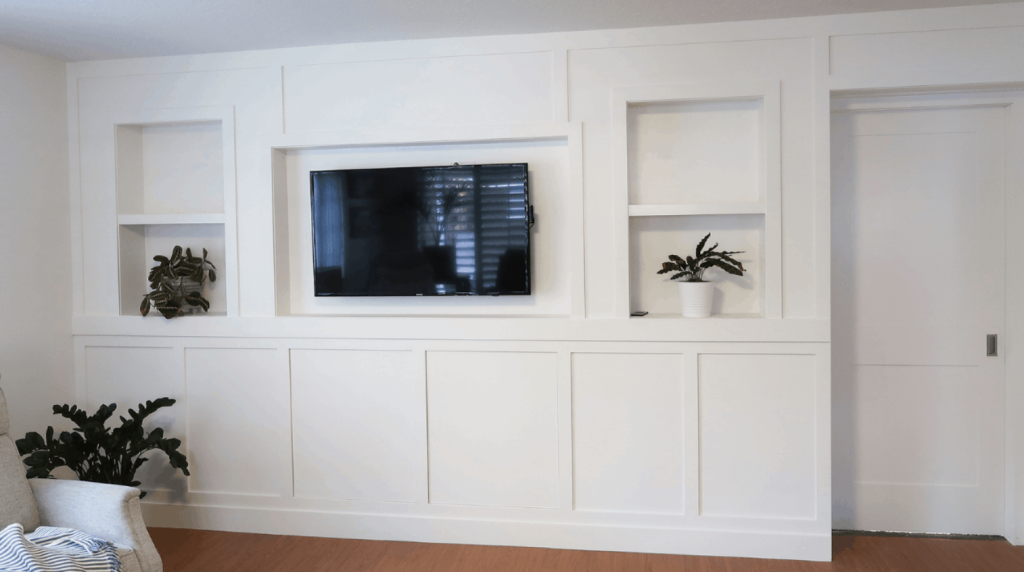
Conclusion
After carefully following the steps in this ultimate guide, you now have a stunning, personalized media wall that elevates the look and functionality of your living space.
From the thoughtful planning and design stages to the final decorative touches, you’ve worked to create a truly impressive focal point for your home.
Remember, maintaining your media wall is just as important as building it. Regularly dusting and cleaning the shelves and TV area will keep everything looking its best.
And don’t forget to check for any structural issues that need addressing periodically.
With your new media wall, you can sit back, relax, and enjoy your hard work. It’s the perfect blend of form and function, tailored to your needs and style.
Frequently Asked Questions
How Much Does It Cost to Build a Media Wall?
The cost to build a media wall can vary widely, ranging from a few hundred dollars for a basic setup to several thousand for a more elaborate design with high-end materials.
How Deep Does a Media Wall Need to Be?
Media walls must typically be 6-8 inches deep to accommodate the TV, audio equipment, and other components. Still, the exact depth can vary based on the specific setup.
What Material is Used for Media Walls?
Wood, drywall, stone, or a combination of these are common materials used for media walls, depending on the desired aesthetic and structural requirements.