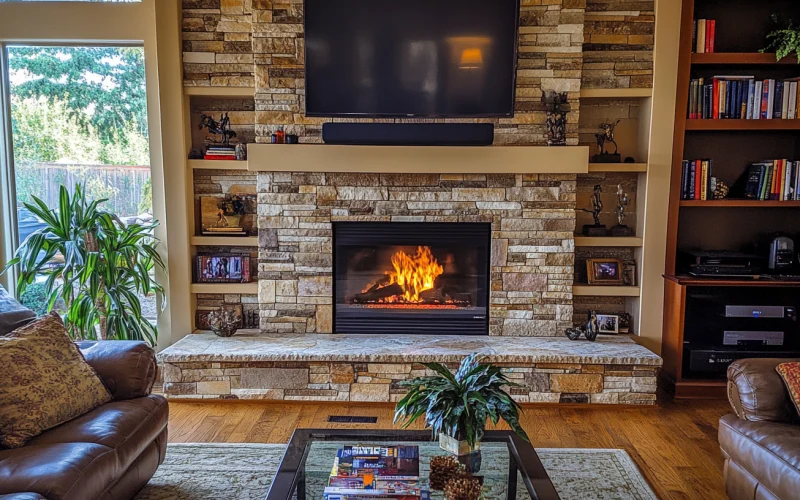
As winter’s chill sets in, there’s nothing quite like the warmth and coziness of a gas fireplace.
But what if you’re new to using one or haven’t fired it up in a while?
Don’t worry—I’ve got you covered! In this post, I’ll show you how to light a gas fireplace safely and easily in just seven steps.
Gas fireplaces are a great way to add heat and ambiance to your home without the mess of traditional wood-burning fireplaces.
However, it’s important to handle them properly to ensure safety.
Whether your fireplace has a control panel, uses a key, or has electronic ignition, I’ll explain the process in simple terms.
By the end of this guide, you’ll feel confident lighting your gas fireplace and enjoying its warm glow all winter.
Steps to Light Up a Gas Fireplace
Lighting up your gas fireplace doesn’t have to be a daunting task.
Follow these simple steps to safely and easily bring warmth and coziness to your home.
Remember, if you’re ever unsure, it’s always best to consult a professional.
Step 1: Check Your Fireplace Type
Before we dive into lighting your gas fireplace, we must know exactly what type you’re working with.
This knowledge will guide you through the right steps and help you avoid mishaps.
There are three main types of gas fireplaces you might encounter in your home:
- Control panel models: These have a built-in panel with knobs and buttons to manage the fireplace.
- Key-operated systems: These use a special metal key to control gas flow.
- Electronic ignition fireplaces have a simple switch or remote control for operation.
Each type has its own unique lighting process, so correctly identifying yours is the first step to success.
If you’re unsure, don’t worry!
You can usually find this information in your fireplace’s user manual.
If you can’t locate the manual, closely examine the controls around your fireplace.
The type of controls present will give you a good clue about which system you have.
Remember, if you’re still unsure after checking, it’s always better to ask for help than to guess.
You could contact the previous homeowner, landlord, or even a local fireplace professional for assistance.
Getting this first step right sets the foundation for safely enjoying your cozy gas fireplace all winter.
Step 2: Review Safety Precautions
Now that we know what type of fireplace we’re dealing with let’s talk about staying safe.
I can’t stress enough how important this step is.
Gas fireplaces are wonderful, but they involve flammable materials, so we must be careful.
- First and foremost, always read your fireplace’s manual from cover to cover.
- It might seem boring, but trust me, it’s packed with crucial information specific to your model.
- Next, make sure the room is well-ventilated before you start.
- Open a window or two to let fresh air circulate.
- Here’s a big one: if you smell gas at any point, stop immediately.
- Don’t try to light the fireplace or flip any switches.
- Just get everyone out of the house and call for professional help. It’s always better to be safe than sorry.
- Keep anything that could catch fire at least three feet away from the fireplace.
- This includes furniture, curtains, and even decorations.
- And while we hope we never need it, keep a fire extinguisher nearby, just in case.
- Lastly, consider installing a safety screen if you have little ones or pets.
This can prevent accidental burns from touching the hot glass front.
Remember, these precautions aren’t meant to scare you but to ensure you can enjoy your fireplace worry-free all season.
Step 3: Prepare the Fireplace
Now that we’ve covered safety let’s prepare your fireplace for action.
This step is about giving yourself clear access to the important parts of your fireplace.
- Start by removing any decorative items around the fireplace.
- This includes screens, logs, or any other ornamental pieces.
- They might look nice, but they can get in the way when trying to light the fire.
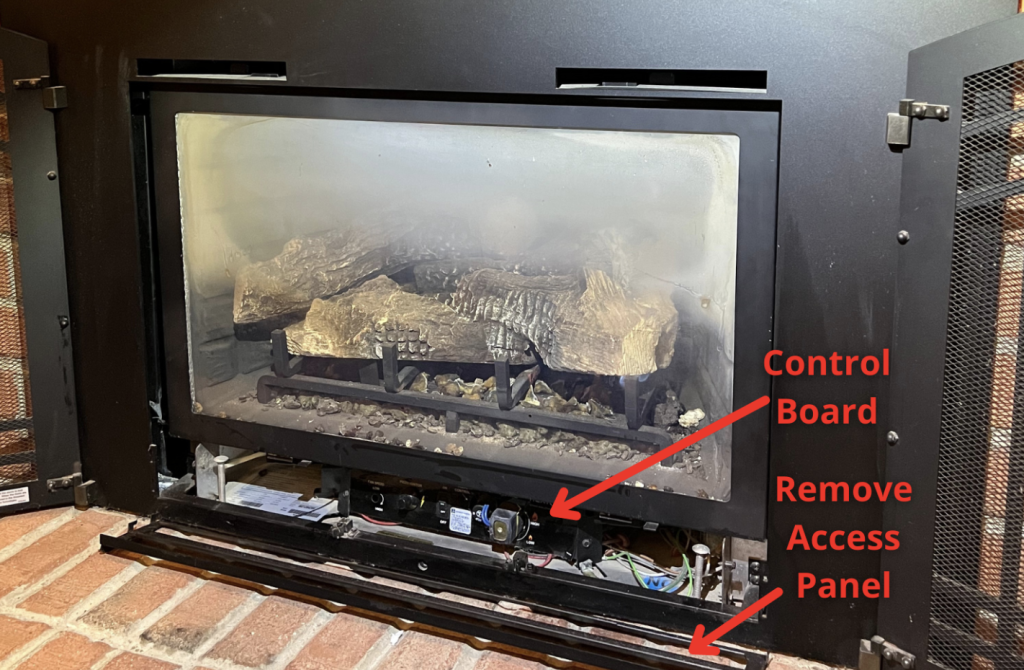
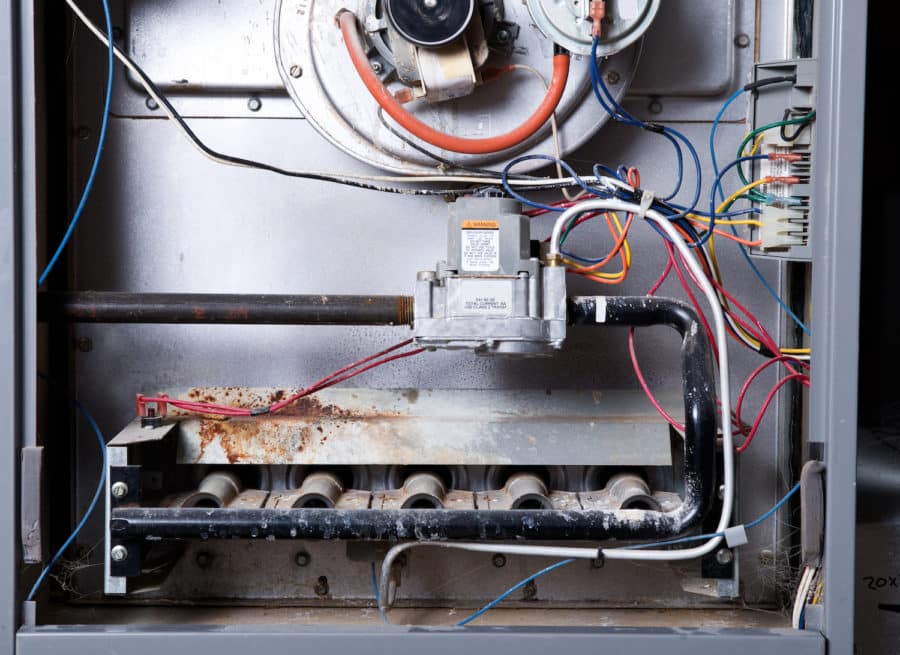
- Next, locate the control panel or gas valve.
- This is usually near the bottom of the fireplace, sometimes hidden behind a small door or panel.
- If you’re unsure where to look, consult your manual – it should have a diagram showing exactly where to find it.
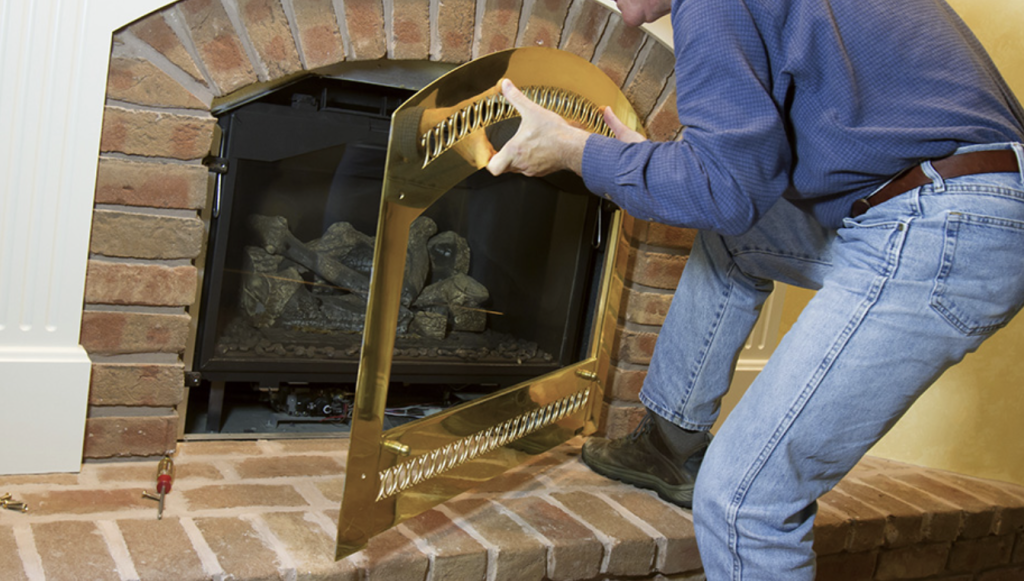
- If your fireplace has a glass front, you might need to remove it.
- Some models require this to access the controls.
- Don’t worry if it seems daunting – most are designed to be easily removed.
- Just be gentle and follow the instructions in your manual.
- Lastly, make sure the gas supply to the fireplace is turned on.
- There’s usually a valve near the fireplace or the basement near the gas line entering your home.
- Turn it so it’s parallel to the pipe – this means it’s open.
These steps will give you a clear workspace and simplify the lighting process.
Plus, it’s a good opportunity to quickly clean your fireplace.
Step 4: Locate the Pilot Light
Now we’re getting to the heart of the matter – finding the pilot light.
This little flame is the key to roaring your fireplace, so knowing where it is is important.
- In most gas fireplaces, the pilot light is near the main burner.
- It’s usually a small, blue flame that’s always burning (unless it’s gone out, which is why we’re here!).
- Look for it near the back or bottom of the fireplace.
- Sometimes, the pilot light hides behind a small metal door or cover.
- If you don’t see it immediately, check for any removable panels in your fireplace.
- Remember, safety first – if you need to remove anything, ensure you can put it back correctly.
- If you’re having trouble spotting the pilot light, don’t panic.
- Your fireplace manual should have a diagram showing its exact location.
- It’s worth taking a moment to find this information—knowing where your pilot light is located will make future lighting much easier.
- Remember that in some newer models with electronic ignition, there might not be a constant pilot light.
- Instead, these systems create a spark to light the gas when needed.
- If this is the case for your fireplace, you’ll look for the ignition point rather than a small flame.
Remember, it’s okay to ask for help if you’re ever unsure.
A quick call to a fireplace professional can save you a lot of guesswork and ensure you’re on the right track.
Step 5: Light the Pilot
Now, we’ve reached the main event – lighting the pilot.
This step varies depending on your fireplace type, so I’ll break it down for each:
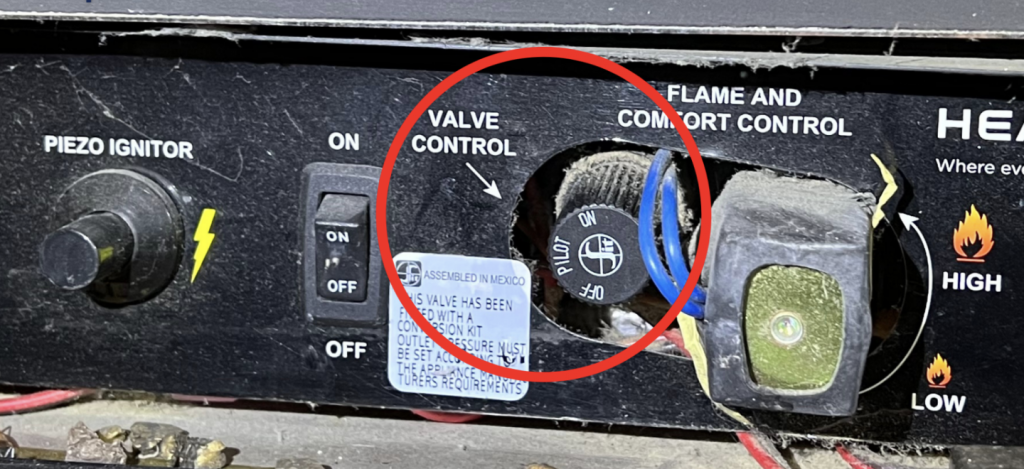
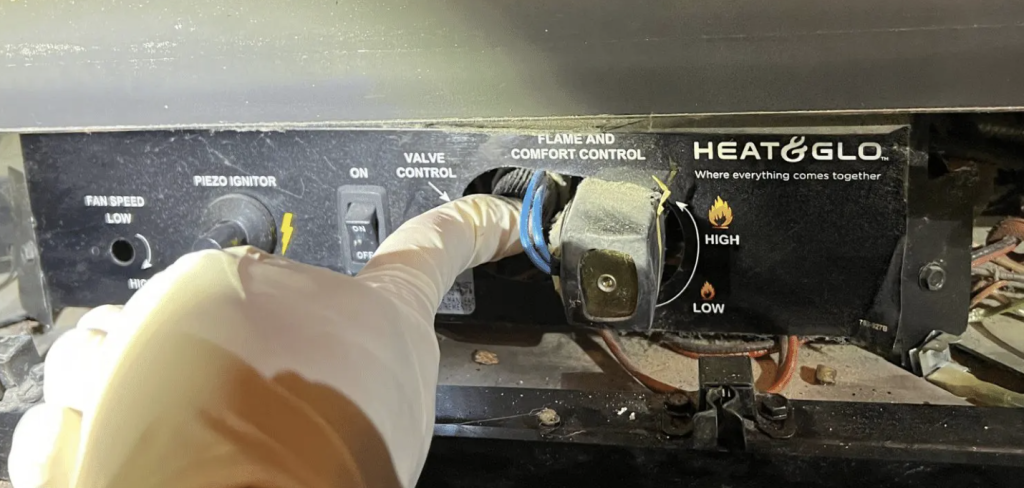
- For control panel models: Find the control knob and turn it to the “Pilot” position.
- Press and hold this knob down – this releases a small amount of gas.
- While holding it, look for an igniter button nearby. It’s usually red or black.
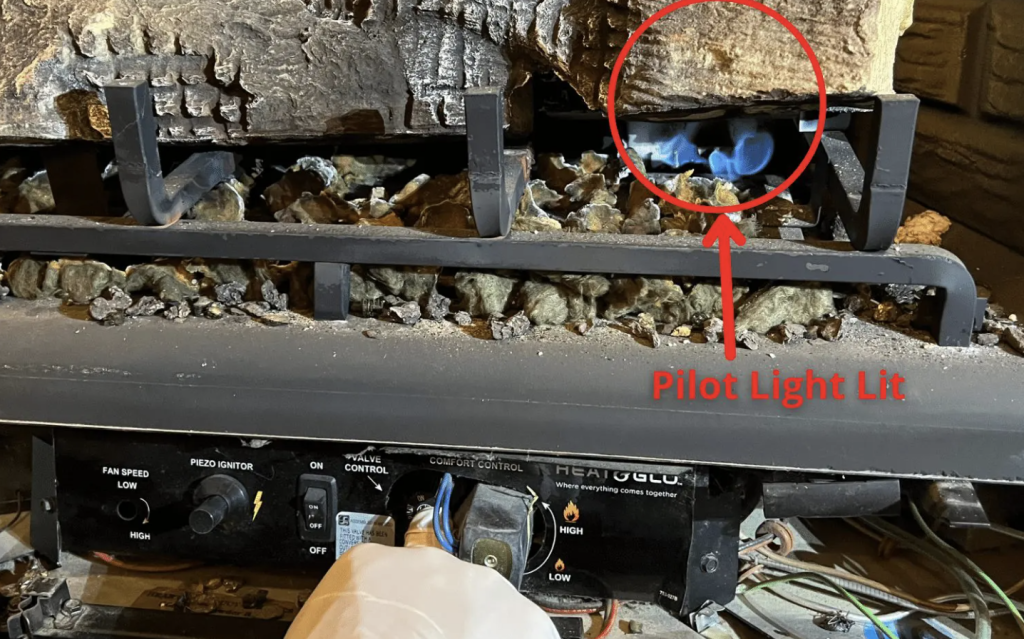
- Press this button repeatedly until you see the pilot light come on.
- Once it’s lit, keep holding the knob for about 30 seconds.
- This gives the thermocouple (a safety device) time to heat up.
- After 30 seconds, slowly release the knob. If the pilot stays lit; great! If not, wait five minutes and try again.
For key-operated systems: Insert the key into the gas valve near the fireplace.
Turn it slightly to release a small amount of gas.
Now, use a long lighter or match to ignite the pilot.
Be careful to keep your hands away from the flame.
Once lit, turn the key a bit more to keep the gas flowing to the pilot.
Electronic ignition is the easiest—usually, you just need to flip a switch or press a button on your remote control.
The system will automatically attempt to light the pilot.
If it doesn’t work the first time, it might try a few more times automatically.
If the pilot doesn’t light after a few attempts, stop and wait at least five minutes before trying again.
This allows any unburned gas to dissipate.
If you’re still having trouble, it might be time to call in a professional.
Step 6: Turn on the Main Burner
Great job! With the pilot light on, we’re ready to get the main show started.
This step is where you’ll see your efforts pay off with a beautiful, warming flame.
For Control Panel Models
- Now that your pilot is lit and stable, it’s time to turn on the main burner.
- Look for the control knob you used to light the pilot.
- Slowly turn it from the “Pilot” position to “On”.
- You should hear a soft whoosh as the main burner ignites.
If it doesn’t light right away, turn the knob back to “Pilot” and wait a few minutes before trying again.
With Key Systems
- Once your pilot is lit, slowly turn the key in the direction you used to light the pilot.
- This increases the gas flow to the main burner.
- You should see the flames spread across the burner.
If the flames seem too low, you can turn the key a bit more to increase them.
For Electronic Ignition
- These systems often light the main burner automatically once the pilot is lit.
- If not, there should be a separate switch or button to turn on the main flame.
- Consult your manual if you’re not sure which control to use.
In all cases, watch the flames as they spread across the burner.
They should be steady and even.
If you notice any unusual behavior, like flames that are mostly yellow or flames that seem to “dance” erratically, turn off the fireplace and consult a professional.
Step 7: Adjust and Enjoy
Congratulations! Your gas fireplace is now lit and warming up your room.
But we’re not quite done yet – let’s ensure everything is set up for maximum enjoyment and safety.
- First, take a moment to adjust the flame height to your liking.
- Most fireplaces have a control that allows you to increase or decrease the flame size.
- Find a level that provides the right amount of heat and ambiance.
- If your fireplace model has a thermostat or timer, now’s the time to set those.
- A thermostat can help maintain a consistent temperature in the room.
- At the same time, a timer can automatically shut off the fireplace after a set period – great for those who might fall asleep by the fire!
- Next, replace any covers or glass panels you removed earlier.
This is important for both safety and efficiency.
Make sure they’re securely in place.
Conclusion
There you have it – a step-by-step guide to lighting your gas fireplace.
With these instructions, you should be able to enjoy the warmth and ambiance of your fireplace whenever you want.
Remember, safety always comes first when dealing with gas appliances.
Don’t hesitate to call a professional if you ever feel unsure or uncomfortable during the process.
Regular maintenance is key to keeping your gas fireplace in top shape.
Consider scheduling an annual inspection to ensure everything’s working properly.
This can help prevent issues and extend the life of your fireplace.
Now that you know how to light your gas fireplace, you’re all set for those chilly evenings.
So go ahead, get that fire going, and enjoy the cozy atmosphere it brings to your home.
Stay warm and safe!