Have you ever seen DIY wood wall art and thought it was out of your reach? Well, I’m here to prove you wrong!
I’ve discovered a clever technique using wood glue and stain that creates stunning contrasts on wood. It’s simpler than you’d think, and the results are sure to impress.
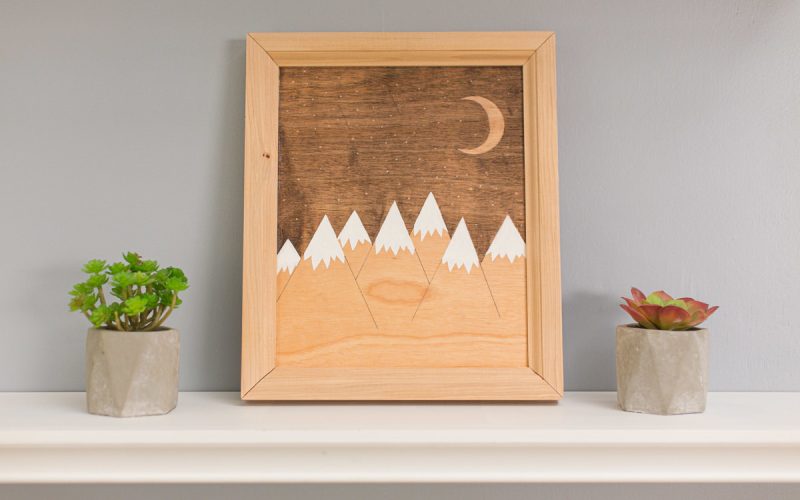
In this guide, I’ll walk you through creating your DIY wood wall art featuring a beautiful mountain scene. We’ll cover every step, from preparing the wood to adding the final touches.
Whether you’re new to crafting or a seasoned expert, this wood wall art project suits all skill levels perfectly.
Are you ready to make your unique piece of DIY wood wall art? Grab your supplies, and let’s begin!
By the end, you’ll have the know-how to create a striking piece of art, and everyone will ask where you bought it.
Stepwise Guide for a Perfect DIY Wood Wall Art
A few years back, I stumbled upon an intriguing technique that combines wood glue and stains to create stunning contrasting shades of wood.
This method has become my go-to for creating captivating wall art pieces. I’m excited to share how to make beautiful mountain scene wall art using this technique today.
It’s a fun project that allows you to tap into your creativity while creating a unique piece for your home. Let’s dive into the process step by step.
Step 1: Prepare the Wood
Start by cutting a piece of plywood to 8″ x 10″ using a circular saw. If you’re uncomfortable with power tools, don’t worry – you can use a utility knife to score and cut a piece of door skin to the same dimensions.
The great thing about this project is that the edges don’t need to be perfectly straight since they’ll be hidden by the frame later.
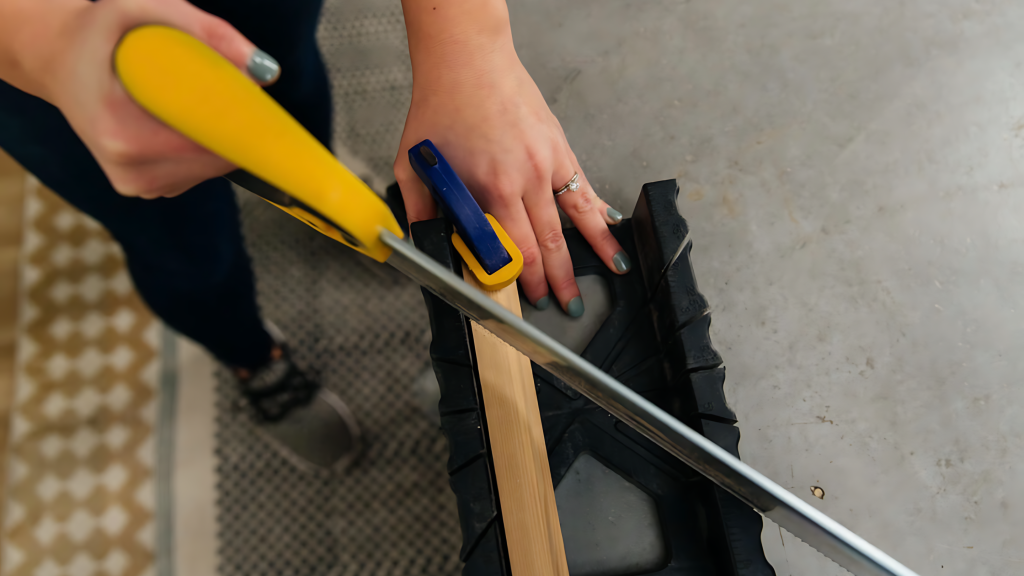
For the frame, you’ll need to cut molding pieces. Use a backsaw and miter box to cut these at 45° angles so they fit snugly around your plywood.
When selecting your molding, look for pieces with a lip on one side – this lip should face inward when you assemble the frame.
Take your time with these cuts, as a well-fitted frame will elevate the final look of your artwork.
Step 2: Sand the Wood
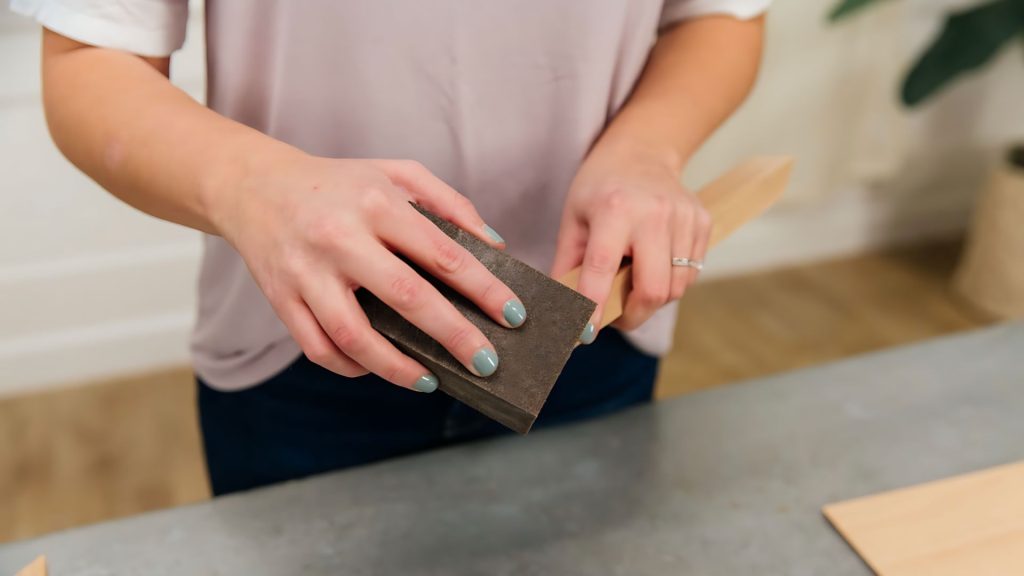
Grab a fine/medium sanding sponge and give all your wood pieces a light once-over. This step might seem minor, but it’s crucial for achieving a polished final product.
Pay extra attention to the cut edges and corners of the molding – these areas are prone to splintering and can be rough.
Sanding smooths the surface and helps the paint and stain adhere better, giving you a more professional-looking result.
Don’t forget to wipe away any dust after sanding to ensure a clean surface for the next steps.
Step 3: Draw Your Design
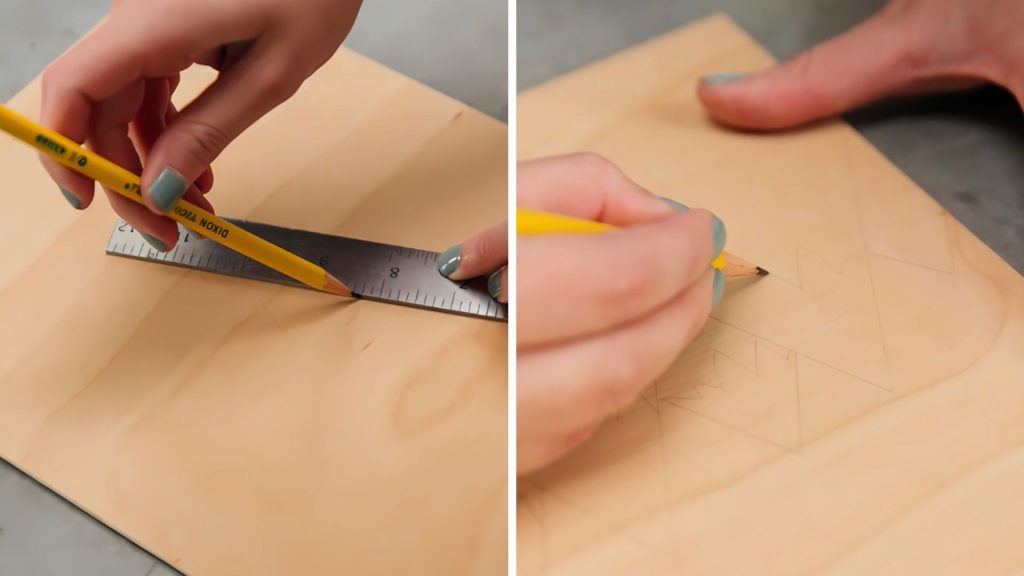
Now comes the fun part – sketching your design onto the wood. For this project, we’re creating a serene night sky scene with majestic mountains and a luminous moon. Use a pencil to draw your design lightly.
I find it helpful to use a ruler for straight lines, like mountain slopes, and round objects, like cups or hole saws, for perfect circles (like the moon).
Feel free to let your creativity flow here – you might want to add trees, stars, or even wildlife silhouettes.
The key is to keep your pencil lines light so they won’t show through in the final piece.
Don’t be afraid to erase and redraw until you’re happy with the composition – this is your unique artwork!
Step 4: Paint the Design
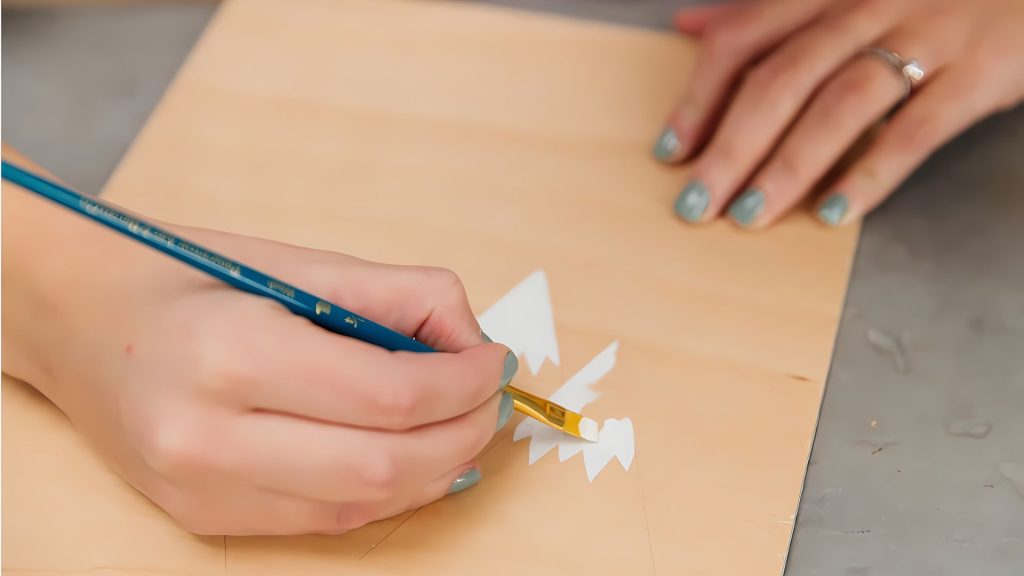
With your design sketched, it’s time to bring it to life with paint. We’ll use white acrylic paint for this step, as it provides good coverage and dries quickly. Using a small brush, carefully paint the mountain peaks.
You might find it easier to use a flat brush for the sides of the peaks and a small pointed brush for the jagged edges. Don’t worry if the first coat looks thin – acrylic paint often needs a couple of layers for full coverage.
The beauty of working with acrylics is that by the time you finish painting all the peaks, the first ones are usually dry and ready for a second coat.
Take time with this step, as clean lines will make your design pop.
Step 5: Add Details
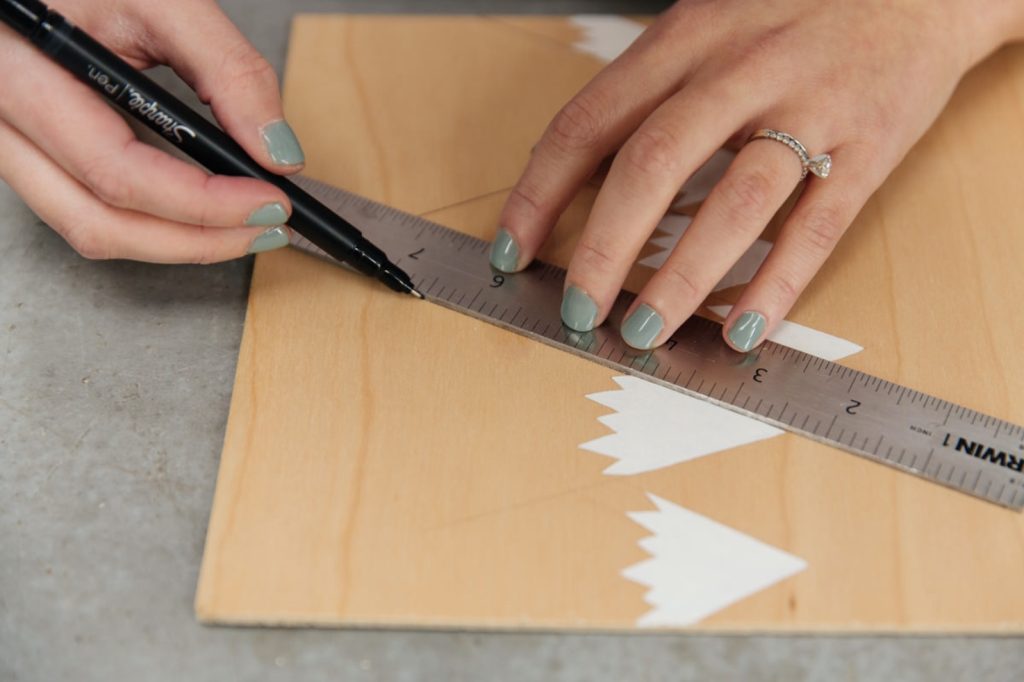
Now that the main elements are painted, let’s add finer details to our mountain scene. Use a fine-tip permanent marker and a ruler to draw additional mountain slopes.
These lines will add depth and dimension to your artwork. Remember to keep a light touch when using the marker and avoid letting the tip linger in one spot for too long.
This will help prevent the ink from bleeding into the wood grain. You can also use this opportunity to add other small details, such as tree lines or rock formations.
The key is building up layers of detail to make your artwork more interesting and realistic.
Step 6: Apply Glue for Shading
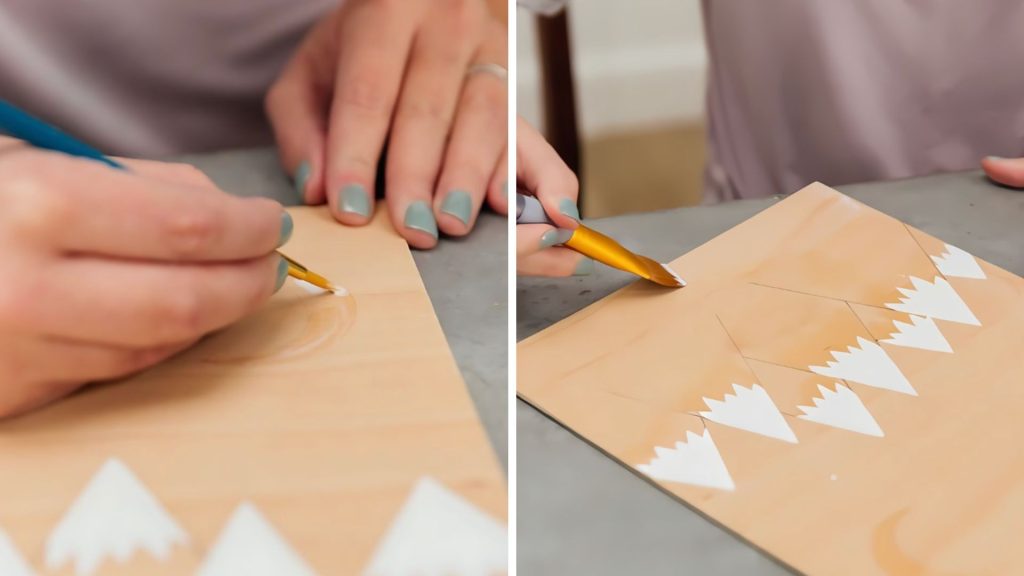
This step is where the magic happens in our wood art technique. We’ll use Mod Podge (or wood glue if you prefer) to create areas that resist the wood stain, which we’ll apply later.
This creates the contrasting shades that make this artwork technique so unique.
Start by painting Mod Podge over the base of the mountains, the painted peaks, and the moon. If you find the Mod Podge too thick to work with easily, you can water it down slightly.
Apply two coats, allowing each to dry completely before applying the next. This step creates our shading effect and protects the painted areas from the stain we’ll use later.
Dip a toothpick in Mod Podge to add stars to your night sky and carefully dot it onto the wood. You can also dot some white paint stars between the Mod Podge stars for added dimension.
This will give your sky a twinkling, multi-dimensional effect that brings the scene to life.
Remember, the areas where you apply the Mod Podge will resist the stain, stay lighter, and create contrast.
So, think carefully about where you want lighter areas in your final piece. This technique allows for much creativity, so feel free to experiment!
Step 7: Stain the Wood
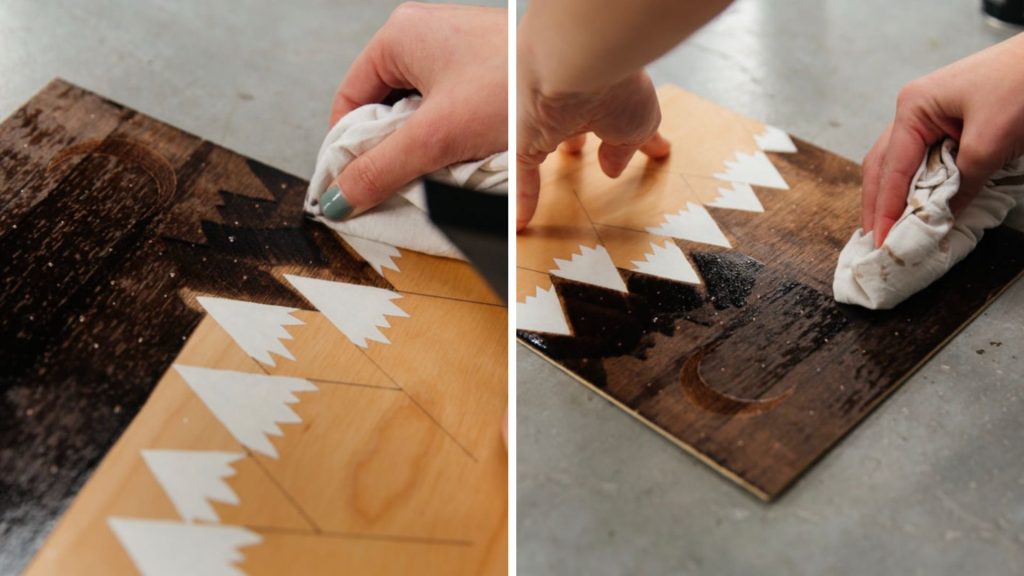
Once all the glue is completely dry, it’s time to apply the wood stain. This step will make your design pop by creating deep, rich tones contrasting with the lighter, glue-covered areas.
Choose a dark stain to create a dramatic night sky effect.
Apply the stain over the entire surface, including the moon and stars. Don’t worry—the areas covered with Mod Podge will resist the stain. A lighter touch creates a subtle gradient effect when applied over the mountains.
Follow the manufacturer’s instructions for applying and wiping off the stain. Generally, you’ll want to quickly wipe off excess stains, especially from the painted parts.
Use a dry cloth first, then follow up with a slightly damp one to clean up any remaining residue. When wiping the mountains, always wipe away from the peaks to maintain the shape of your design.
This step can be messy, so ensure you work in a well-ventilated area and protect your work surface. The results are worth it, though – you’ll see your design come to life with beautiful, rich tones contrasting with the lighter areas.
Step 8: Attach a Hanger
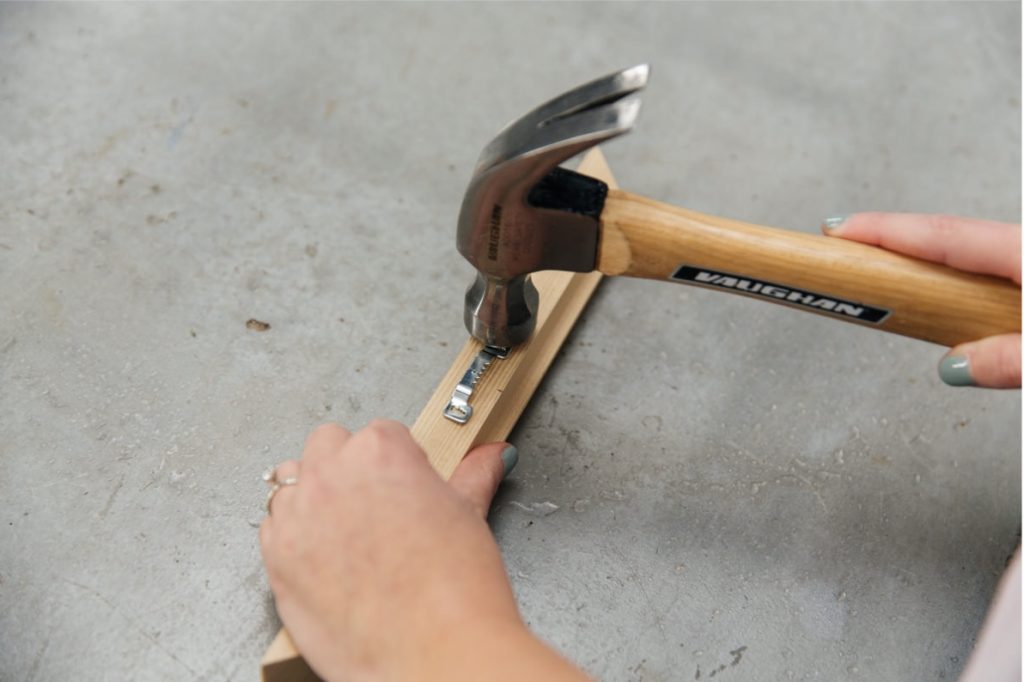
With your artwork complete, it’s time to prepare it for display. Flip your wood piece over and attach a sawtooth hanger to the back of the top molding piece.
This type of hanger is easy to install and provides a secure way to hang your artwork.
Position the hanger centrally and about 1/3 of the way down from the top edge. This placement ensures your artwork will hang straight and flush against the wall.
Use a small hammer to tap the hanger gently into place. Be careful not to hammer too hard—you don’t want to damage your beautiful artwork!
Adding a hanger might seem like a small detail, but it makes your piece ready to display when the frame is attached. Plus, it gives your DIY project a professional finishing touch.
Step 9: Frame Your Artwork
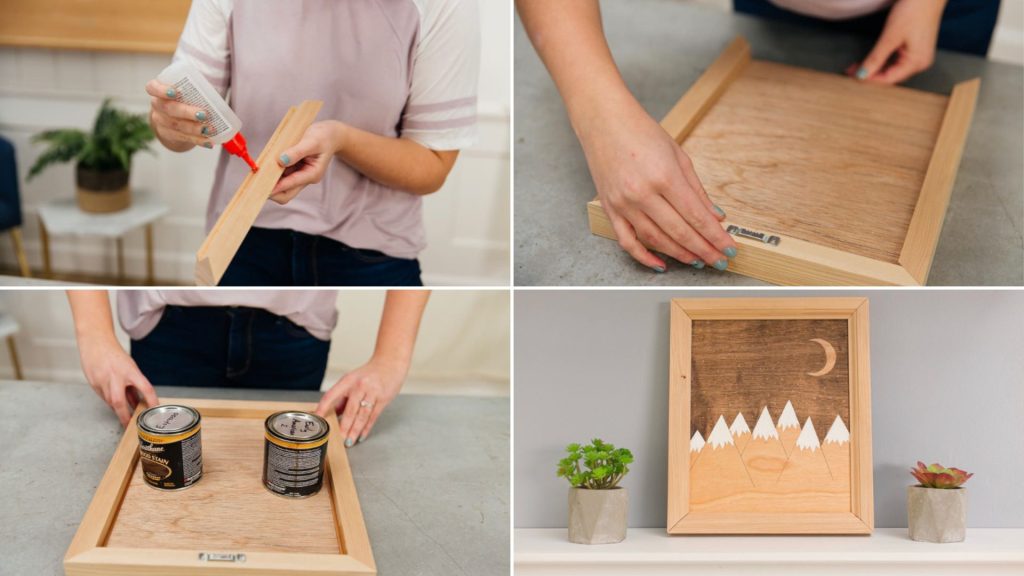
The final step is to frame your masterpiece, elevating its appearance and making it look like a professional piece of art. Once everything is completely dry, it’s time to attach the molding pieces you prepared earlier.
Apply a thin, even layer of wood glue to the back of each molding piece. Carefully position them around your artwork’s edges, ensuring the corners meet neatly.
The lip of the molding should be on the inside, slightly overlapping your artwork.
If you notice that your plywood is slightly warped (which is common with thin wood pieces), don’t worry. You can use heavy objects like books or cans to weigh down the frame while the glue dries.
This will ensure good contact between the frame and the artwork.
Allow the glue to dry completely according to the manufacturer’s instructions. Once dry, your framed artwork is ready to hang and admire!
The frame not only adds a finishing touch but also protects the edges of your artwork, making it more durable.
Final Thoughts
Making your own DIY wood wall art is both enjoyable and fulfilling. This project lets you showcase your creativity while learning new skills.
Don’t worry if your first piece isn’t perfect—remember, practice is key to improvement.
I encourage you to experiment with designs, colors, and stains to create unique DIY wood wall art pieces.
You might find yourself hooked on this craft! Whether decorating your home or making gifts, this DIY wood wall art technique opens up a world of possibilities.
I hope this guide has motivated you to try DIY wood wall art. Have fun crafting, and take pride in your handmade wood wall creation!

