
Ready to relive childhood nostalgia on a grand scale? Many of us remember the joy of creating glowing designs on a LiteBrite, but it often felt too small for our big ideas.
Now, imagine having a massive 4×8 foot version to play with! This guide will show you how to build your giant LiteBrite to wow friends and family.
This project transforms a simple toy into an impressive, room-sized light display perfect for events or as a unique home decor piece.
We will cover each process step, from the materials needed to creating the grid, drilling holes, building the frame, and adding lights.
Get ready to supersize your creativity and bring a beloved classic into the modern era now!
Tools and Materials Required to Build Giant Lite Bright
Essential Items
- Two 4′ x 8′ sheets of 1/2″ plywood
- One 4′ x 8′ sheet of 1/8″ clear plexiglass
- Four 2×4 boards
- At least twenty 1″ diameter, 6-foot long clear acrylic rods
- Various colors of sea glass paint (blue, ruby, green)
- Spray paint (red, black, orange, metallic blue)
- Four LED light strips
- Table saw
- Drill and drill bits
- Miter saw
- Glue gun
- Planer (optional, but helpful)
Quick Tips
- Choose high-quality plywood for a smoother finish
- Opt for LED strips with adjustable brightness
- Look for acrylic rods that are crystal clear for better light transmission
Remember, the quality of materials will impact the final result. While it might be tempting to cut corners, investing in good materials will make the giant Lite Brite more durable and visually appealing.
Steps to Create Your Own Giant Lite Brite
Follow these detailed steps to build your own Giant Lite Brite. Gather your materials, and let’s get started on this fun DIY project!
1. Drawing the Grid

Let’s start with the most crucial part of our giant Lite Brite—drawing the grid. This step sets the foundation for everything that follows, so it’s important to take your time and be precise.
- Start by laying out the plywood sheet on a flat surface. Creating a template in design software can be helpful. This template should have dots marking the center of each hole, which is a real-time saver.
- Print out the template and carefully position it on the plywood. Using a punch, mark the center of each hole. This method helps keep all the holes perfectly aligned and evenly spaced.
Here’s a tip: Double-check measurements before starting to mark. Even a small error at this stage can throw off the entire grid.
Remember, patience is key here. It might feel tedious, but taking time now will save headaches later. The effort will have been worth it when all those pegs are glowing in perfect alignment!
2. Drilling the Holes
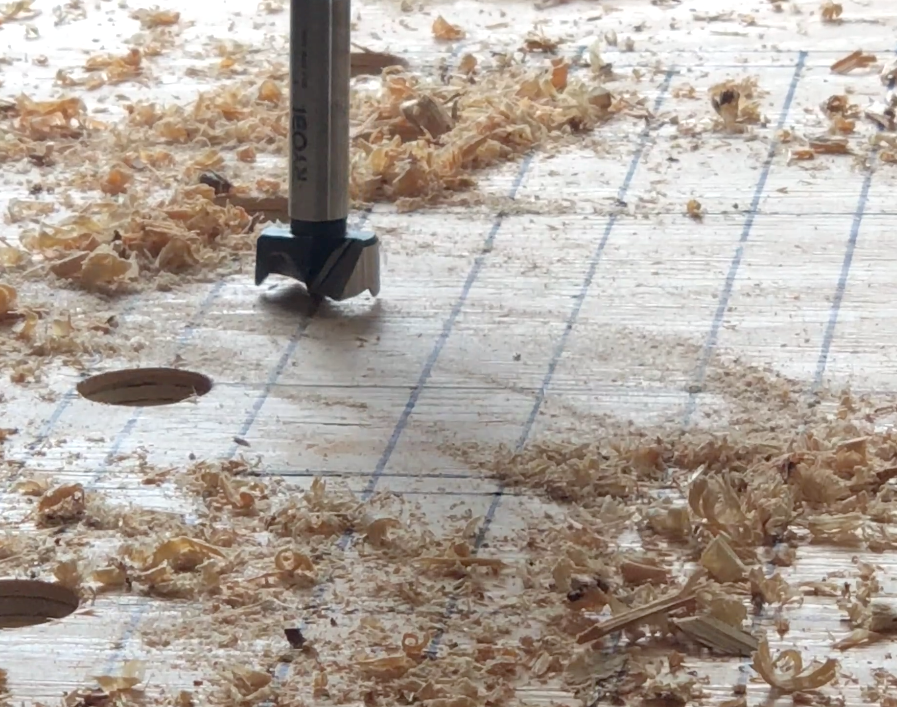
This part will test your patience – drilling over 500 holes! But don’t worry; there are ways to make this task more manageable.
- Use a drill and a forstner bit that matches the diameter of the acrylic rods. A 1-inch bit works well for this project. Always wear safety goggles and a dust mask. Safety first!
- Begin drilling at the marks made earlier. Keep the drill straight to ensure all holes are uniform. Take breaks often to avoid fatigue – this job can take about 13 hours, so pacing is important!
Here’s a Trick: Try breaking the task into smaller chunks to keep energy up. Aim for 100 holes at a time, then take a short break. This helps maintain focus and avoid mistakes.
Clear away sawdust regularly. This keeps the work area clean and helps track progress.
Remember, it’s okay if this part feels boring. Put on some music or a podcast for entertainment. Stay focused on the task – each hole brings the project closer to completion!
3. Building the Frame
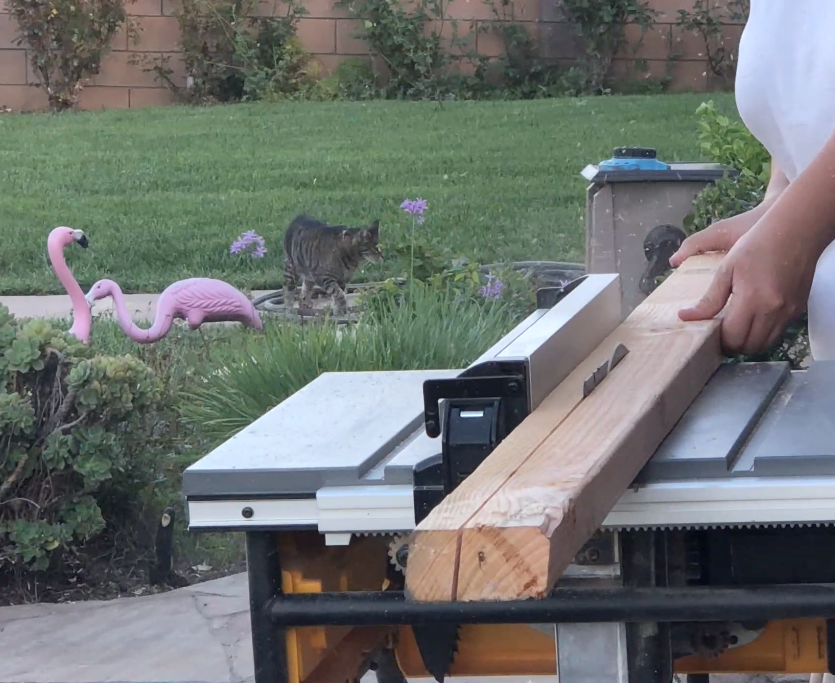
Now that we’ve got our grid of holes, it’s time to give our giant Lite Brite some structure. Let’s build the frame!
- Start by cutting 2×4 boards on a table saw. These pieces will form the outer frame of the Lite Brite.
- Running them through a planer removes rounded edges, but this step can be skipped if a planer isn’t available.
- Next, cut some smaller pieces to act as internal supports. These are crucial for keeping everything sturdy, especially for such a large piece.
- When assembling, use a combination of wood glue and screws. Apply the glue first, then secure with screws for extra strength. Ensure the corners are square – this will help when adding the acrylic backing later.
Here’s a Tip: Pre-drill screw holes to prevent the wood from splitting. It takes a bit more time, but it’s worth it for a cleaner, stronger finish.
Remember, this frame needs to support a lot of weight, so take time to make it solid. A wobbly Lite Brite isn’t much fun for anyone!
4. Adding the Acrylic Back Panel
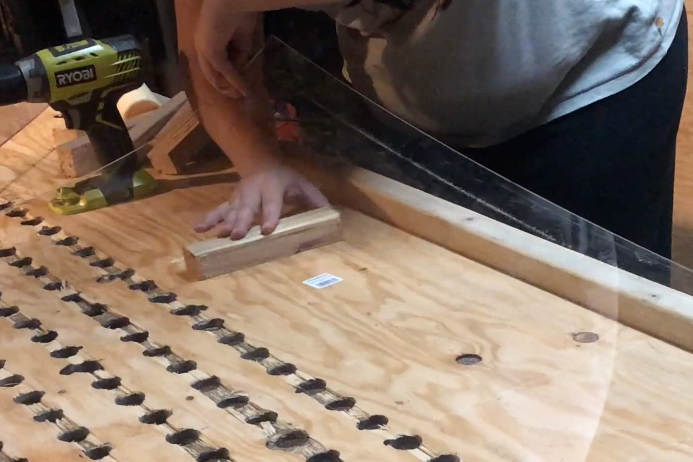
Now it’s time to add the clear acrylic sheet that’ll keep our pegs in place. This step is crucial for the stability of our giant Lite Brite.
- Lay the 4×8 sheet of acrylic on top of the frame. Handle this carefully – acrylic can crack if treated too roughly.
- To attach the acrylic, first drill countersunk holes around the edges of the frame. This allows the screw heads to sit flush with the surface. Be gentle when drilling acrylic – too much pressure can cause it to crack.
- When screwing the acrylic to the frame, go slowly and don’t over-tighten. The acrylic needs some room to expand and contract with temperature changes.
- If a piece of the acrylic breaks during installation, don’t panic! Hot glue is easy to use and dries clear, so it’s barely noticeable.
Here’s a Tip: Clean the acrylic thoroughly before attaching it. Any dirt or fingerprints will be visible once the lights are on.
Remember, this back panel keeps all those pegs from falling out, so ensure it’s secure. Take time with this step – it’s key to making the giant Lite Brite functional and long-lasting.
5. Lighting
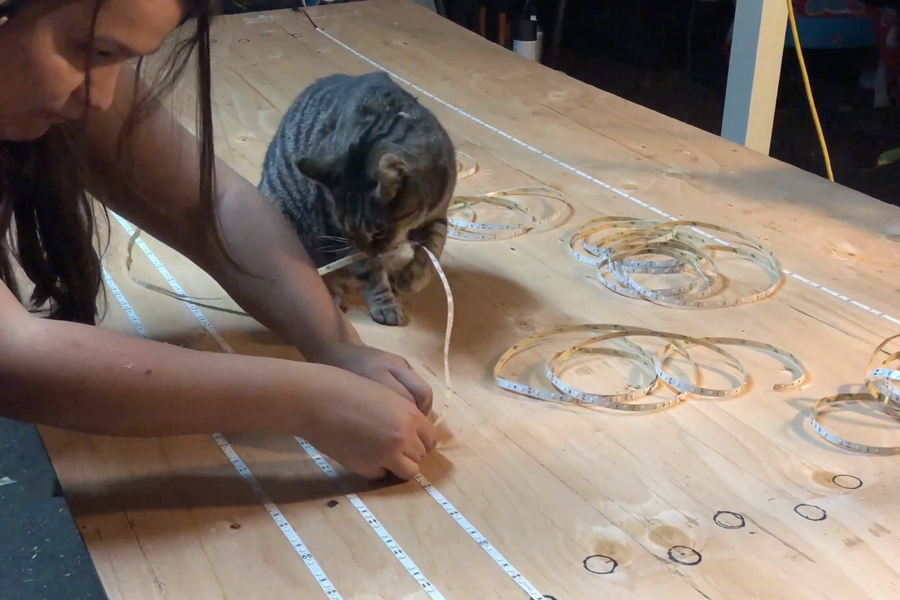
Let’s brighten things up! The lights make our Lite Brite truly shine, so this step is super important.
- Start by cutting LED strips to fit around the frame. Then, these strips are soldered together to create one continuous light source. Be careful when soldering—it’s easy to melt the LED strip accidentally if you are not gentle.
- If the power supply isn’t strong enough to light up all the LEDs, don’t worry! You can solve this by getting extra LED strips and connecting them to a separate power source. This can work great, making the whole thing even brighter.
- When attaching the LEDs, make sure they’re positioned to light up all the pegs evenly. Placing them around the edges of the frame often works best.
Pro Tip: Test the lights before finalizing everything. It’s much easier to fix issues now than after everything is assembled.
Remember, the lighting is what brings the magic to the Lite Brite. Take time to get it right; the reward will be an eye-catching display.
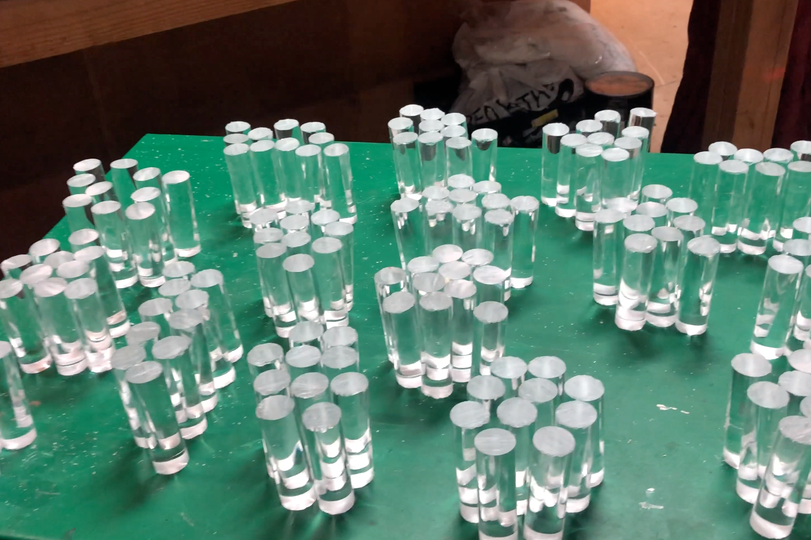
6. Cutting the Acrylic Pegs
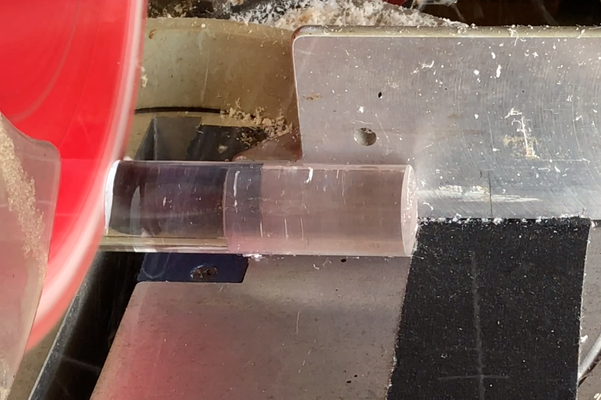
Now for the fun part – creating over 500 pegs that’ll bring our giant Lite Brite to life!
- Use a miter saw to cut the acrylic rods into uniform pieces. To save time, put a piece of tape on the saw to mark the length. This way, there’s no need to measure each peg individually.
- Safety first! Wear protective goggles and gloves. The acrylic chips can fly back and cut hands, so it’s important to be cautious.
- Here’s a time-saving tip: Enlist a friend to help cut the pegs. One person can cut while the other collects and sorts the finished pieces. It makes the job go much faster and is more fun too!
- If working solo, try cutting in batches. Set a goal, maybe 100 pegs, and then take a short break. This helps maintain focus and prevent fatigue.
Remember, consistency is key here. Take time to ensure all pegs are the same length. Uneven pegs will be noticeable when the Lite Brite is lit up.
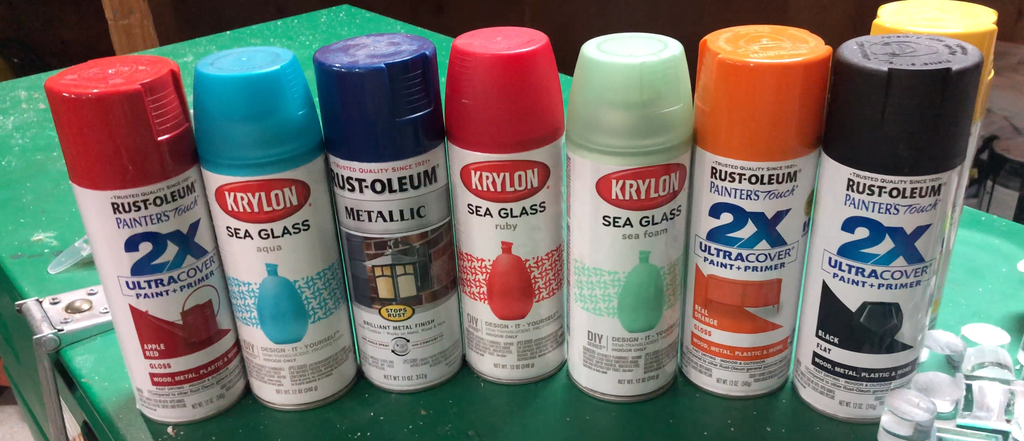
7. Painting the Acrylic Pegs
It’s time to add some color to our project! This step is where your giant Lite Brite starts to come alive.
- Use regular spray paint for other colors, applying it lightly from a distance to maintain transparency.
- When painting, work in a well-ventilated area.
- Doing this outside on a calm day avoids wind blowing the paint around.
- Lay out the pegs on cardboard or newspaper for easy painting and cleanup.
Here’s a Cool Trick: Try layering different colors for unique effects. Spray some pegs with a light coat of one color, then add a mist of another for a multi-toned look.
Remember to rotate the pegs while painting to ensure even coverage. Doing this in batches by color is helpful – it keeps things organized and lets each batch dry while working on the next.
Don’t worry if the colors look too intense at first. Once the light shines through, they’ll soften up beautifully. If a color is too opaque, it can always be sanded lightly to let more light through.
8. Final Assembly

Finally, it’s time to put all the pieces together and see our giant Lite Brite come to life!
- Start by inserting the colored pegs into the holes. Try making patterns or pictures. This is a great time to get creative. Don’t be afraid to experiment; the design can change later.
- Once all the pegs are in place, do a final lighting check. Ensure all areas are evenly lit, and adjust the LED strips if needed. This is also a good time to double-check that all pegs are secure and the frame is stable.
- Now for the moment of truth – turn it on! There’s nothing quite like seeing all that hard work light up for the first time. It’s truly a wow moment!
Here’s a Fun Idea: invite friends for a “lighting ceremony.” It’s a great way to share the creation and inspire others to try their projects.
Remember, the design can always be changed – that’s the beauty of a Lite Brite!
Conclusion
Let’s wrap this up! Building a giant Lite Brite is no small feat but worth the effort.
This guide has covered everything from gathering materials to the final assembly, providing all the information needed to create an oversized masterpiece.
Remember, this project is about having fun and letting your creativity shine. Don’t stress if things don’t go perfectly—each challenge is just a chance to problem-solve and make the Lite Brite unique.
Why not give it a try? Whether planning a special event or just wanting to add nostalgic flair to a space, this project will surely impress. Plus, imagine the joy of playing with a Lite Brite that’s bigger than you are!
So, what are you waiting for? Grab those tools and start building.
A giant, glowing creation awaits!