


The Modern Renaissance of Paint by Numbers
What started as a weekend pastime in the 1950s has transformed into something far more meaningful for today’s adults. Modern paint by numbers kits have evolved beyond simple children’s activities into powerful tools for mental wellness and creative expression that double as sophisticated home decor. In our screen-dominated world, these kits offer a rare opportunity to disconnect from digital chaos and reconnect with the calming rhythm of brush on canvas while creating artwork that genuinely enhances your living space.
The psychological benefits mirror what practitioners experience during meditation. When you focus intently on filling each numbered section, your mind enters a flow state that quiets anxiety and racing thoughts. This repetitive, focused action activates the same neural pathways that meditation does, helping reduce cortisol levels and promote relaxation. Many adults report feeling their shoulders drop and breathing slow as they settle into painting sessions.
What makes these creations particularly valuable as wall art is their unique combination of personal investment and visual impact. Unlike mass-produced prints from big box stores, your completed painting carries genuine authenticity because you devoted hours to its creation. Guests notice the textured brushstrokes and layered paint depth that flat prints simply cannot replicate. The physical dimensionality catches light differently throughout the day, creating a living piece that changes with your room’s natural lighting.
The artwork becomes a conversation starter that reflects both your aesthetic taste and your commitment to mindful creativity, all while filling that empty wall you’ve been ignoring for months.
Preparing Your Canvas for a Professional Finish
The foundation of any stunning paint by numbers project starts well before you open your first paint pot. Your canvas condition directly impacts how smoothly colors glide on and how professional your finished piece looks hanging on the wall.
Surface preparation is absolutely critical. Most canvases arrive with minor creases from packaging, which can create distracting lines in your finished artwork. Gently iron the back of your canvas on low heat (no steam) to smooth out these wrinkles, or let it sit under heavy books overnight. For stubborn creases, lightly mist the back with water and let it air dry while weighted down.
Understanding your canvas material matters more than most beginners realize. Cotton canvases are lighter and more affordable, but they absorb paint differently and can feel flimsier under your brush. Linen canvases offer superior texture and durability, with tighter weaves that hold paint beautifully. Premium options like those from Davincified use extra thick linen canvas that arrives wrinkle-free, eliminating the prep hassle you’d face with standard cotton alternatives.
You’ll need to decide between working stretched or flat. Stretching your canvas onto bars before painting gives you better tension and makes the surface easier to work on, especially for detailed areas. The taut surface prevents paint from pooling in saggy spots. Working flat is simpler but can lead to uneven paint application.
Here’s an insider secret that transforms your results: apply a coat of clear gesso to your canvas before starting. This primes the surface to grab the paint better, eliminating the slickness often found on standard kit canvases. Let it dry completely (usually 30 minutes), and you’ll notice your brush strokes become smoother and more controlled right from your first number.
Mastering Acrylics: Consistency and Flow
Acrylic paints in paint by numbers kits have unique qualities that make them both wonderful and occasionally tricky to work with. These fast-drying formulas typically set within 10-15 minutes on your canvas, which means you can layer colors quickly without waiting around. However, this speedy drying can work against you when paints start forming films in their pots during extended painting sessions.
To keep your paints workable throughout multi-day projects, add a single drop of water to each pot before closing the lid after each session. Store them upside down occasionally to prevent settling. If you notice paint thickening, here’s a pro technique: use a flow improver additive instead of water to thin your acrylics, as this increases fluidity for smoother strokes without breaking down the pigment binder. This preserves the paint’s opacity and prevents that frustrating watery look.
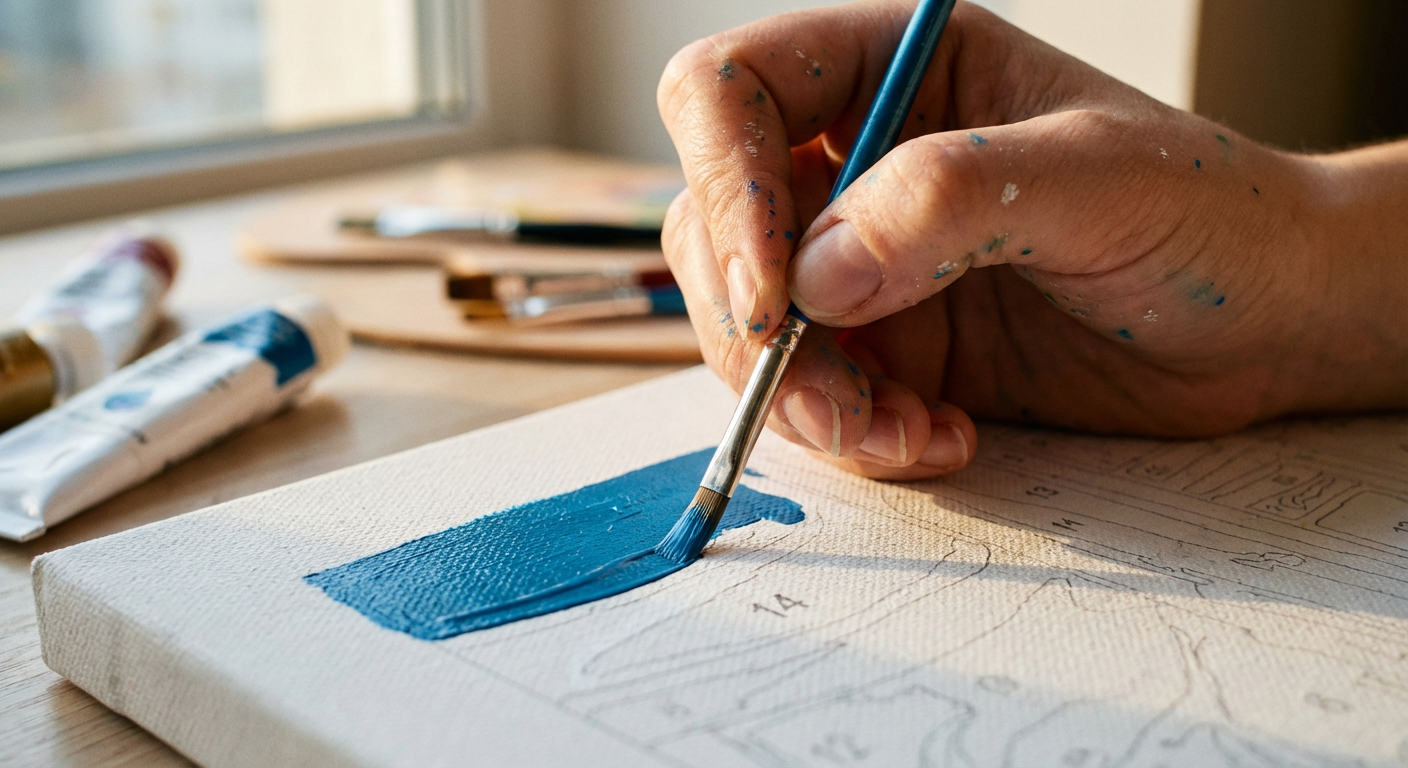
Speaking of opacity, achieving solid coverage on lighter numbered areas requires patience. Apply thin, even layers rather than one thick coat. Heavy application creates visible ridges that catch light and ruin the smooth finish. Let each layer dry completely (about 15 minutes), then add another if needed.
Your brushes deserve special attention when tackling those tiny numbered spaces. Maintaining a sharp point is essential for precision work:
Rinse brushes immediately after each color change Never let paint dry on the bristles, especially near the ferrule Reshape the tip while wet by gently rolling between your fingers Store brushes tip-up in a cup or flat to protect the point Consider having dedicated brushes for light versus dark colors to prevent contamination
A well-maintained brush glides smoothly into corners and edges, giving you the control needed for professional-looking results.
Advanced Techniques to Elevate Your Art
Once you’ve mastered the basics, these techniques will transform your paintings from obviously numbered sections into cohesive artworks that look professionally crafted.
Feathering is your secret weapon against those telltale hard edges. After applying paint to adjacent sections, use a barely damp brush to gently blend where two colors meet while the paint is still slightly wet. Work in small strokes that follow the natural direction of your subject. For instance, blend sky sections with horizontal movements, but use vertical strokes where trees meet the horizon. This creates smooth transitions that eliminate the segmented appearance.
The dry brush technique adds remarkable texture to your paintings. Load your brush with paint, then wipe most of it off on a paper towel. Lightly drag the almost-dry brush across areas like clouds, grass, or water. This creates broken color effects that mimic natural textures far better than solid coverage. It’s particularly effective for:
Adding dimension to cloudy skies Creating realistic fur or hair texture Suggesting movement in water or wind-blown grass * Building up subtle highlights on textured surfaces
Mistakes happen, but acrylic paint’s layering properties make them fixable. Simply let the problem area dry completely (usually 20-30 minutes), then paint over it. Multiple thin layers work better than one thick coat, which can crack or look muddy.
Strategic painting order dramatically impacts your results. Most artists prefer painting background elements first, then gradually working toward foreground details. This approach lets you overlap elements naturally without worrying about preserving edges. Alternatively, some painters start with the darkest values and progress to lighter ones, which helps establish contrast early. Experiment with both approaches to discover which feels more intuitive for your working style.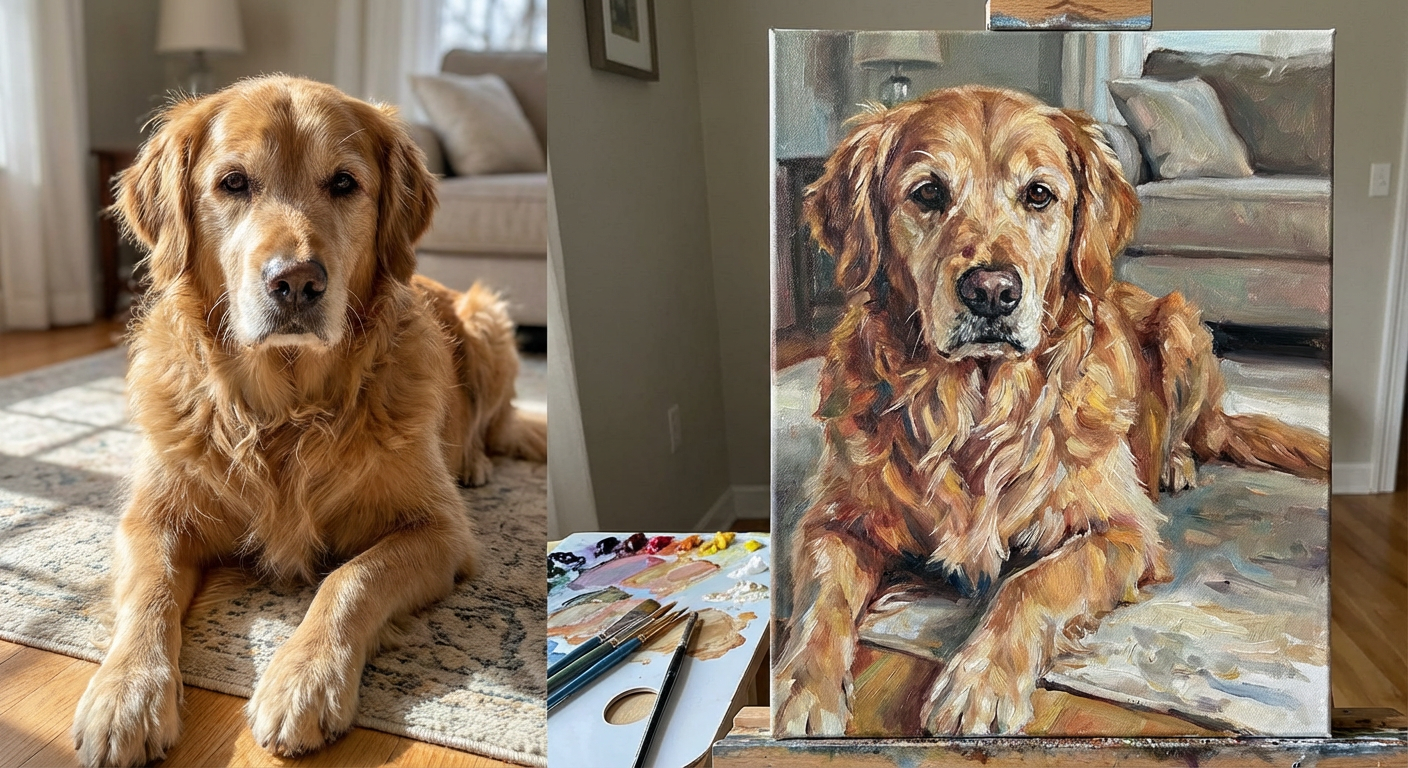
Customizing Your Design with Personal Photos
Creating a custom paint by numbers kit from your own photos has become one of the most popular ways to personalize this creative hobby. Instead of painting a generic landscape or pre-designed image, you can transform treasured memories into artwork that truly means something to you.
Choosing the right photograph is the critical first step in this process. Images with strong contrast work best because they create distinct sections that translate well into numbered regions. Look for photos where the subject stands out clearly from the background, with good lighting that doesn’t create harsh shadows or washed-out areas. A portrait with natural lighting, a beloved pet against a simple backdrop, or a vacation scene with clear focal points will typically produce better results than dim, cluttered, or blurry images.
Once you’ve selected your photo, the conversion process begins. Digital algorithms analyze your image and break it down into a manageable paint palette, typically ranging from 24 to 48 colors depending on the complexity you want. This color mapping technology identifies similar hues and groups them together, creating numbered zones that guide your painting. Companies like Davincified use industry-leading AI photo conversion to produce highly accurate custom designs that capture minute details you might not expect to see in a paint by numbers format.
The emotional difference between painting your own photo versus a stock design cannot be overstated. When you apply paint to a numbered canvas showing your grandmother’s smile, your child’s first birthday, or that sunset from your honeymoon, each brushstroke carries personal significance. You’re not just filling in spaces – you’re actively recreating a moment that matters to you. This connection transforms the painting experience from simple entertainment into something more meaningful, creating artwork you’ll genuinely want to display rather than tuck away in a drawer.
Sealing, Framing, and Displaying
Your finished paint by numbers masterpiece deserves protection and proper presentation to showcase all your hard work. Let’s explore how to preserve and display your artwork like a pro.
Sealing your painting is absolutely essential, not optional. Without protection, your artwork will accumulate dust that embeds into the paint texture, and UV rays will gradually fade your colors over months of exposure. A quality varnish creates an invisible barrier that keeps your painting looking fresh for years.
The gloss varnish that suggest with premium kits creates a protective shield while adding brilliant depth to your finished piece. This glossy finish makes colors appear more saturated and vibrant, similar to how wet pavement looks richer than dry concrete. The reflective surface catches light beautifully, creating dynamic visual interest as you move past the artwork throughout the day.
Application technique matters tremendously. Use a wide, flat brush to apply thin, even coats in consistent strokes across the entire surface. Don’t overwork any area or you’ll create streaks. Wait a full 24 hours between layers, applying at least two coats for complete protection. Work in a dust-free environment to prevent particles from settling into wet varnish.
Framing and Display Choices
Traditional wooden frames add professional polish and gravitas to your artwork. Choose frame colors thoughtfully based on your painting’s dominant tones and your room’s existing decor. Black frames deliver crisp, modern contrast that makes artwork pop, while natural wood tones create warmth and classic appeal. Floating frames offer contemporary sophistication by suspending your canvas inside the frame with a visible gap around all edges. This creates shadow depth and three-dimensional interest that draws the eye. They work exceptionally well when you’ve painted the canvas edges to match your composition. Gallery-wrapped presentation eliminates framing costs entirely while delivering an intentionally minimalist aesthetic. Simply continue painting around your canvas edges before sealing, then hang the piece directly. This approach suits modern, uncluttered interiors perfectly.
Position artwork at eye level, typically 57-60 inches from floor to center, adjusting slightly higher in rooms where people stand more than sit.
Conclusion: Building Your Home Gallery
Your walls are waiting for something personal, something crafted with your own hands. The journey from opening your first paint by numbers kit to displaying a full gallery of completed works is more rewarding than you might imagine. Each piece you finish adds another layer of confidence and skill to your artistic foundation.
As you grow comfortable with the process, don’t hesitate to branch out. Try different artistic styles that speak to you, whether that’s calming landscapes, bold abstract compositions, or detailed portraits. Your taste will evolve as you paint, and that’s exactly how it should be. Some painters stick with one genre they love, while others bounce between styles to keep things fresh.
The beauty of this hobby lies in its staying power. Unlike trends that fade, paint by numbers offers lasting appeal because you’re always learning and improving. The community around this art form continues to expand, with painters sharing their finished pieces online and offering encouragement to newcomers. Platforms like Davincified’s collaboration with real artists support original creators and offer unique designs you won’t find elsewhere, ensuring you’ll never run out of fresh projects to tackle.
Remember these core principles as you build your collection:
- Patience transforms average results into stunning displays
- Quality materials make every brush stroke easier and more enjoyable
- Proper framing elevates even simple pieces into gallery-worthy art
- Regular practice develops your technique faster than you’d expect
Your first piece taught you the basics. Your tenth will show you how far you’ve come. Start planning that gallery wall now, because once you experience the satisfaction of completing these works, you’ll want to keep going.