


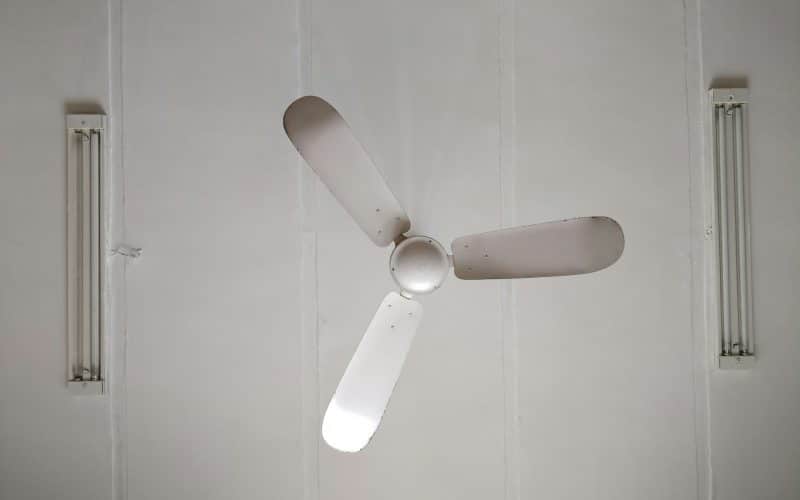
Installing a ceiling fan is one of the most effective ways to enhance natural air circulation in your home while reducing energy costs. When properly positioned and configured, ceiling fans can create a comfortable living environment year-round, working in harmony with your existing HVAC system to distribute air more efficiently throughout your space.
Understanding the Science of Air Circulation
Before diving into installation specifics, it’s essential to understand how ceiling fans optimize airflow patterns in your home. Ceiling fans don’t actually cool the air; instead, they create a wind chill effect that makes you feel cooler by increasing evaporation from your skin. This principle allows you to raise your thermostat setting by several degrees while maintaining the same level of comfort, resulting in significant energy savings.
The key to maximizing natural air circulation lies in creating consistent airflow patterns that move stagnant air throughout the room. Hot air naturally rises to the ceiling, while cooler air settles near the floor. A well-positioned ceiling fan disrupts this stratification, mixing the air layers to create more uniform temperatures and improved comfort levels.
Selecting the Right Location for Optimal Performance
The placement of your ceiling fan dramatically affects its ability to circulate air effectively. The center of the room typically provides the best coverage, but this isn’t always practical due to architectural features or furniture arrangements. When choosing your installation location, ensure the fan will be at least eight feet above the floor and eighteen inches away from walls or other obstructions.
For rooms with sloped or vaulted ceilings, consider using a down rod to position the fan at the optimal height. The goal is to create the largest possible circulation pattern while maintaining safe clearance from people walking beneath. In bedrooms, avoid positioning the fan directly over the bed if possible, as the direct airflow can be disruptive to sleep for some individuals.
Large rooms may benefit from multiple fans working together to create comprehensive air circulation. When installing multiple units, ensure they rotate in the same direction to avoid creating conflicting airflow patterns that reduce overall efficiency.
Pre-Installation Preparation and Safety Considerations
Before beginning any electrical work, turn off power to the circuit at the main electrical panel and verify the power is off using a non-contact voltage tester. Ceiling fan installation requires proper electrical box support, as standard ceiling boxes designed for light fixtures cannot safely support the dynamic load and weight of a rotating fan.
Install a ceiling fan-rated electrical box that can support at least fifty pounds of dynamic weight. These specialized boxes either attach directly to a ceiling joist or use an expandable brace that spans between joists. If you’re replacing an existing light fixture, you’ll likely need to upgrade the electrical box to meet fan installation requirements.
Gather all necessary tools before starting the installation process. You’ll need a drill with various bits, wire strippers, electrical tape, wire nuts, a level, and a sturdy ladder or scaffolding. Having a helper makes the installation process much safer and easier, particularly when lifting and positioning the fan motor assembly.
Step-by-Step Installation Process
Start by assembling the fan according to the manufacturer’s instructions, but don’t attach the blades yet. This makes the unit lighter and easier to handle during installation. Install the mounting bracket to the electrical box, ensuring all screws are tight and the bracket is level.
Thread the fan’s electrical wires through the down rod if you’re using one, then attach the down rod to the motor housing. Most energy efficient ceiling fans come with detailed wiring diagrams, but the basic connections typically involve matching black to black (hot), white to white (neutral), green to green or bare copper (ground), and any additional wires for light kits or remote controls according to the manufacturer’s specifications.
With your helper supporting the fan motor, make the electrical connections inside the ceiling box. Use wire nuts to secure all connections and wrap them with electrical tape for additional safety. Carefully tuck the wired connections into the electrical box, ensuring no wires are pinched or damaged.
Attach the fan motor to the mounting bracket according to the manufacturer’s instructions. Most modern fans use a ball-and-socket mounting system that allows for slight adjustments if the ceiling isn’t perfectly level. Once the motor is securely mounted, attach the fan blades to the blade arms, then attach the blade assemblies to the motor.
Optimizing Fan Direction and Speed Settings
Ceiling fan direction significantly impacts air circulation effectiveness and should be adjusted seasonally for maximum benefit. During warmer months, fans should rotate counterclockwise when viewed from below, creating a downdraft that produces the wind chill effect. This downward airflow helps evaporate moisture from skin, making you feel cooler even at higher temperatures.
In winter, reverse the fan direction to clockwise rotation at low speed. This creates an updraft that pulls cool air up and pushes the warm air that has accumulated near the ceiling down along the walls. This gentle circulation helps distribute heated air more evenly throughout the room without creating uncomfortable drafts.
Modern energy efficient ceiling fans often include variable speed controls that allow fine-tuning of airflow. Start with lower speeds and gradually increase until you achieve comfortable air movement without excessive noise or vibration. Higher speeds aren’t always better; the goal is to create gentle, consistent air circulation rather than turbulent airflow.
Maximizing Energy Efficiency and Performance
To get the most from your ceiling fan installation, consider upgrading to energy efficient ceiling fans with DC motors, which consume significantly less electricity than traditional AC motor fans while providing superior performance and quieter operation. These advanced fans often include features like LED lighting, remote controls, and smart home integration capabilities.
Regular maintenance ensures optimal performance and extends the life of your fan. Clean the blades monthly to prevent dust accumulation that can cause wobbling and reduce efficiency. Check and tighten all connections annually, and lubricate motor bearings if specified by the manufacturer.
Proper integration with your home’s HVAC system multiplies the benefits of ceiling fan installation. During cooling season, ceiling fans allow you to raise thermostat settings while maintaining comfort, reducing air conditioning costs. In heating season, improved air circulation helps your heating system work more efficiently by eliminating hot and cold spots.
Troubleshooting Common Installation Issues
If your newly installed fan wobbles, check that all blade attachments are tight and that blades are properly balanced. Minor wobbling can often be corrected using the balancing kit included with most fans. Excessive noise usually indicates loose connections, worn bearings, or interference between moving parts and stationary components.
Installing a ceiling fan correctly maximizes natural air circulation, improves comfort, and reduces energy costs throughout the year. With proper planning, installation, and maintenance, your ceiling fan will provide decades of reliable service while enhancing your home’s air quality and comfort.