


Are you looking to add a personal touch to your home decor? Clay coasters are a fun and easy DIY project that can level up any coffee table.
Many of us want unique, handmade items but worry about the time and skill required.
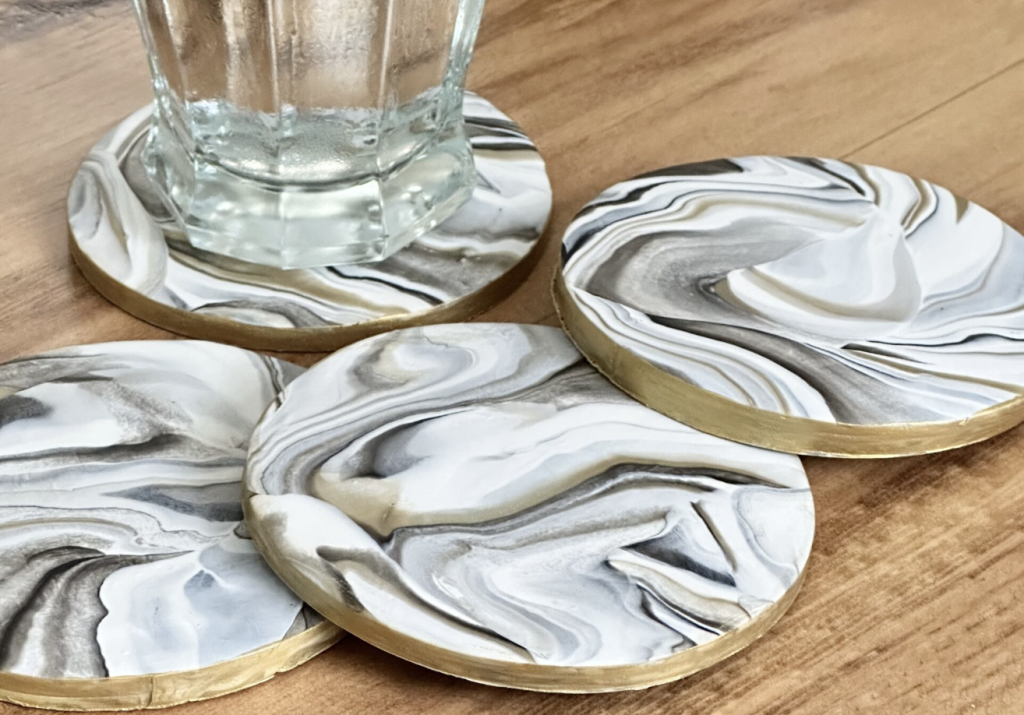
I’m here to show you that making clay coasters is simpler than you might think. In this guide, I’ll walk you through creating beautiful, marbleized clay coasters.
You’ll learn how to:
- Choose the right materials
- Create stunning marble effects
- Shape and bake your coasters
- Add finishing touches for a professional look
By the end, you’ll have a set of custom coasters perfect for your home or as thoughtful gifts. Let’s get started on your DIY clay coaster adventure!
DIY Clay Coasters: Easy Tutorial for Beginners
Step 1: Gathering Materials
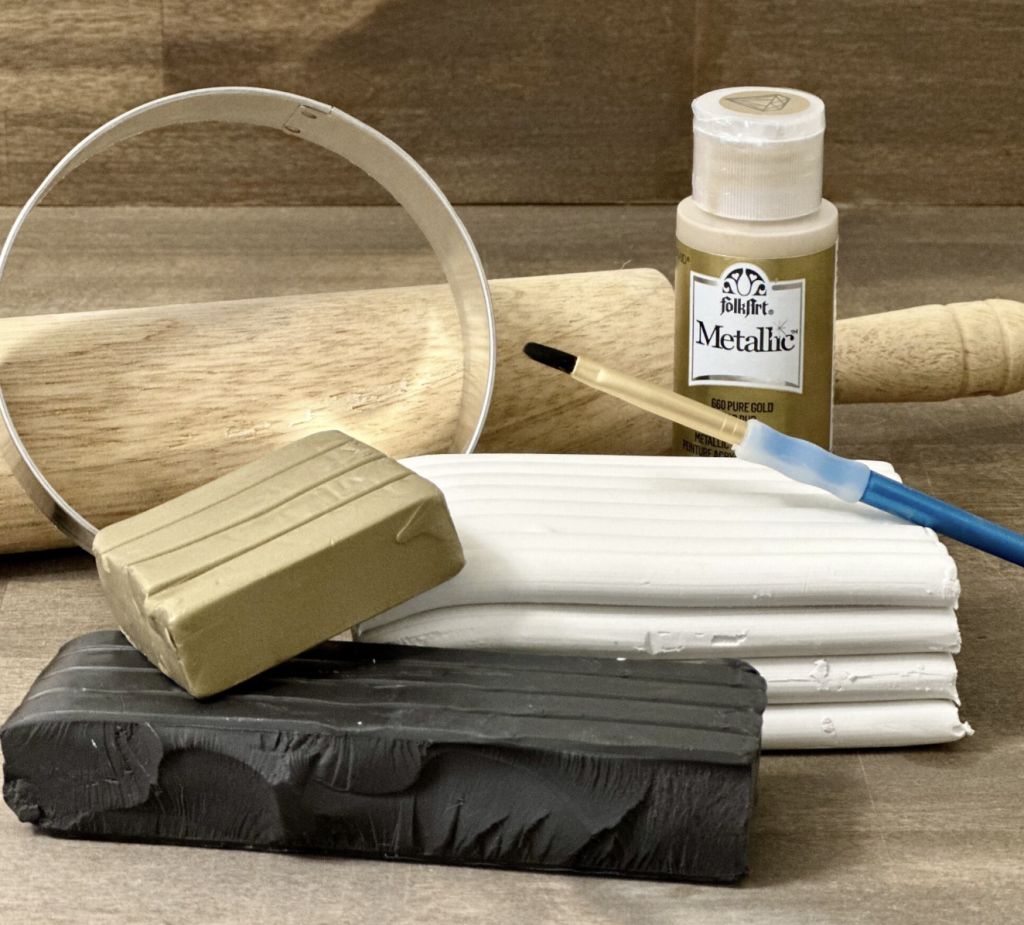
Before we make our DIY clay coasters, let’s ensure we have everything we need. Here’s what you’ll want to gather:
- Polymer Clay: Pick 2-3 colors you like. I prefer the Sculpey brand, but any polymer clay works well.
- Rolling Pin: A simple kitchen rolling pin does the job perfectly.
- Circle Cookie Cutter: Get one at least 4 inches wide for good-sized coasters.
- Baking Sheet: Any oven-safe tray will do.
- Parchment Paper: This keeps your coasters from sticking to the baking sheet.
- Acrylic Paint: Optional, but great for adding edge details. I used gold paint on mine.
- Paintbrush: If you’re using paint, a small brush works best.
- Fine-Grit Sandpaper: Handy for smoothing any rough edges after baking.
You can find most of these items at craft stores like Michaels or Hobby Lobby.
An art supply store might have a better selection of clay, cookie cutters, and paint. Don’t forget to check online retailers, too—they often have good deals on craft supplies.
Step 2: Preparing the Clay
Now that our materials are ready let’s start working with the clay. This step is where the magic of marbling begins!
First, we’ll make our clay rods:
- Break off pieces from each color of clay.
- Roll these pieces into long, thin rods about 6-8 inches long.
- Make one rod about 1 inch thick and the others about 1/2 inch thick.
Here’s a handy tip: If your clay feels too hard, knead it in your hands to warm it up.
Next, we’ll blend the colors:
- Put your rods side by side.
- Gently twist them together. Don’t worry if it’s not perfect – that’s part of the charm!
- Roll this twisted bundle on a flat surface to make one long rod.
Remember, we’re not aiming for perfection here.
The uneven blending gives each clay coaster its unique look. If you’re unhappy with the result, you can always start over. That’s the beauty of working with clay!
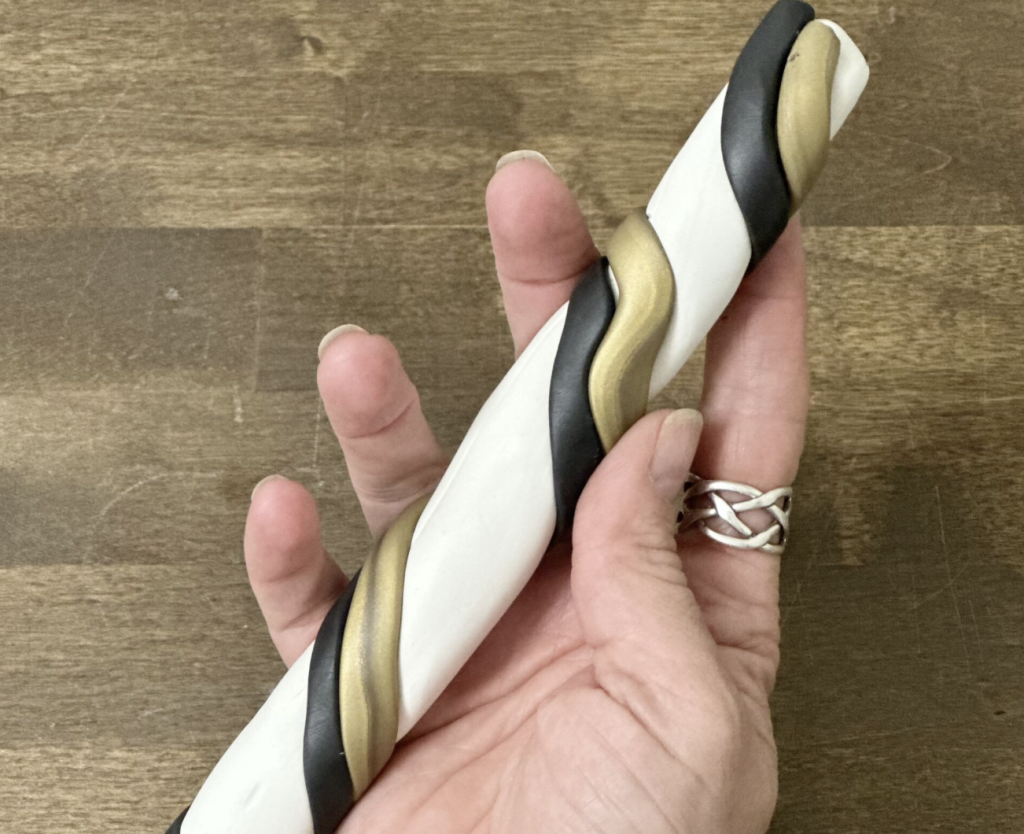
Step 3: Creating the Marbling Effect
Now we’re ready for the fun part – creating that beautiful marble look! Here’s how we do it:
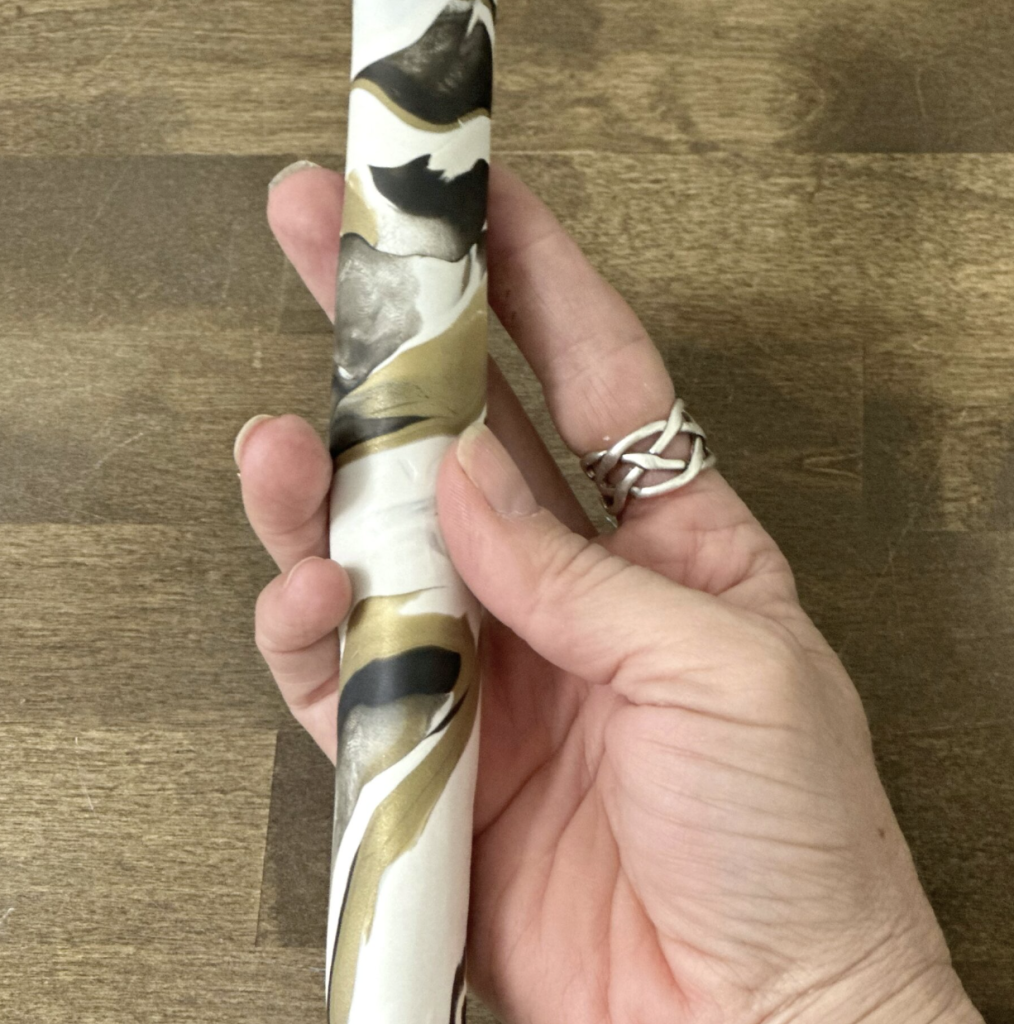
Take Your Long Clay Rod and Fold It in Half
- Line up the ends carefully.
- Press the folded section gently to ensure it sticks together.
Gently Twist the Halves Together
- Start at one end and work your way down.
- Use a consistent, gentle pressure as you twist.
- Don’t worry if it’s not perfect – that’s part of the charm!
Roll This Twisted Piece Back Into a Long Rod
- Place the twisted clay on your work surface.
- Use your hands to roll it out, applying even pressure.
- Aim for a uniform thickness along the entire length.
Repeat This Folding, Twisting, and Rolling Process 3-4 Times
- Each repetition will create more intricate patterns.
- Pay attention to how the colors are blending.
You’ll see the colors blending more with each twist as you work. Keep an eye on your clay – we want marbling, not one big mixed color! If you feel the clay getting too warm or soft, pop it in the fridge for a few minutes to firm up.
Here’s a tip: If you want more subtle marbling, stop after 2-3 twists. For bolder patterns, go for the full four twists. Try varying the direction of your twists for even more interesting effects.
Play around and see what you like best!
Step 4: Shaping the Coasters
Now that we’ve got our marbled clay, it’s time to shape our coasters. Let’s break it down:
Roll Your Clay Into a Ball
- Just gather up your marbled clay and roll it into a smooth ball.
- Make sure there aren’t any cracks or air bubbles.
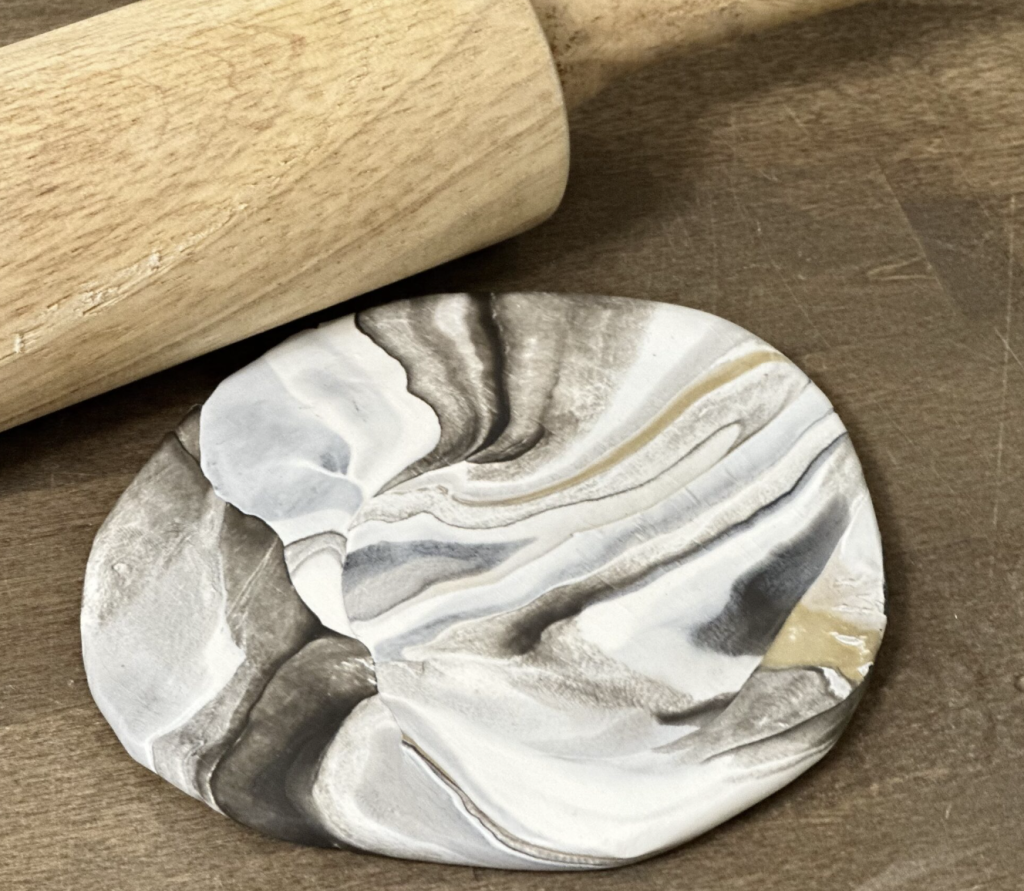
Flatten the Ball
- Put your clay ball on a flat surface.
- Use your rolling pin to flatten it to about 1/4 to 1/2 inch thick.
- Try to roll from the center outwards for even thickness.
Cut out Your Coasters
- Place your cookie cutter on the flattened clay.
- Press down firmly to cut out your coaster shape.
- Give the cutter a little wiggle to make sure it cuts cleanly.
Transfer to Baking Sheet
- Carefully move your cut-out coasters to a baking sheet lined with parchment paper.
- Space them out so they don’t touch each other.
Here’s a handy tip: If your coasters get distorted while you’re moving them, don’t worry! You can gently reshape them on the baking sheet.
Remember, we’re aiming for coasters about 1/4 to 1/2 inch thick.
If you’re unsure, you can always use a ruler to check. And don’t throw away the leftover clay—you can use it to make more coasters or other fun projects!
Step 5: Baking the Coasters
Now that we’ve shaped our clay coasters, it’s time to bake them. This step is crucial for turning our clay creations into durable coasters.
Here’s how we do it:
Preheat Your Oven
- Check your clay package for the right temperature. It’s usually around 265°F to 275°F (130°C to 135°C).
- Let your oven preheat for at least 10 minutes.
Bake the Clay Coasters
- Place your baking sheet with the coasters in the center of the oven.
- Set a timer for 15-30 minutes, depending on how thick your coasters are.
- If you’re not sure, start with the minimum time. You can always add more if needed.
Cool Down
- Once baking is done, take out the sheet using oven mitts.
- Let the coasters cool completely on the sheet. This might take 30-60 minutes.
- Don’t touch them while they’re hot – we don’t want fingerprints on our artwork!
A Tip from My Experience: If you have an oven thermometer, use it to double-check your oven’s temperature. The correct temperature is key for properly cured clay.
Remember, patience is important here. Let the coasters cool fully before you handle them. Once they’re cool, you can smooth any rough edges with fine sandpaper.
Step 6: Finishing Touches
Now that our coasters are baked and cooled let’s add some final touches to make them extra special:
Smoothing the Edges (Optional)
- If you notice any rough spots, gently sand the edges with fine-grit sandpaper.
- Use a light touch and sand in a circular motion.
- Wipe off any dust with a slightly damp cloth when you’re done.
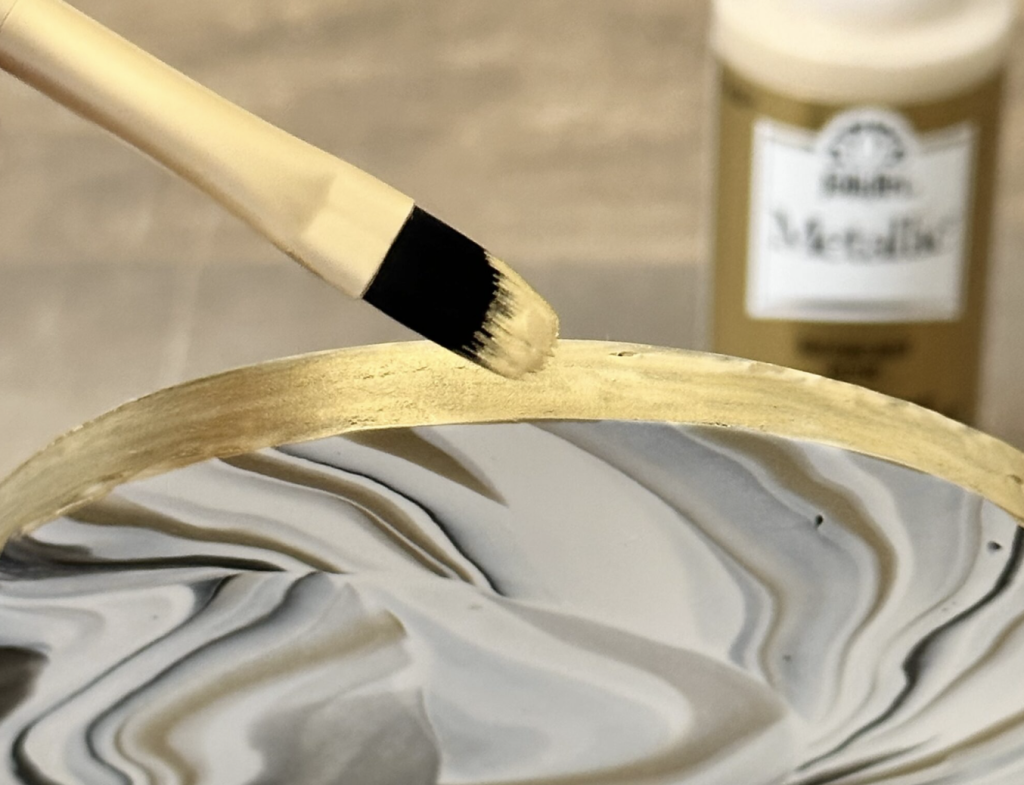
Adding a Pop of Color (Optional)
- If you want, you can paint the edges of your coasters.
- Choose a color that goes well with your marbled design.
- Use a small brush to paint the edges carefully.
- Apply thin coats and let each one dry before adding another.
Here’s a tip: Metallic paints like gold or silver can add a touch of elegance to your DIY coasters. They look great with many color combinations!
Remember, these steps are optional. Your coasters are already beautiful and functional. These finishing touches are just if you want to add extra flair.
The great thing about polymer clay is that it’s quite durable.
You don’t need to seal it, but you can use a product like Mod Podge Dishwasher Safe Gloss if you want a glossy finish. Apply a thin layer with a soft brush and let it dry completely.
Step 7: Sealing the Coasters (Optional)
Let’s discuss sealing your coasters. It’s not a must, but it can add some extra protection.
First off, your polymer clay coasters are already pretty tough cookies. Once they’re baked, they’re durable and ready to use. You don’t have to seal them if you don’t want to.
But sealing is an option if you want a glossy look or extra protection, especially if your coasters might get wet often.
Here’s how you can do it:
Choose Your Sealer
- I like using the Mod Podge Dishwasher Safe Gloss formula. It gives a nice shine and extra durability.
Apply the Sealer
- Use a clean, soft brush to apply a thin layer on each coaster.
- Let it dry completely (about 1-2 hours) before adding another coat.
For Best Results
- Apply in a well-ventilated area.
- Use smooth, even strokes to avoid bubbles or streaks.
- For a glossy finish, you can apply 3-4 coats. Just make sure each one dries fully before adding the next.
Here’s a pro tip: If you seal your clay coasters, let them cure for about 28 days before using them with water or putting them in the dishwasher. This gives the sealer time to reach its full strength.
Creative Variations and Personalization
Now that you’ve mastered the basics let’s dive into some exciting ways to make your DIY clay coasters unique!
1. Color and Pattern Ideas
Pastel Paradise
- Mix soft pinks, baby blues, and mint greens for a dreamy look.
- Try a marble effect with white as your base color.
Neon Nights
- Use vibrant yellows, electric blues, and hot pinks for eye-catching coasters.
- Create a swirled effect for a psychedelic vibe.
Galaxy Swirl
- Blend deep navy, purple, and black with touches of white.
- Add tiny white specks after marbling to mimic stars.
Earthy Elegance
- Combine browns, greens, and terracotta for a natural look.
- Try a wood grain effect by layering these colors.
Texture Play
- Before baking, gently press small beads, buttons, or lace into the clay.
- Use a toothpick to create intricate patterns on the surface.
Personalized Touch
- Use letter stamps to add initials, names, or short phrases.
- Create a set with different words like “sip,” “savor,” “enjoy,” and “relax.”
Glitter Magic
- Mix a small amount of fine glitter into your clay before marbling.
- For a subtler effect, dust the edges with mica powder before baking.
2. Themed Coaster Ideas
Beach Vibes
- Layer sand-colored clay with turquoise and white to mimic waves.
- Press small shells into the clay before baking for a 3D effect.
Coffee Lover’s Dream
- Shape your clay coasters like oversized coffee beans.
- Use brown and cream clays to create a latte art swirl effect.
Nature’s Touch
- Collect small leaves or flowers and press them into the clay.
- Remove before baking to leave a delicate imprint.
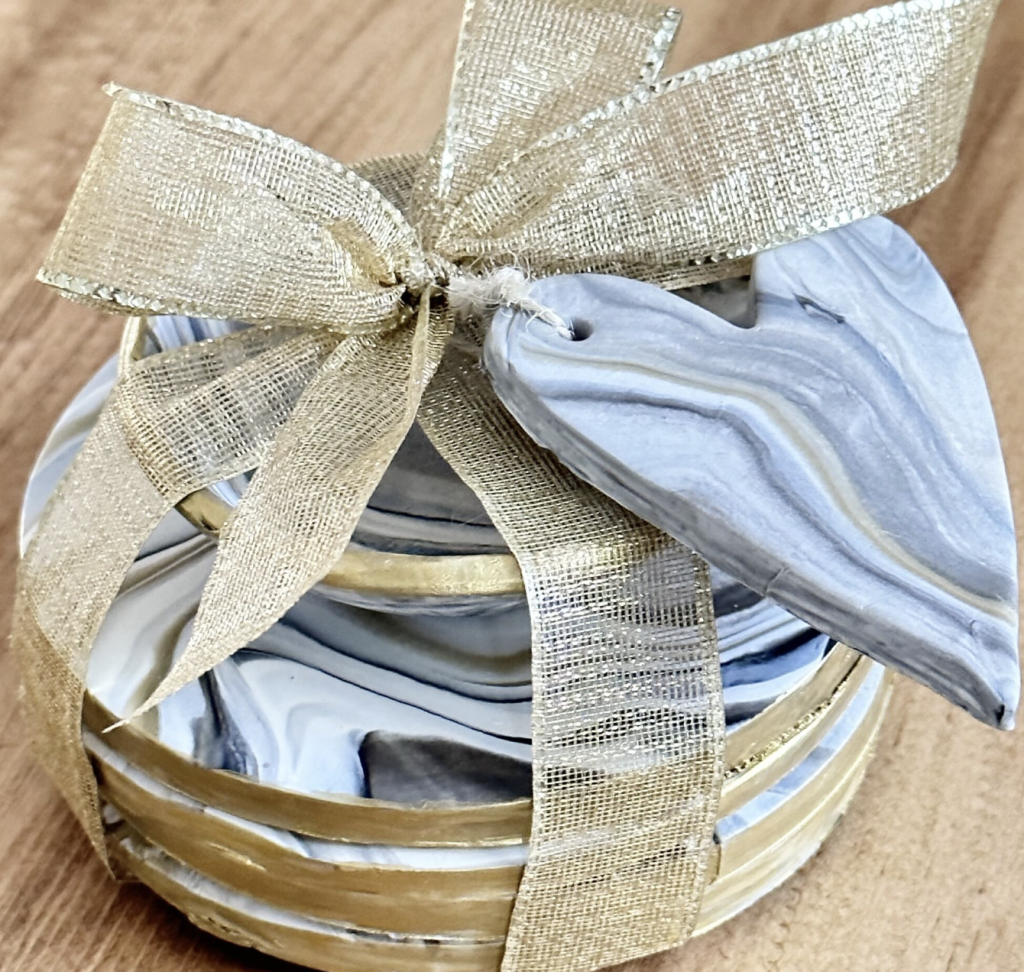
3. Gift Ideas
Seasonal Sets
- Spring: Pastel colors with flower imprints
- Summer: Bright colors with fruit shapes
- Fall: Warm oranges and reds with leaf patterns
- Winter: Cool blues and whites with snowflake designs
Family Fun
- Create a set where each coaster represents a family member.
- Use their favorite colors or hobbies as inspiration for each design.
Summing It Up
As we wrap up our clay coaster adventure, I hope you feel inspired to create your unique set.
Remember, each coaster you make is a small canvas for your creativity. Whether aiming for a marbled masterpiece or a personalized gift, the process is as rewarding as the result.
Don’t worry if your first attempt isn’t perfect – that’s part of the charm of handmade items. With practice, you’ll develop your techniques and style.
Why not gather some friends for a coaster-making party?
Spending an afternoon with everyone and going home with a practical, personalized creation is fun.
So, grab your clay and let your imagination run wild. Your coffee table (and your drinks) will thank you!