Maintaining a tidy garden can be challenging, especially when keeping flower beds separate from the lawn. Many gardeners struggle with creating clean, defined edges that look great and stay intact.
I understand this frustration, so I’m here to help you discover effective ways to edge your flower beds.
In this guide, I’ll share practical techniques for creating beautiful, low-maintenance garden border ideas to elevate your landscape.
You’ll learn simple methods to establish crisp boundaries between your flowerbeds and lawn, prevent grass from invading your plantings, and achieve a polished look with minimal effort.
Let’s explore how to edge your flower beds like a pro, transforming your garden into a well-organized oasis.
1. Understanding the Purpose of Edging
Aesthetics
Edging creates a clean, polished look in your garden. It acts like a frame for your flower beds, making them stand out.
Clear lines between different areas (like lawns and flowers) make your garden look more organized. You can use edging to highlight specific garden features or create focal points.
Functionality
Edging helps keep mulch and soil in place, especially during heavy rain. It makes mowing easier by creating a clear boundary for your lawn.
Edging can guide foot traffic, keeping people on paths and out of planting areas. It can also help with water management by directing runoff away from certain areas.
Protection
A good edge is a barrier, stopping grass from spreading into your flower beds and helping prevent plants in your beds from spreading into the lawn.
Edging can protect delicate plants from accidental damage during mowing or trimming. Vegetable gardens can help keep soil-borne diseases from spreading between different areas.
2. Tools and Materials Needed
Edging Tools
1. Edging spade
- This tool has a flat, straight blade perfect for cutting clean edges.
- It’s great for creating new edges or reshaping existing ones.
- Look for one with a comfortable handle to reduce strain during use.
2. Half-moon edger
- This tool has a curved blade that’s ideal for making precise cuts.
- It’s especially useful for creating curved edges.
- The foot plate helps you apply even pressure for consistent results.
3. String trimmer
- Also known as a weed eater, this tool is essential for edge maintenance.
- It helps keep grass from growing over your edging.
- Look for one with an adjustable head for easier edging work.
Edging Materials
Natural stone
- It provides a timeless, rustic look that blends well with most garden styles.
- Comes in various shapes and sizes for different design needs.
- It’s heavy and stable and great for creating permanent edges.
- Remember, it can be more expensive and harder to install than other options.
Plastic edging
- This is a budget-friendly option that’s easy to work with.
- It’s flexible, making it great for curved edges.
- It comes in various colors to match your garden design.
- While affordable, it may not last as long as stone or metal.
Metal strips
- These provide a sleek, modern look to your garden.
- They’re durable and long-lasting.
- Metal edging is great for creating straight lines or gentle curves.
- It can be more expensive than plastic but less than stone.
3. Steps to Edge a Flower Bed Effectively
Plan the Layout
- Walk around your garden at different times of the day. Notice how light and shadows move across your space. This can help you decide where to place your flower bed.
- Think about your viewing angles. Where do you usually sit or stand in your garden? Plan your edges to look good from these spots.
- Consider future growth. If you’re planting shrubs or trees, ensure your edge allows room for them to grow.
Prepare the Area
- If you’re dealing with tough, compacted soil, consider renting a tiller to loosen it up before edging.
- Look for underground utilities. Call your local utility company if you’re unsure about pipe or cable locations.
- If your soil contains many rocks, you might want to sift through the top layer to remove them. This will make digging easier.
Choose the Right Tools
- A long-handled spade can be easier on your back than a short one, especially for larger jobs.
- Keep a file or sharpening stone handy to touch up your tools as you work. Sharp tools make the job much easier.
- A level can help ensure your edging stays even, especially when using hard materials like bricks or stones.
Mark the Edge
- If you’re creating a curved edge, use a garden hose to lay out the shape. Adjust it until you’re happy, then use spray paint to mark the final position.
- For straight edges, use a string line stretched between two stakes to ensure your edge stays perfectly straight.
- If you match an existing edge on the other side of your lawn, use measuring tape to keep the width consistent.
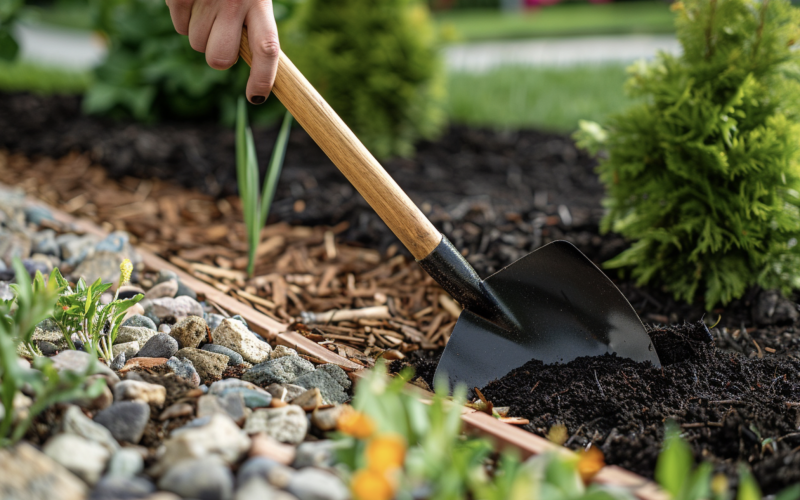
Dig a Trench
- If you’re planning to use edging material like plastic or metal strips, make your trench slightly wider than the material to facilitate installation.
- When digging at an angle for a natural edge, use a spirit level to check that the slope is consistent throughout.
- If you hit any large roots while digging, don’t try to force through them. Either work around them or use pruning shears to cut them cleanly.
Install Permanent Edging (if applicable)
- If using bricks or pavers, lay a base of sand in the trench for stability and drainage.
- Unroll it along the trench and secure it with the provided plastic or metal edging stakes.
- Use a level to ensure your edging material is even all along.
4. Tips for Maintaining the Edge
Regular Trimming
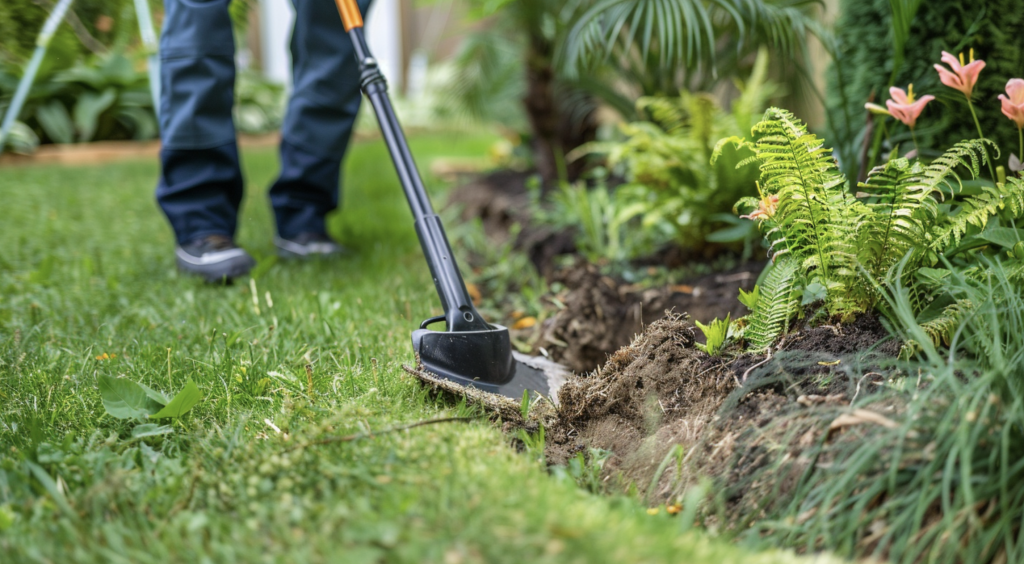
- Use a string trimmer every 1-2 weeks during the growing season.
- Hold the trimmer vertically to create a clean, crisp edge.
- Be careful not to damage plants in the flower bed while trimming.
- After trimming, use a broom or leaf blower to clean up grass clippings.
- Use hand shears to snip any stray grass blades for an extra-neat look.
Seasonal Maintenance
In spring: Re-cut the edge to restore its shape after winter. Add fresh mulch to define the edge more clearly.
In summer: Water the edge area if the soil dries out to prevent cracking. Check for and remove any weeds growing along the edge.
In fall: Clear fallen leaves from the edge to prevent decay. Consider adding a layer of compost to nourish the soil.
In winter: Avoid walking on frozen edges to prevent damage. Plan any major redesigns for the next growing season.
Additional Maintenance Tips
-
After heavy rain, check for soil erosion along the edge and fill in as needed.
- If using stone or brick edging, check annually for any loose or shifted pieces and reset them.
- Inspect for cracks or bends and replace damaged metal or plastic edging sections.
- Consider applying a pre-emergent herbicide along the edge in early spring to prevent weed growth.
Conclusion
As we wrap up, remember that edging your flower bed is more than just a task—it’s an art that enhances your garden’s beauty and makes maintenance easier.
By following these steps, from planning your layout to regular upkeep, you’ll create a garden edge that looks great and stands the test of time.
Whether you choose a simple trench or elegant stonework, your effort will pay off in a cleaner, more defined garden space.
Don’t forget to maintain your edges regularly to keep them looking sharp. With these techniques in your gardening toolkit, you’re well on your way to creating stunning, well-defined flower beds that will envy the neighborhood.
Happy gardening, and enjoy your beautifully edged flower beds!
Frequently Asked Questions
1. How Often Should I Re-Edge My Flower Beds?
Re-edge your flower beds once a year, usually in spring. During the growing season, maintain the edge with a string trimmer every few weeks.
2. Is It Okay to Use Recycled Materials for Edging?
Absolutely! Recycled materials like bricks, bottles, or wood can make unique, eco-friendly edges. Just make sure they’re sturdy and won’t harm plants.
3. What’s the Cheapest Way to Edge a Flower Bed?
The cheapest way is trench edging. Just dig a V-shaped trench along your bed’s edge. It’s free if you have a spade and some time.


