


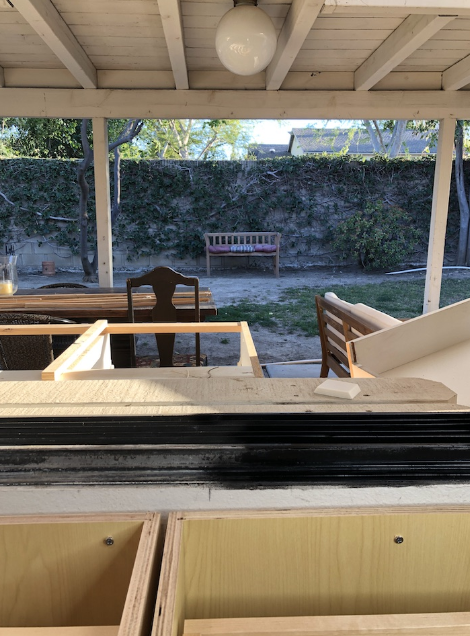
As a homeowner on a budget, I know how expensive it can be to replace old windows. But an easy and affordable way to give your windows a fresh, modern look is to paint the trim black.
In this post, I’ll show you a simple, step-by-step process for painting your window trim black for less than $10. This DIY project can transform the look of your windows without breaking the bank.
You’ll learn how to prep the windows properly, apply the paint with expert techniques, and achieve professional-looking results.
Let’s get started!
Materials Needed for Painting the Window Trim Black
Before you get started, make sure you have all the necessary supplies on hand. Here’s what you’ll need for this project:
- Satin Finish Spray Paint: Look for high-quality spray paint with a satin finish. This will give your window trim a smooth, professional-looking result.
- Painter’s Tape and Plastic: To protect your windows from overspray, you’ll want to thoroughly cover the areas around them. Painter’s tape and plastic sheeting are essential for clean, crisp lines.
- Frog Tape: Use this specialized painter’s tape for an extra-clean paint line. It creates sharp edges that will make your trim painting look flawless.
- Safety Glasses and Respirator: Spray paint can be toxic, so protect your eyes and lungs with safety gear. A good pair of goggles and a respirator mask are must-haves.
- TSP Cleaner: Before painting, you must thoroughly clean the window trim. TSP cleaner is great for cutting through any built-up grime.
- Tack Cloth (Optional): Running a tack cloth over the cleaned trim will pick up any final dust or debris, ensuring a smooth painting surface.
Initial Preparation Before Painting the Trim
Proper preparation is key to successfully painting your window trim black. Although it may be the most time-consuming part of the process, it’s essential for achieving professional-looking results.
1. Ventilation
The first and most crucial step in preparing to paint your window trim is ensuring proper ventilation in the workspace.
- Spray paint can release strong, toxic fumes that are harmful to inhale, so you’ll want to provide ample airflow throughout the area.
- Open any nearby windows and doors to allow fresh air to circulate. This will protect your health by diluting the fumes and helping the paint dry more quickly. Good ventilation is an absolute must for this project.
- If you’re working in a small, enclosed space, consider setting up a fan to increase air movement further.
2. Cleaning
Before you can start painting, it’s essential to ensure the window trim is completely clean and free of dirt, grime, or debris.
- The best way to clean the window trim is using a TSP (trisodium phosphate) cleaner. TSP is a powerful degreasing agent that can cut through even the toughest buildup.
- Mix the TSP solution according to the package instructions and thoroughly clean the trim with a scrub brush or cloth.
- Be sure also to pay close attention to the window tracks, as this area can often get dirty over time. A clean track will make a big difference in the overall appearance of your freshly painted windows.
- Once you’ve finished cleaning, allow the trim to dry completely before moving on to the next step. This will help the paint bond properly to the surface.
3. Covering
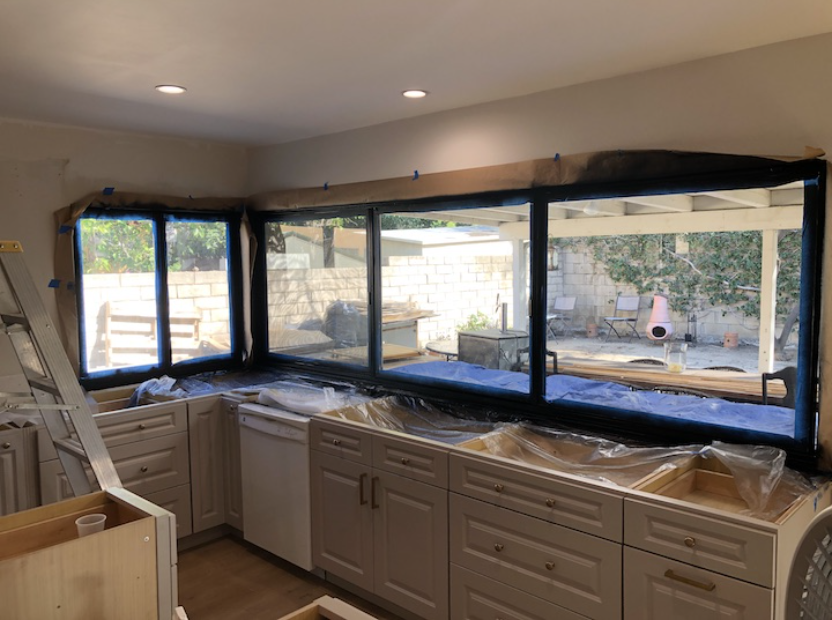
Now that the window trim is clean and dry, it’s time to start protecting the surrounding areas before you begin painting. This is crucial to ensure you get clean, sharp paint lines and avoid unwanted splatters or overspray.
- Start by using painter’s tape to mask off the window glass, sills, and any adjacent walls or surfaces.
- Apply the tape carefully, pressing it firmly to create a tight seal. This will prevent the paint from bleeding under the edges.
- Next, use plastic sheeting to cover the floor, cabinets, or other areas near the windows. Spray paint can travel quite far, so you want to ensure you’ve protected everything in the immediate vicinity.
- Consider using a specialized product like Frog Tape for an extra professional touch. This tape is designed to create incredibly clean paint lines, leaving your newly painted trim with crisp, defined edges.
4. Safety Measures
Before we begin the painting process, it’s important to prioritize your safety. Spray paint can release strong fumes, so you’ll want to ensure you have the proper protective gear.
- The two most important safety items you’ll need are a good pair of safety glasses and a respirator mask.
- The safety glasses will shield your eyes from paint particles or overspray, while the respirator will filter out the toxic fumes so you can breathe easily.
How to Paint the Trim
Now that your work area is fully prepped and you’ve put on your safety gear, it’s time to start painting the window trim! This is where the magic happens.
1. Initial Paint Application
- Before spraying, take one last pass with a tack cloth to remove any lingering dust or debris from the trim. This will ensure you have a perfectly smooth surface to work with.
- When applying the paint, start with light, even coats. Avoid thick, heavy layers, leading to unwanted drips and runs. Instead, gradually build the coverage by spraying in thin, consistent passes.
- Pay close attention to the edges and corners, getting paint into all the nooks and crannies for full, even coverage. Take your time, and don’t rush through this step – it’s the key to a professional-looking finish.
- Once the initial coat is dry, you can apply additional layers to achieve your desired opacity. Just remember to keep the paint application light and even throughout the process.
2. Painting the Track
- After you’ve finished painting the main window trim, it’s time to tackle the track. Many overlook This important step, but it can greatly impact the finished look.
- First, ensure the initial paint coat on the trim is completely dry. Once it is, you can open the windows, giving you better access to the track area.
- Before painting the track, inspect it. If there is any built-up dirt or debris, quickly clean it with a damp cloth or small brush. Ensure the surface is nice and smooth before applying the paint.
- When ready, spray the track with the same black, satin-finish paint you used on the trim. Apply the paint evenly, making sure to get into all the nooks and crannies for a seamless, professional look.
- Allow the track paint to dry fully, then close the windows. Your window transformation is nearly complete!
Finishing Up
The final step in your window trim painting project is carefully removing all the tape and plastic you use for protection. This is an important task that requires patience, but it’s well worth the effort to achieve a flawless, professional-looking finish.
1. Removing the Tape
- Start by slowly peeling off the painter’s tape and pulling it back at a 45-degree angle. This will help prevent the paint from cracking or peeling as you remove the tape.
- Take time with this step, and inspect the edges as you go. If you notice any paint bleeding under the tape, use a sharp utility knife to trim the excess carefully. This will ensure you’re left with clean, crisp paint lines.
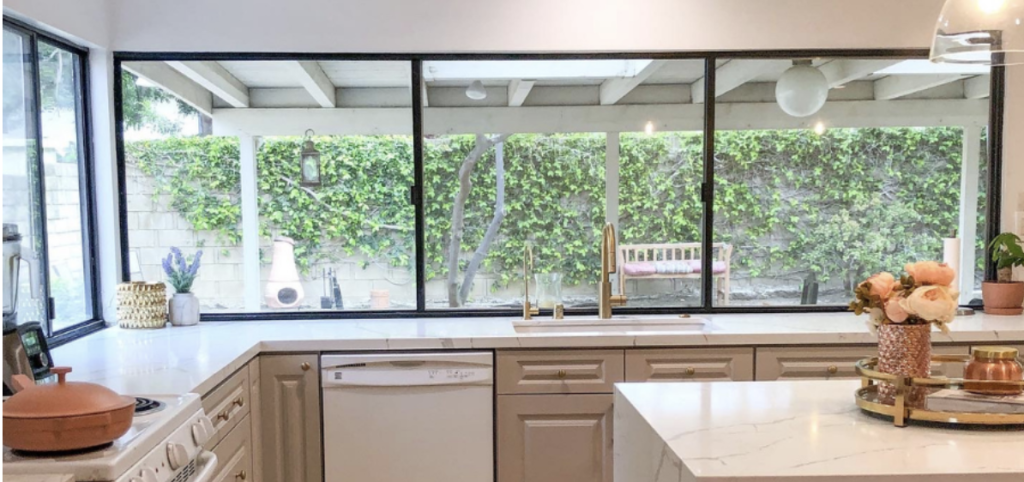
- Step back and admire your handiwork once all the tape has been removed. Your freshly painted window trim should now have a sleek, modern look that makes your windows pop.
2. Final Touches
- If you notice any small imperfections or touch-ups needed, now is the time to address them.
- Use a small paintbrush to carefully fill in any gaps or touch up any areas that may have been missed.
- You can enjoy your transformed windows with the painting complete and any final adjustments made!
How to Maintain the Trim After Painting It Black
With just a few simple tips, you can keep your painted trim looking its best for years.
1. Cleaning the Painted Trim
- Avoid using abrasive cleaners or scrubbing too hard, which could damage the paint finish. Instead, wipe the trim down regularly with a soft, damp cloth.
- Use mild soap and water for tougher spots or built-up dirt. Rinse the area thoroughly afterward to prevent soap residue from affecting the paint.
- It’s also a good idea to avoid exposing the painted trim to direct sunlight or extreme temperatures, which can cause the paint to fade or discolor over time.
2. Touch-Up Painting
- Even with the best care, you may notice small chips or scratches in the painted trim. When this happens, don’t worry – it’s an easy fix!
- Simply use a small artist’s paintbrush to touch the affected areas carefully. Make sure to match the paint color as closely as possible for a seamless blend.
Conclusion
Painting your window trim black is an easy, affordable way to transform the look of your home. By following these simple, step-by-step instructions, you can achieve professional-looking results without breaking the bank.
This DIY project allows you to personalize your space and add a touch of modern elegance. And the best part? You can do it all for less than $10 in materials.
Now that you’ve completed your window trim makeover share your before-and-after photos on social media.
Enjoy your beautiful new windows!